
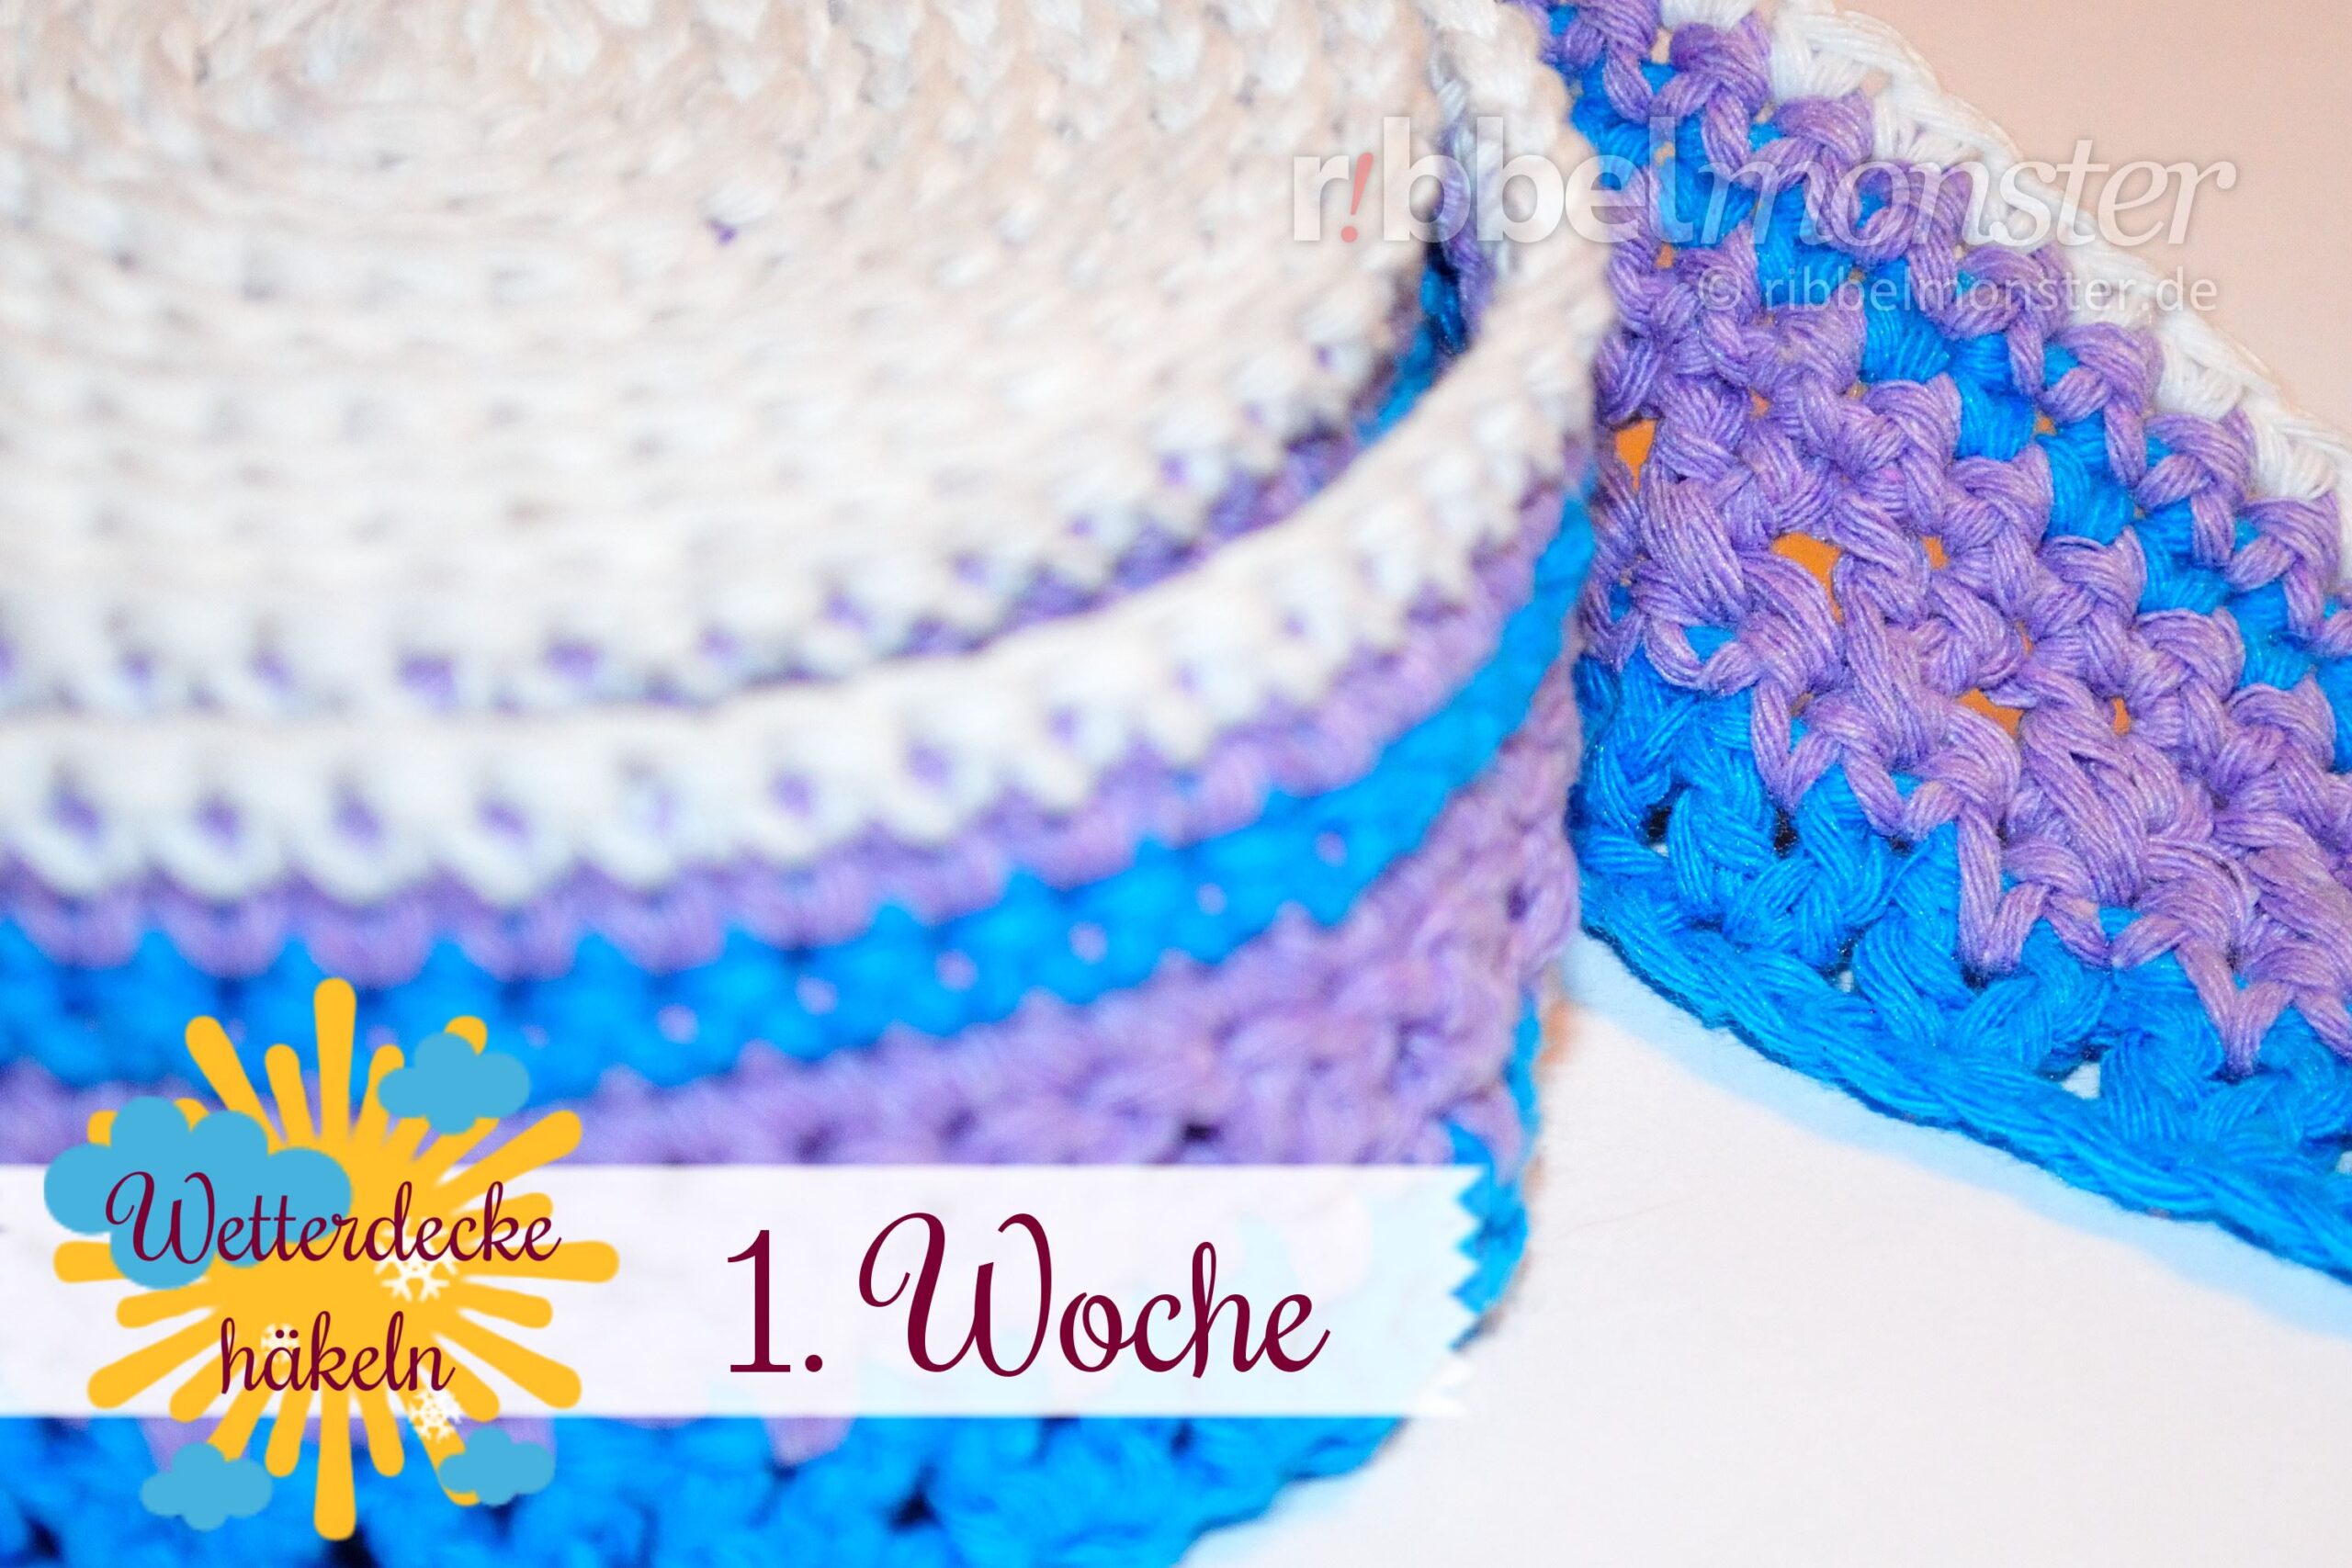
Last week we started to crochet our weather blanket and here is already the second status report. You have probably already crocheted your first rows and we can now compare our work for the first time. If you have no idea what this is about, you can read it in the Pattern to Crochet a Weather Blanket.
1st Week of Crocheting a Weather Blanket
Now we have already done the first week and because we are still at the very beginning, I documented each day with a little more detail. Of course, your weather blanket will look very different after the first week because your weather is quite different. But here you can already understand exactly why I crocheted which row with which stitches and in which colour. In addition, I have also noted a few problems and hints that have resulted in crocheting. This will also show you, that not everything goes smoothly with me.
1st Day of Crocheting a Weather Blanket
On the first day of the year it was 11°C with the most beautiful sunshine. Just the right weather to start a new year.
I started the blanket with blue yarn and lots of chain stitches and crocheted the first row with the sun pattern on it. Quickly I found out that my chains are too tight, as always. So I raveled it up and crocheted the chain stitches this time with needle size 4.0 and then the first row with needle size 3.5. My weather blanket is now 410 stitches or 240cm wide and 1 + 1 rows high.
2nd Day of Crocheting a Weather Blanket
Today it is only 6°C and it rains again and again. The new year had started so well!
So today it continue with purple yarn and rain pattern. The deeper single crochet stitches fit wonderfully between the single crochet stitches of the sun pattern. Well, purple is not one of my favourite colours, and somehow the combination of blue and purple does not look great, but I’ll let me surprise.
3rd Day of Crocheting a Weather Blanket
The temperature has risen again to 8°C, but it storms pretty nice today. Somehow it is already April weather, because in the meantime sometimes the sun was shining and rain was not spared, but the storm lasted the whole day
This is followed by the next row in purple and it turns out to be smart that I have not cut off the thread from the day before because of laziness. Now I will always leave the thread end, because you do not know what’s coming the next day. It is not boring anyway, because today I may try the storm pattern. These are cross crocheted double crochet stitches and I also imagined them as crosses. But what a surprise, the pattern looks like little mini tornadoes, how fitting!
4th Day of Crocheting a Weather Blanket
Today it is just ugly overcast and the thermometer shows 6°C. That´s why a row single crochet stitches will follow, again in purple. A very easy and fast exercise, but it also takes a few simple rows to make the special ones stand out better. Now that’s 1 + 4 rows.
I have already thought about the projection and measured my first rows, which now have a height of about 2.5cm. I’m so afraid that my blanket is getting too long, so I just had to count on it. The year has 365 days and this measure is for 4 days, so 365 divided by 4 coming in at 91.25. Now simply multiply the current height of 2.5cm by 91.25 and get to 228.125cm. So that’s the length of my weather blanket and what can I say, I’m reassured. The blanket should be between 220cm and 260cm long. I’m exactly in the frame and the rest I can change with the border. Excellent!
5th Day of Crocheting a Weather Blanket
Another ugly overcast day, but at 10°C temperature. I crocheted a new row with single crochet stitches, but this time in blue. This long-turning piece is slowly evolving into a pretty stripe and an ignorant would wonder about this oversized scarf. But even if the last rows only consist of single crochet stitches, I like the pattern very well. I’d like to crochet the snow pattern and I realize that I never looked forward to the next snowfall since I´m a grown-up. What a weather blanket does with everything.
6th Day of Crocheting a Weather Blanket
It is again only 6°C and the sky remains covered the whole day. Today it will be purple again in the cloudy pattern. But hey, there will be snow tomorrow, at least Alexa says. I am almost happy as a little child!
Incidentally, I crocheted a sample with different patterns and a possible colour gradient from January to June. Write me if you want to see it or if you prefer to be surprised.
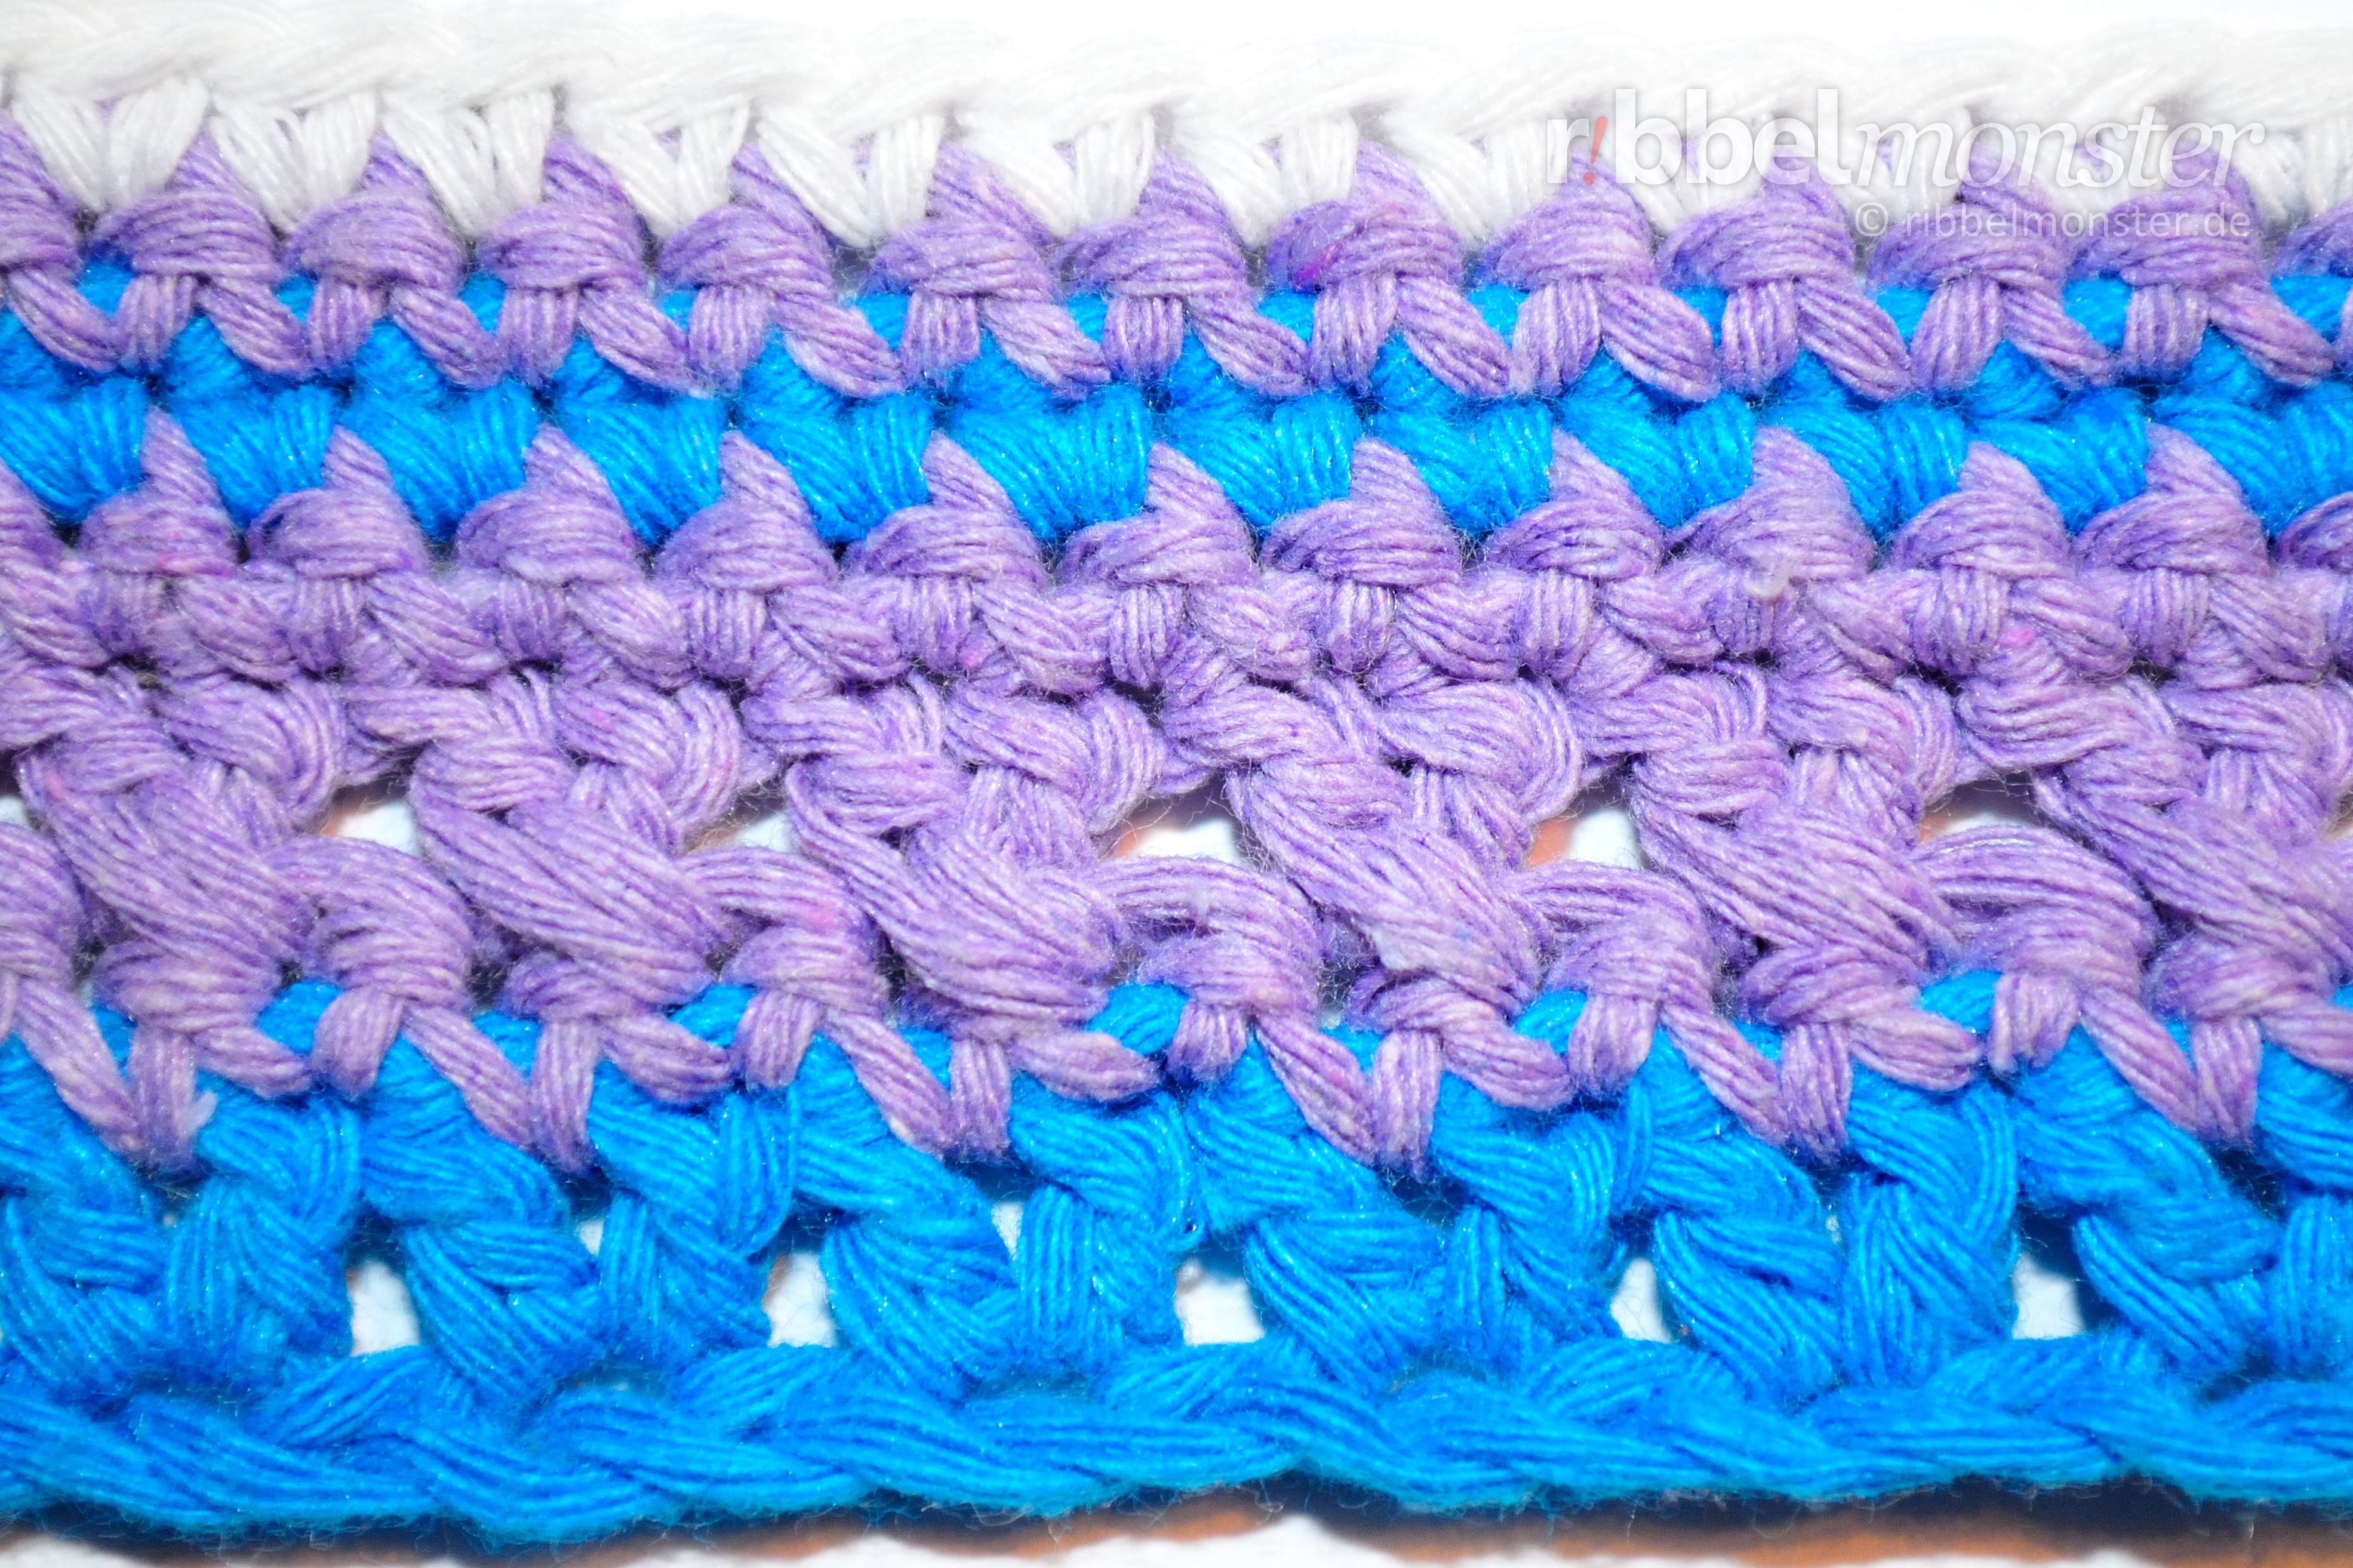
7th Day of Crocheting a Weather Blanket
I waited until evening, hoping it would still snow. Vain. Again only covered, but still only 3°C and so I can finally combine the white yarn with the cloudy pattern.
On the following close-up you can now admire the first 1 + 7 rows. Looks not bad.
Size and Yarn Consumption of the Weather Blanket
Since we crocheted a few rows after the first week, we can start the first projections. I’ll show you my results here and you can easily do it for your weather blanket.
First, measure and weigh are on the program, quasi the body check for weather blankets. 😉 Here you measure the height of all rows and just weigh the finished crocheted part. My blanket is now 4cm high and weighs 87g.
Now we can easily figure out how long and heavy our blanket would become after 365 days. I purposely count with days, not weeks, so you can repeat that on any given day. For this we first need the factor for the part we already crocheted.
- Factor = 365 : Number of Crocheted Days
- E.g.: 365 : 7 = 52,1
Then you can simply multiply the measured values by this factor to get the estimated values for the entire blanket.
- Length of the Blanket = Height until now * Factor
- E.g.: Length of the Blanket = 4cm * 52,1 = 208,4cm
- Weigh of the Blanket = Weigh until now * Factor
- E.g.: Weigh of the Blanket = 87g * 52,1 = 4533g = 4,5kg
My blanket will be about 208cm long and weighs 4.5kg. I’m not completely satisfied with the length, because that’s too short for me. Already funny, I was afraid that it would be too long. But I’m in good spirits, because the ugly weather has brought me many low rows.
Much more interesting, however, that we can now close on the approximate yarn consumption. In addition you simply divide the weight of your blanket by the weight of a yarn ball. Then you can divide the balls by the number of colours and then you get the approximate number per colour, if they were evenly spread.
- Number of Yarn Balls = Weigh of the Blanket : Weigh of a Yarn Ball
- E.g.: Number of Yarn Balls = 4533g : 50g = 90,7
- Number of Yarn Balls per Colour = Number of Yarn Balls : Number of Colors
- E.g.: Number of Yarn Balls per Colour = 90,7 : 9 = 10
So I’m going to need about 10 balls of each colour, but I’m already expecting more. Currently, I have just 4 balls of each colour and probably I will have to buy Yarn as well as you do. I will buy a little bit more and then fill up my stock a little bit again. Yarn, after all, you can never have enough! 😉
Since the start of the project was not so long ago, it should not be a problem to get a little more yarn, especially since we all crochet with different yarns. Perhaps you have noticed that I have not revealed which Yarn I use! With that, I wanted to avoid all of us buying the same yarn and in the end, all of us are depressed when it’s sold out. So everyone has their own Yarn used and everything is spread nicely. Even if the colour number is not exactly right at the end, it will not stand out if you do not change yarn in the middle of the row and mix something old and new yarn.
The numbers of the first projection are of course only approximate, which will be a little more accurate with each week that comes to it. This is simply because our rows are different in height and weight by the different patterns.
Hands-on-task!
Here comes the next hands-on-task! Write a comment describing the work on your blanket and attach a photo of your blanket! If you are not ready yet, you can do that anytime! The following questions could help you: Which patterns have you already crocheted? What was difficult or went wrong? What tips do you have for others? I would also like to ask you to send your projection. Of course, if you can not handle the calculation, I’ll be happy to help you!
Attention! Please use the comment function for your report, so that the project remains for posterity. In social networks, things are disappearing so fast! Of course you are allowed to add your stuff there as well. We are publishing new posts on social networks like Facebook and Twitter. For urgent questions and personal exchange you can also find the Ribbelmonster group on Facebook!