
How to Ccrochet a Cukado Cardigan I show you in this crochet pattern. The Cukado Cardigan “Boston” has a simple straight shape, is simply crocheted and fits all Cukado dolls.
Introduction: Cukado Crochet Cardigan “Boston”

Knowledge: Cukado Crochet Cardigan “Boston”
- Crochet Chain Stitches
- Crochet Slip Stitches
- Single Crochet Stitches (US!)
- Turning Chain Stitches
Supplies: Cukado Crochet Cardigan “Boston”
Buttons
- Amount: 3
- Colour: rose
- Shape: round
- Size: 3/8inch
Crochet Hook
You will need a crochet hook with a size of B or C (alphabetic) or 1 1/2 (numeric). For converting to other sizes, the crochet hook size converter will help you. I have selected some great crochet hooks for you here.
Scissors
You’ll need any scissors. It’s best to use your most beautiful scissors because it brings you joy. If you don’t have really nice scissors, I’ve picked out some lovely ones for you.
Wool Needle
You’ll need a wool needle with a blunt tip. The thickness of the wool needle should match the thickness of your yarn. You might like the set of wool needles I’ve picked out for you.
Yarn – Schachenmayr – Catania – white – 106
I used yarn in the shade White. The material is 100% cotton. The yardage is 137 yds / 1.75 oz. If you want to replenish your supply, I’ve already picked out the matching yarn for you here.
Size: Cukado Crochet Cardigan “Boston”
For the Cukado Cardigan to fit all Cukado dolls you should crochet it with a comparable yarn size and needle size as the Cukado Amigurumi.
Crochet Pattern: Cukado Crochet Cardigan “Boston”
For the Cukado Cardigan, we first crochet the middle part from top to bottom in rows with single crochet stitches (US!). Once the middle part is done we can crochet the sleeves in spiral rounds with single crochet stitches (US!) directly on it. Finally, we sew a few buttons on the button placket.
Crochet Middle Part of Cardigan (1x)

We crochet the middle part for our cardigan from top to bottom in rows of single crochet stitches (US!). In some rows we crochet more lifting-chain stitches than usual to get button pleats for the button placket.
- 1st row: 24 chain stitches + 6 lifting-chain stitch, turn = 24 stitches
- 2nd row:
- 1 lifting-chain stitch
- 3x 1 single crochet stitch (US!) into one stitch
- 1x 2 single crochet stitches (US!) into one stitch
- 2x 1 single crochet stitch (US!) into one stitch
- 1x 2 single crochet stitches (US!) into one stitch
- 8x 1 single crochet stitch (US!) into one stitch
- 1x 2 single crochet stitches (US!) into one stitch
- 2x 1 single crochet stitch (US!) into one stitch
- 1x 2 single crochet stitches (US!) into one stitch
- 5x 1 single crochet stitch (US!) into one stitch
- turn
- = 28 stitches
- 3rd row:
- 1 lifting-chain stitch
- 5x 1 single crochet stitch (US!) into one stitch
- 1x 2 single crochet stitches (US!) into one stitch
- 3x 1 single crochet stitch (US!) into one stitch
- 1x 2 single crochet stitches (US!) into one stitch
- 9x 1 single crochet stitch (US!) into one stitch
- 1x 2 single crochet stitches (US!) into one stitch
- 3x 1 single crochet stitch (US!) into one stitch
- 1x 2 single crochet stitches (US!) into one stitch
- 4x 1 single crochet stitch (US!) into one stitch
- turn
- = 32 stitches
- 4th row:
- 1 lifting-chain stitch
- 4x 1 single crochet stitch (US!) into one stitch
- 1x 2 single crochet stitches (US!) into one stitch
- 4x 1 single crochet stitch (US!) into one stitch
- 1x 2 single crochet stitches (US!) into one stitch
- 10x 1 single crochet stitch (US!) into one stitch
- 1x 2 single crochet stitches (US!) into one stitch
- 4x 1 single crochet stitch (US!) into one stitch
- 1x 2 single crochet stitches (US!) into one stitch
- 6x 1 single crochet stitch (US!) into one stitch
- turn
- = 36 stitches
- 5th row:
- 1 lifting-chain stitch
- 6x 1 single crochet stitch (US!) into one stitch
- 1x 2 single crochet stitches (US!) into one stitch
- 5x 1 single crochet stitch (US!) into one stitch
- 1x 2 single crochet stitches (US!) into one stitch
- 11x 1 single crochet stitch (US!) into one stitch
- 1x 2 single crochet stitches (US!) into one stitch
- 5x 1 single crochet stitch (US!) into one stitch
- 1x 2 single crochet stitches (US!) into one stitch
- 5x 1 single crochet stitch (US!) into one stitch
- turn
- = 40 stitches
- 6th row:
- 6 lifting-chain stitches
- 6x 1 single crochet stitch (US!) into one stitch
- 6 chain stitches
- skip 6 stitches
- 14x 1 single crochet stitch (US!) into one stitch
- 6 chain stitches
- skip 6 stitches
- 8x 1 single crochet stitch (US!) into one stitch
- turn
- = 40 stitches
- 7th – 9th row: (= 3 rows)
- 1 lifting-chain stitch
- each stitch one single crochet stitch (US!
- turn
- = 40 stitches
- 10th row:
- 6 lifting-chain stitch
- each stitch one single crochet stitch (US!
- turn
- = 40 stitches
- 11th – 12th row: (= 2 rows)
- 1 lifting-chain stitch
- each stitch one single crochet stitch (US!
- turn
- = 40 stitches
- cut the thread, pull off the loop, secure and weave in the thread end
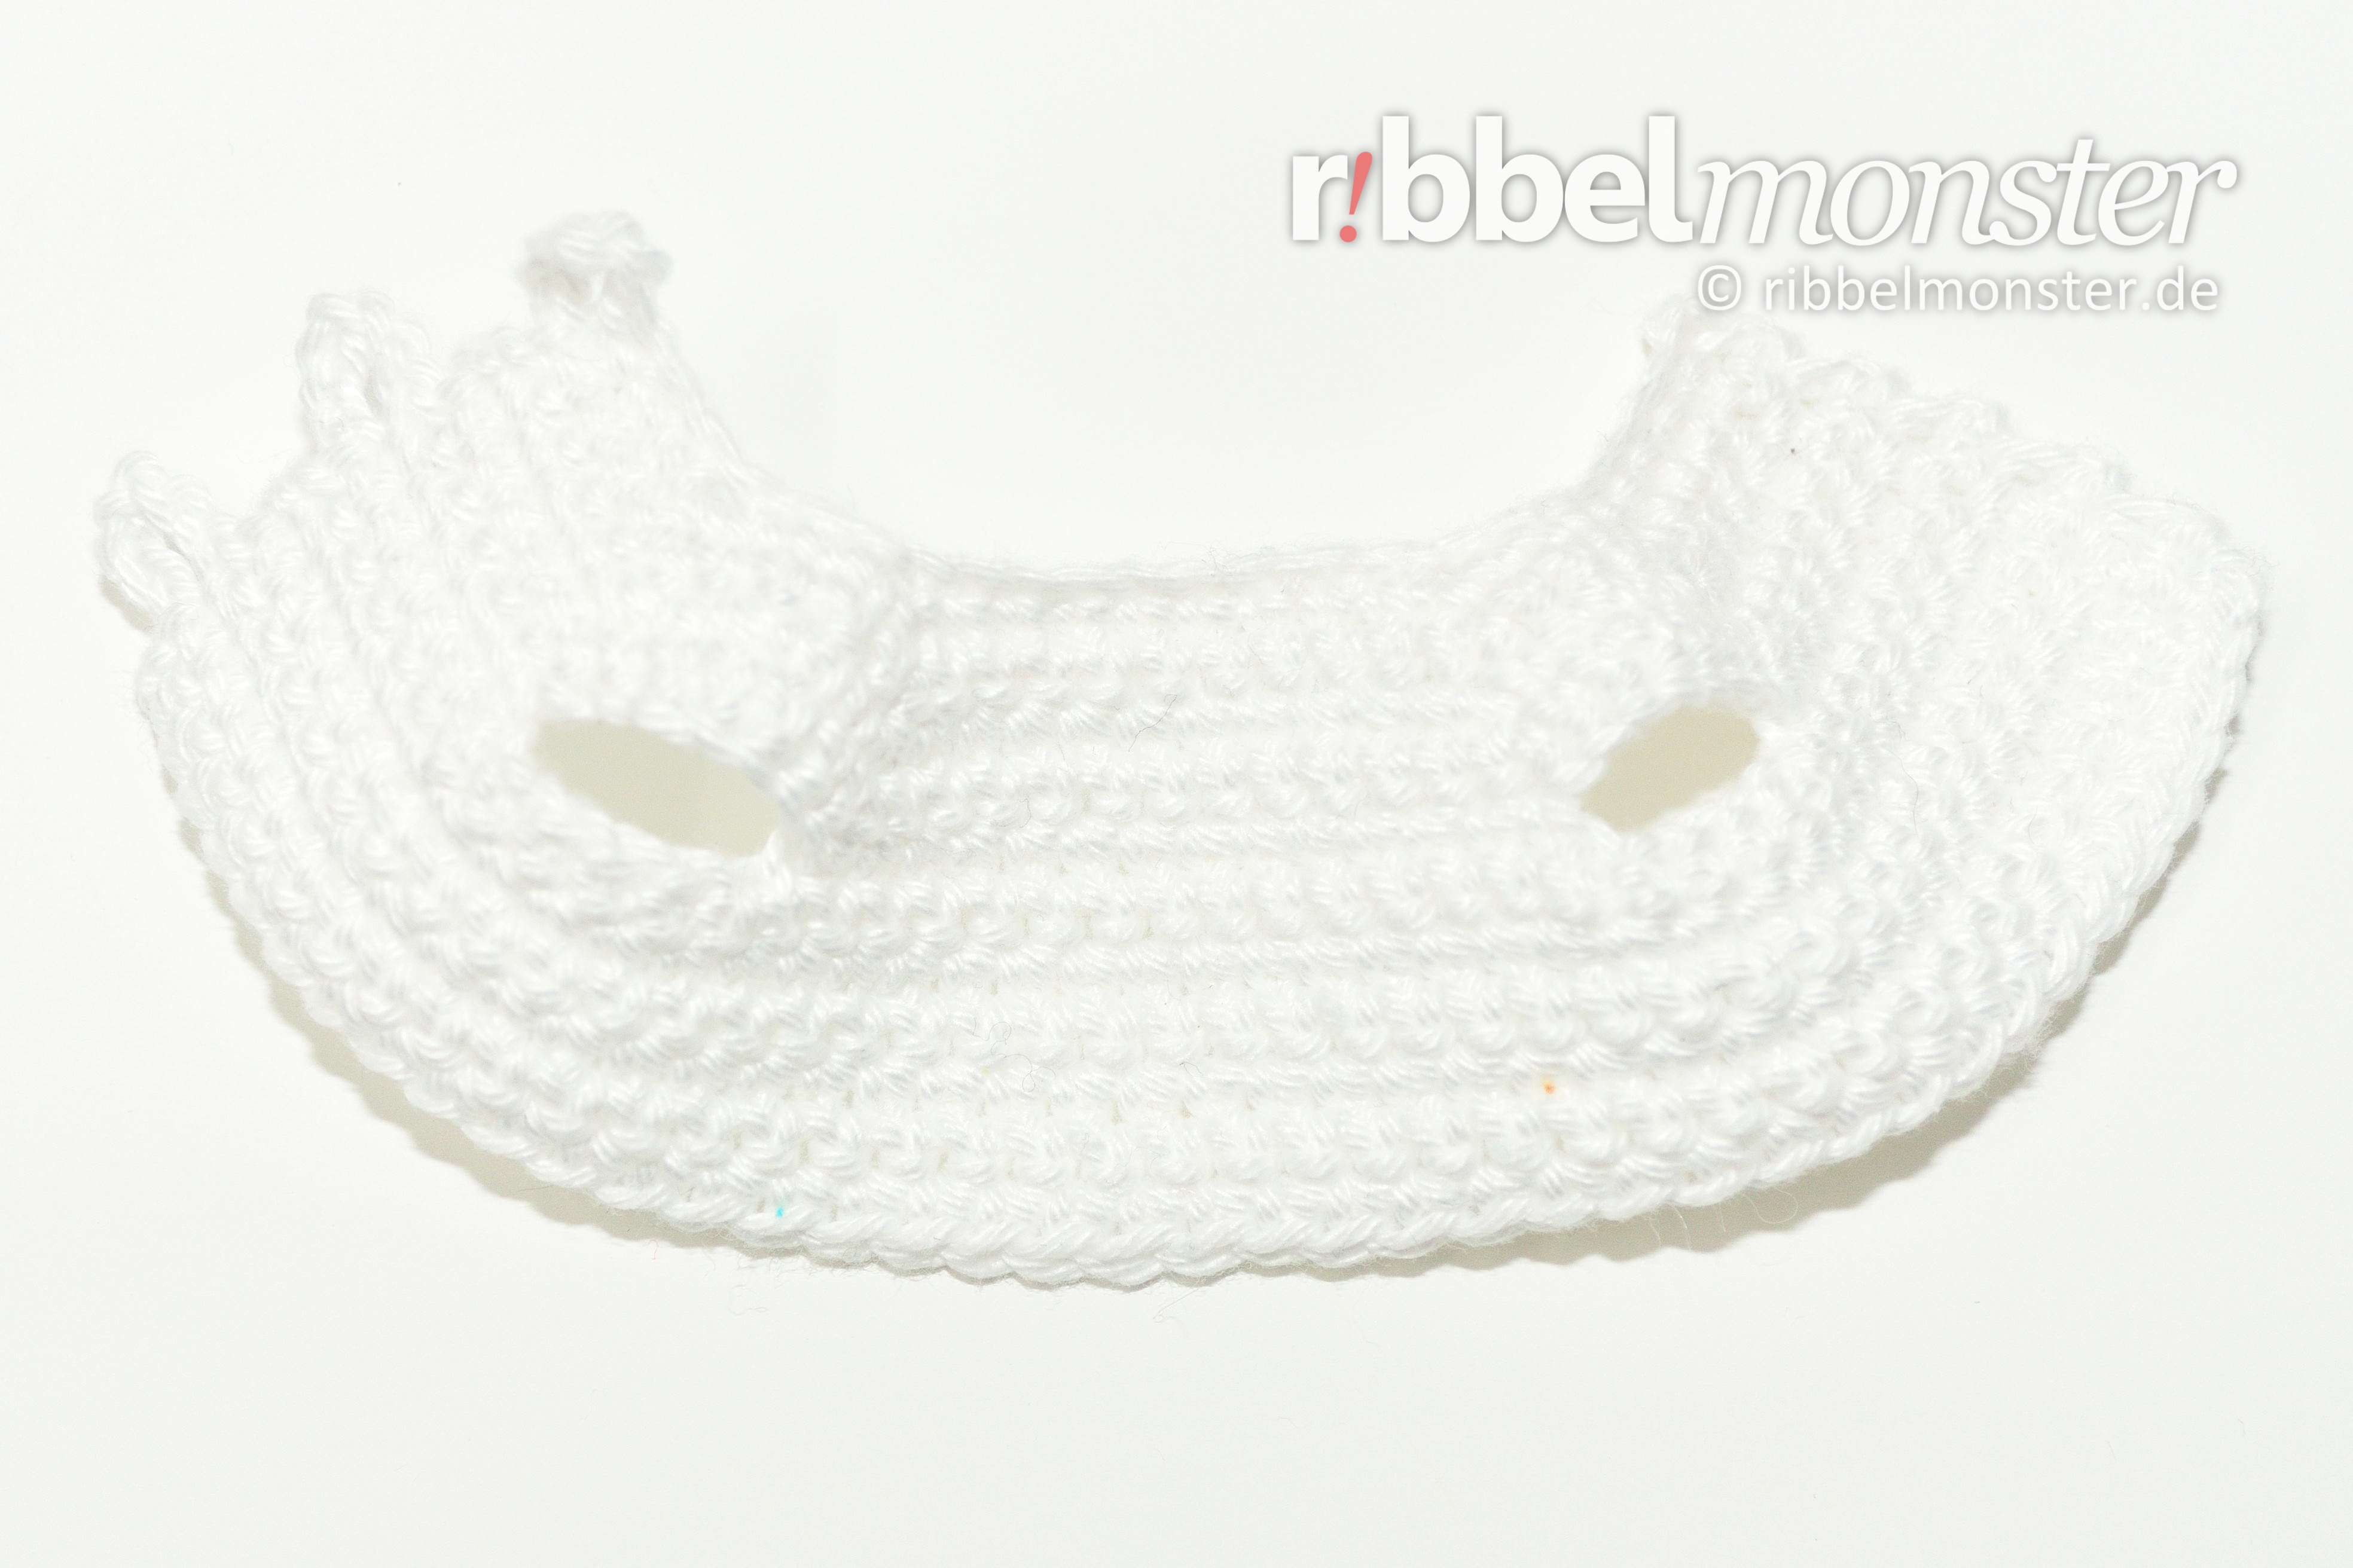
Crochet Sleeves on Cardigan (2x)

The sleeves for the cardigan we crochet directly to the middle part. You start in the back corner of the armhole at the middle part.
We crochet in spiral rounds with single crochet stitches (US!) and start with a slip stitch and crochet in this stitch also the first single crochet stitch (US!)We crochet around with single crochet stitches (US!) and crochet into the stitches at the side, so we come to 16 stitches. Now you just continue crocheting in spiral rounds.
- white:
- 1st – 16th round:
- 1 slip stitches
- 1 lifting-chain stitches
- 16x 1 single crochet stitch (US!) into one stitch
- = 16 stitches
- beyond the end of the round:
- 16x 1 single crochet stitch (US!) into one stitch
- cut the thread, pull off the loop, secure and weave in the thread end
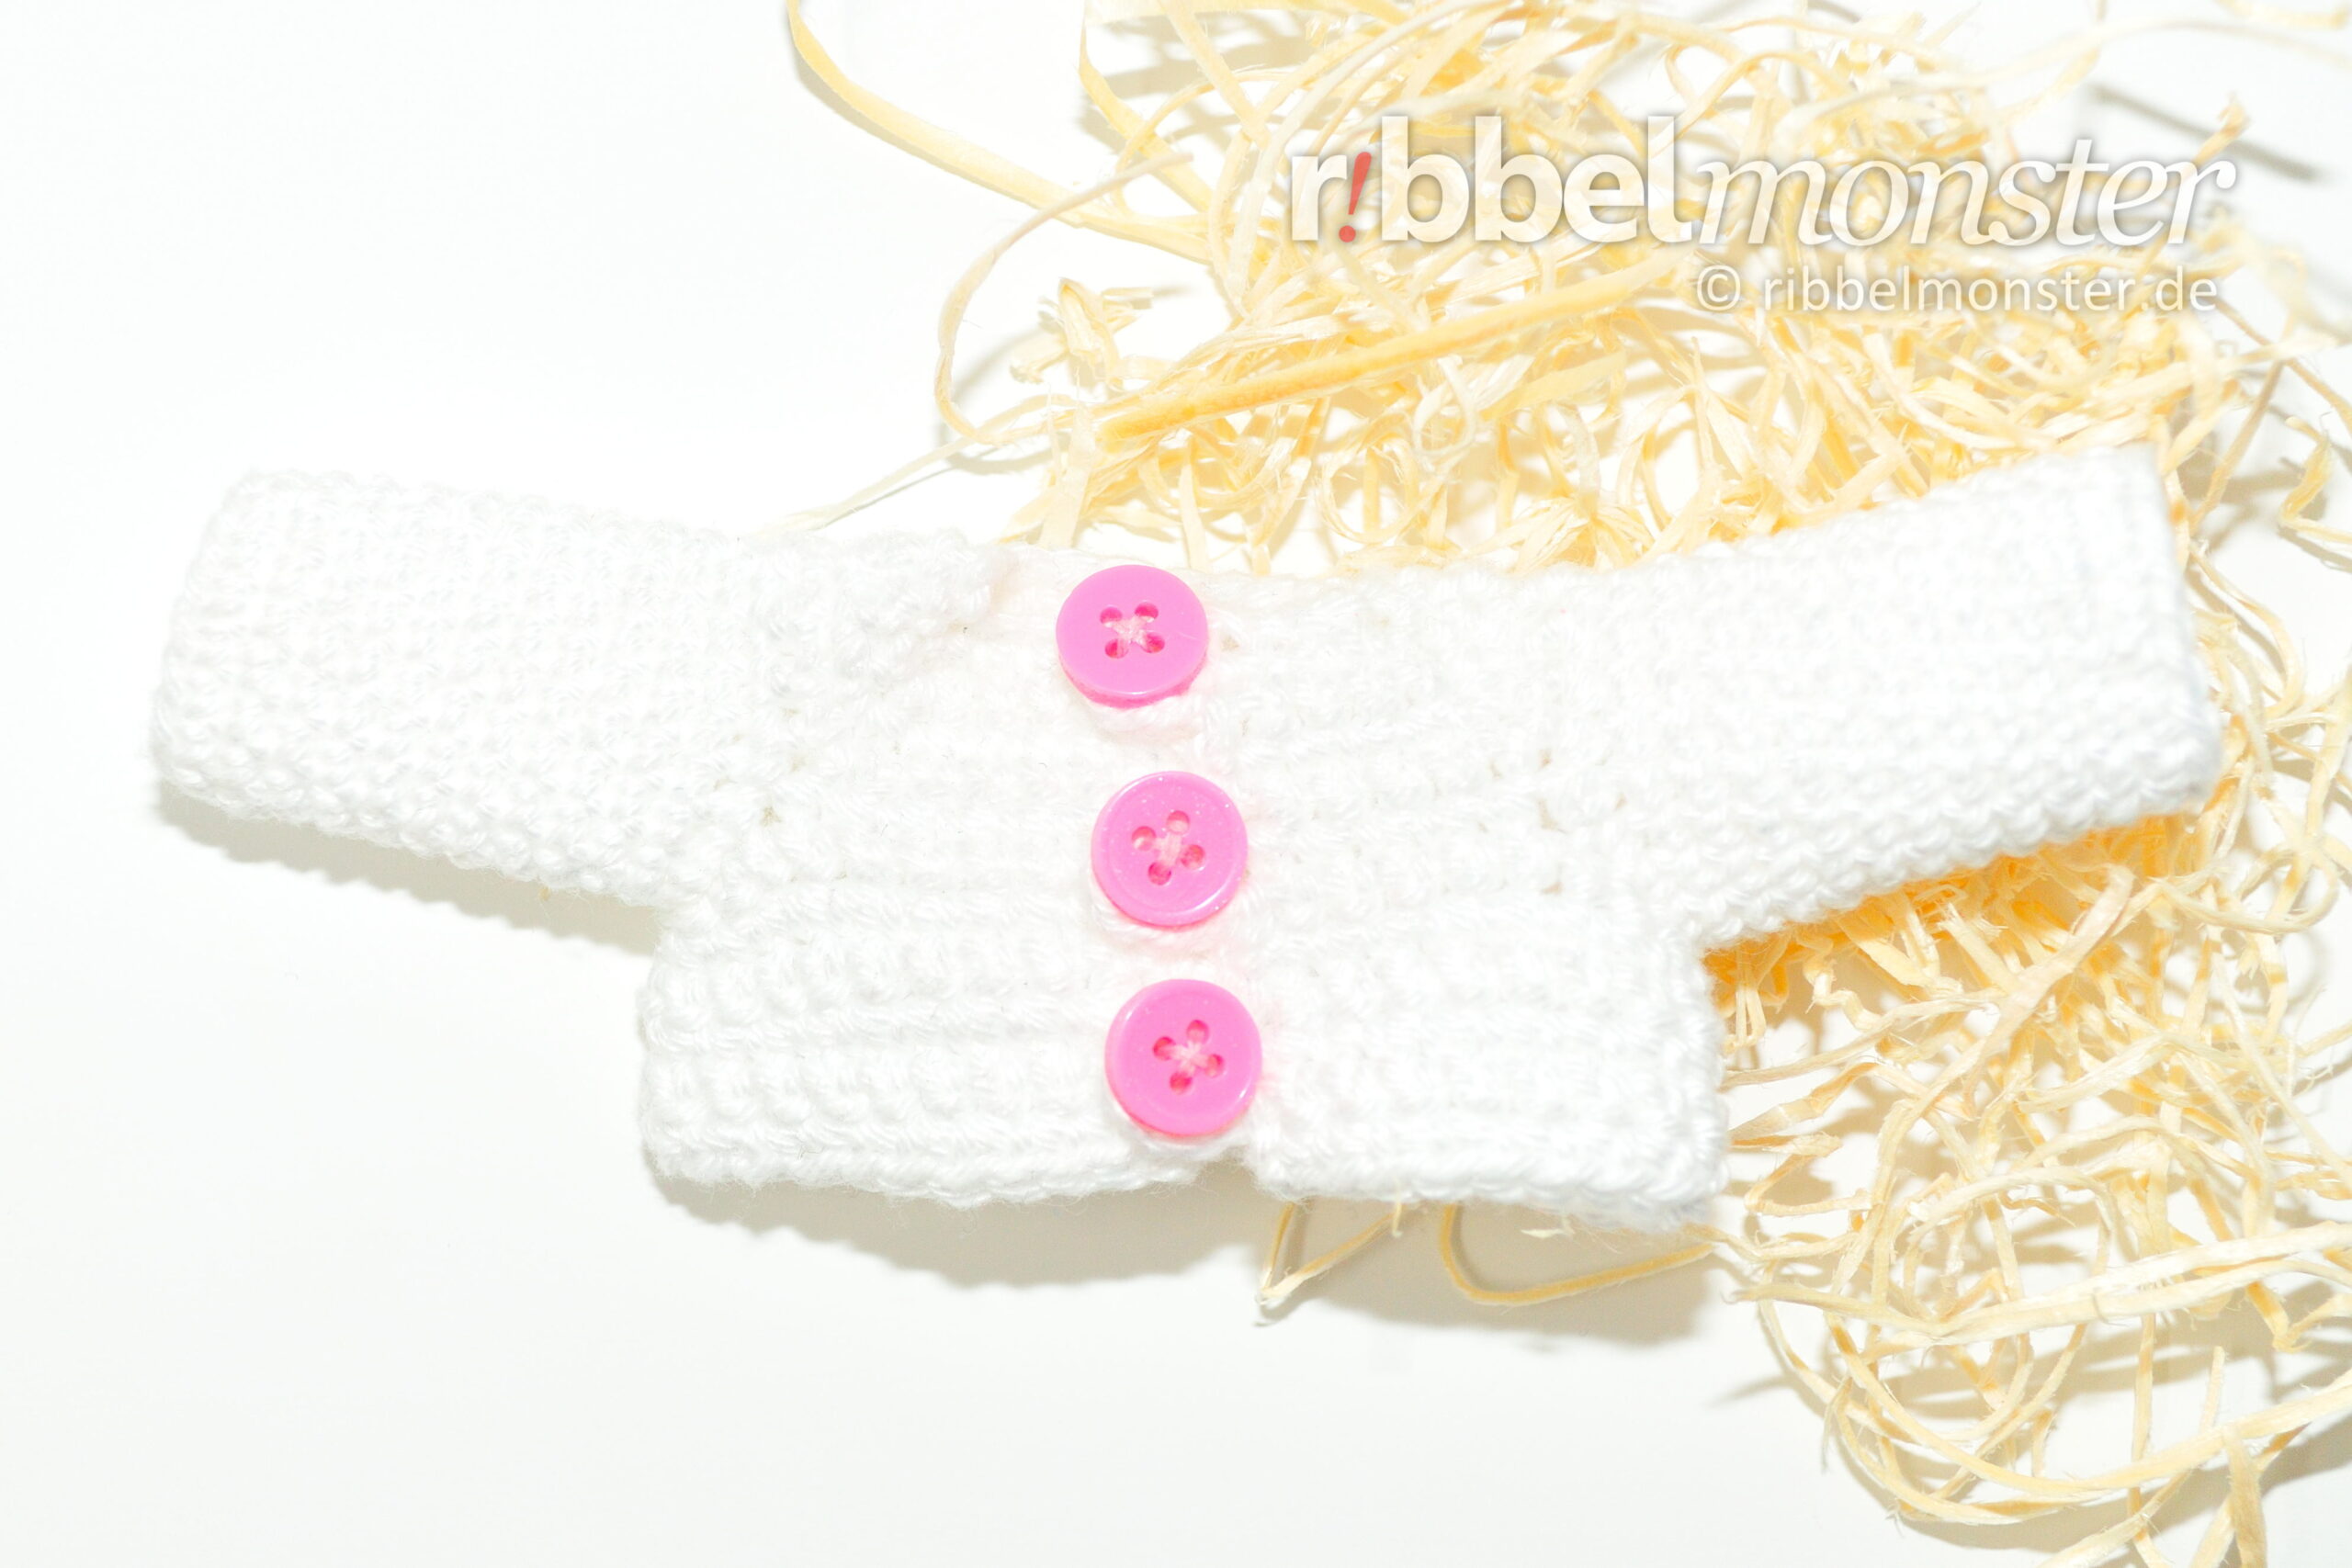
Finish Cukado Cardigan
The cardigan has a nice placket on the front. The loops were created by the many lifting-chain stitches in some rows. All you have to do is sew buttons on the other side of the button placket. Here you try out first if your buttons just fit through the button loops. Then you sew the buttons on the other side and secure the threads inside.
Lass es dir gut gehen!
Kennst du schon den Ribbelmonster VIP Club?