
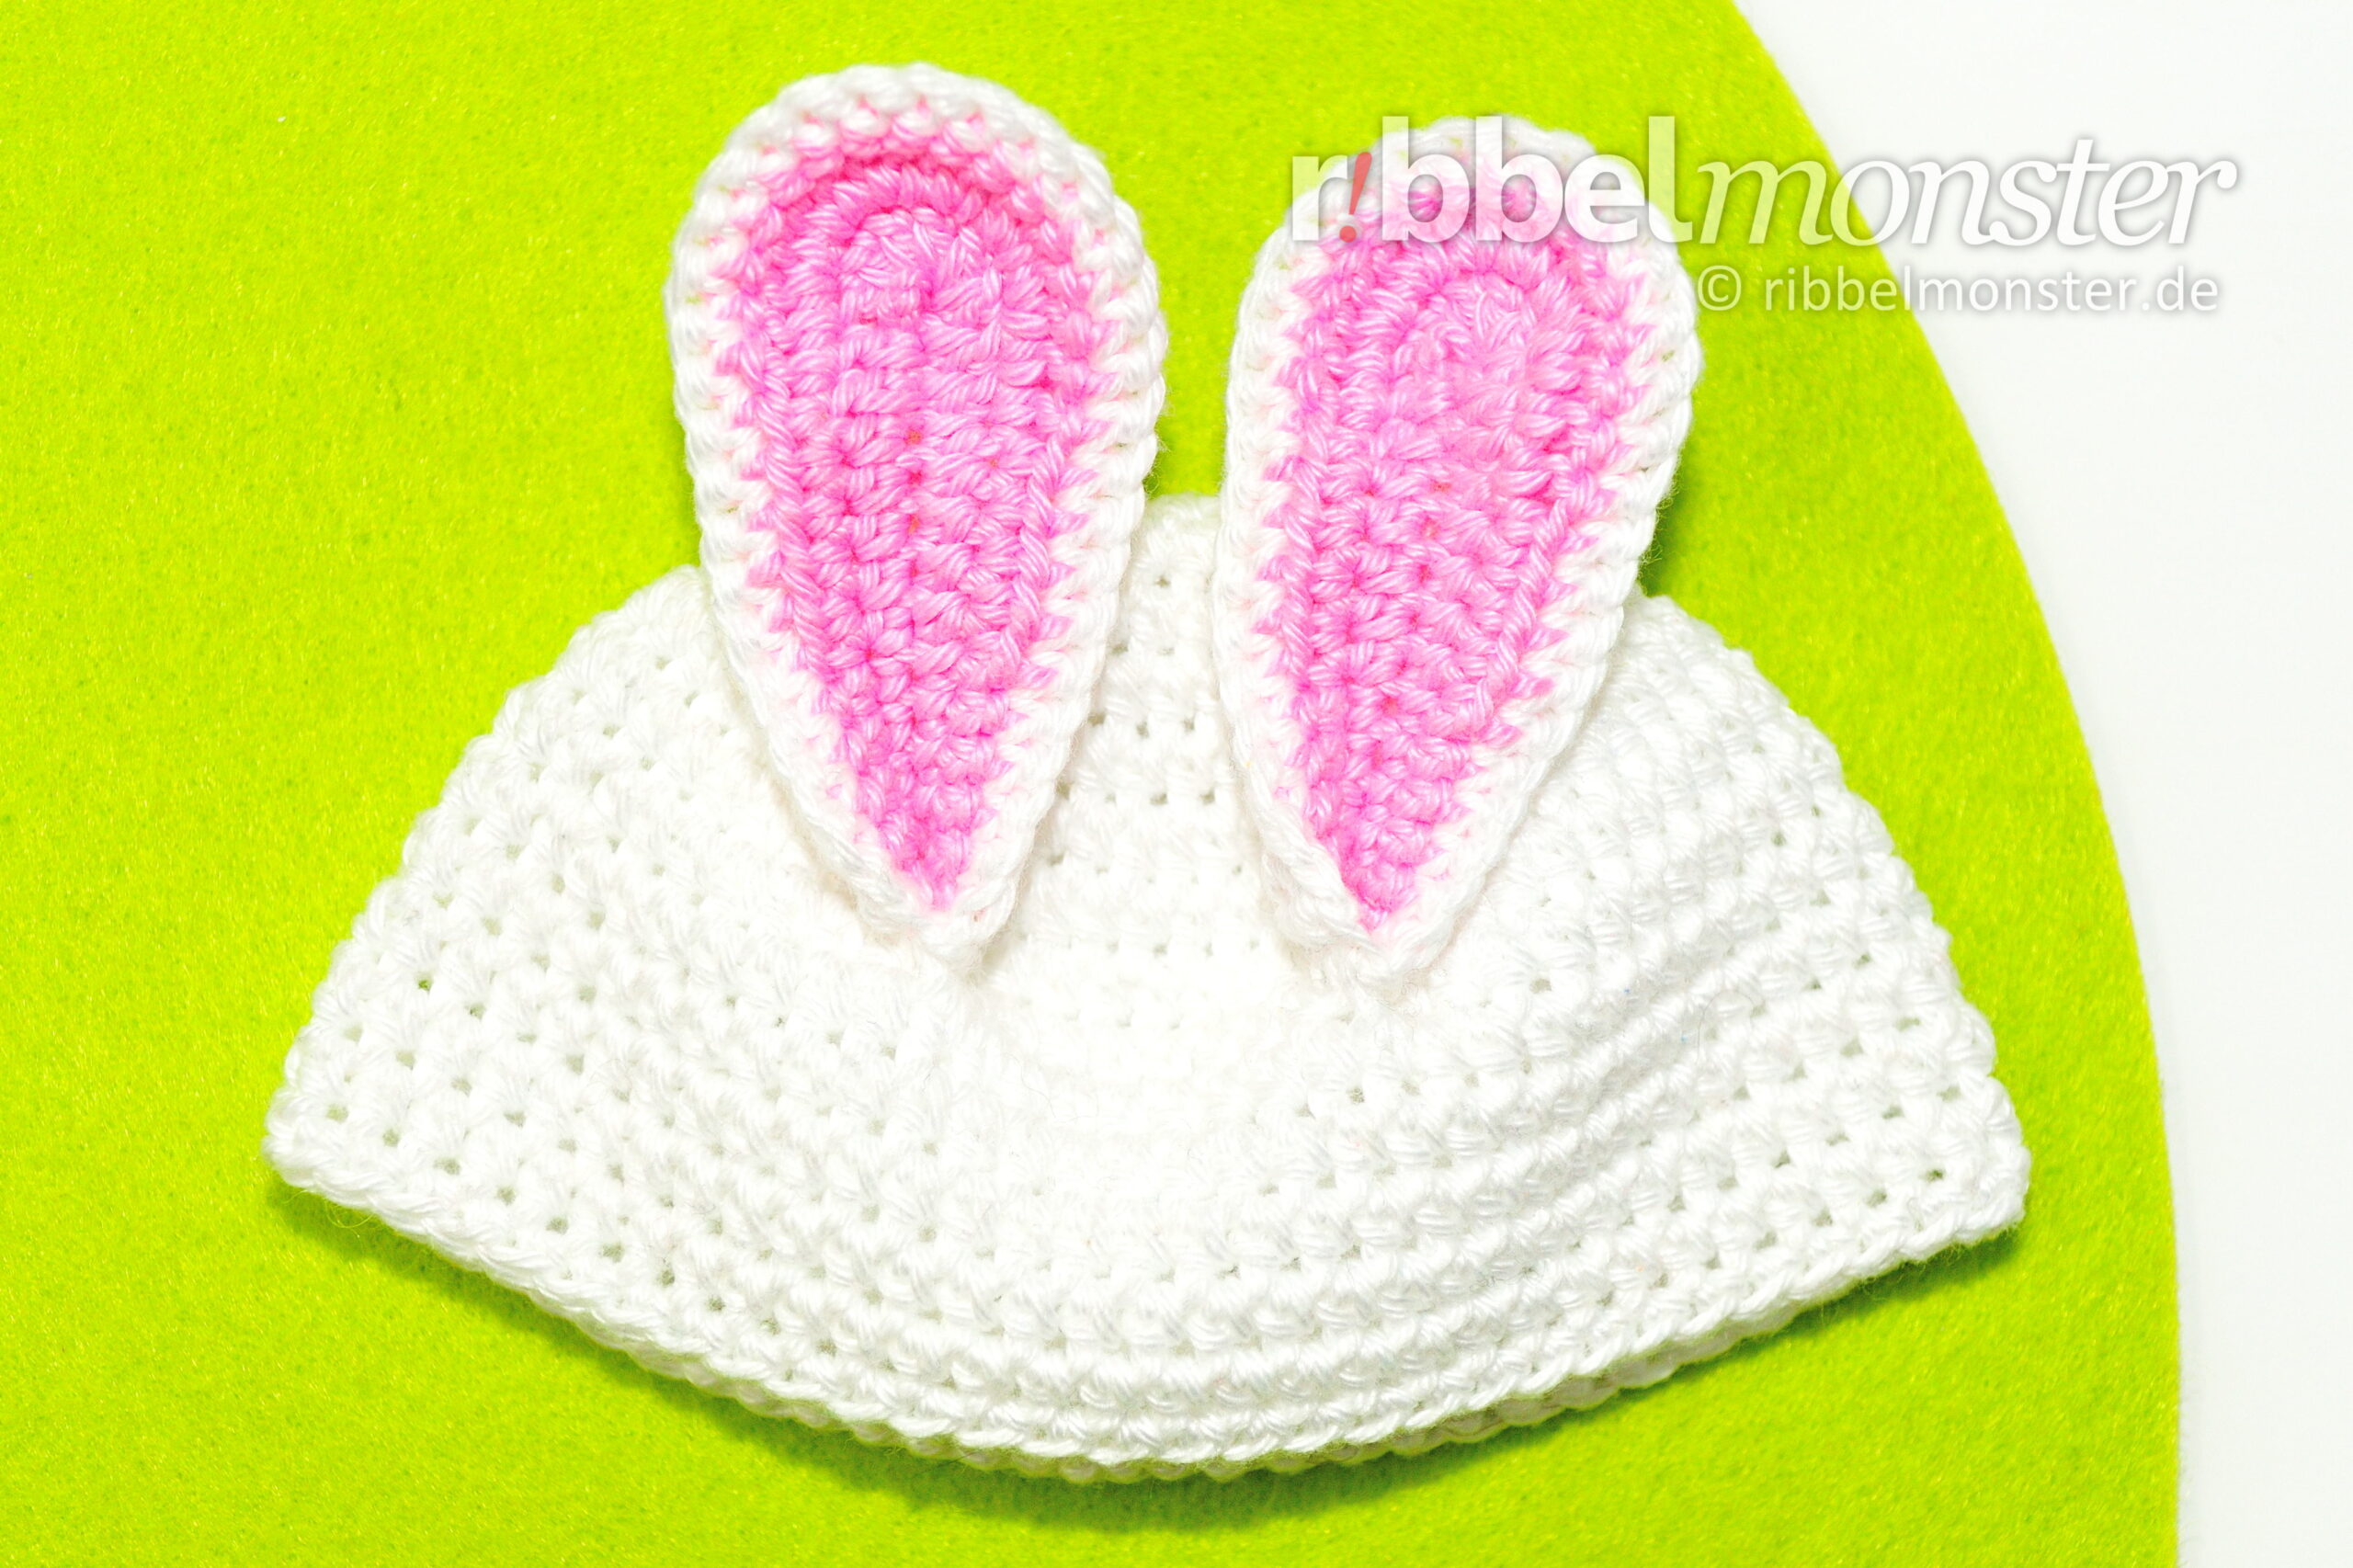
I show you how to crochet a Cukado “Bunny” beanie for your Cukado Amigurumis. The crocheted beanie “Bunny” consists of a simple beanie with funny rabbit ears and fits all Cukado dolls.
Introduction: Cukado Crochet “Bunny” Beanie

Knowledge: Cukado Crochet “Bunny” Beanie
- Crochet Chain Stitches
- Crochet Double Crochet Stitches (US!)
- Crochet Magic Ring
- Crochet Slip Stitches
- Half Double Crochet Stitches (US!)
- Single Crochet Stitches (US!)
- Turning Chain Stitches
Supplies: Cukado Crochet “Bunny” Beanie
Crochet Hook
You will need a crochet hook with a size of B or C (alphabetic) or 1 1/2 (numeric). For converting to other sizes, the crochet hook size converter will help you. I have selected some great crochet hooks for you here.
Scissors
You’ll need any scissors. It’s best to use your most beautiful scissors because it brings you joy. If you don’t have really nice scissors, I’ve picked out some lovely ones for you.
Wool Needle
You’ll need a wool needle with a blunt tip. The thickness of the wool needle should match the thickness of your yarn. You might like the set of wool needles I’ve picked out for you.
Yarn – Schachenmayr – Catania – rose – 222
Colour: rose Size: 137yds / 1.75oz Material: 100% cotton Help? View example
Yarn – Schachenmayr – Catania – white – 106
I used yarn in the shade White. The material is 100% cotton. The yardage is 137 yds / 1.75 oz. If you want to replenish your supply, I’ve already picked out the matching yarn for you here.
Size: Cukado Crochet “Bunny” Beanie
For the Cukado Beanie to fit all Cukado dolls you should crochet it with a comparable yarn size and needle size as the Cukado Amigurumi.
If you are no longer a beginner, you can also adjust the size of each part. This is especially necessary if you use thicker or thinner yarn or your Cukado doll has extra thick or no hair.
Crochet Pattern: Cukado Crochet “Bunny” Beanie
For the Cukado Bunny Beanie we first crochet a simple beanie and a few ears. Finally, the ears are still sewn to the beanie and then your bunny beanie is already finished.
Crochet Beanie for Bunny Beanie (1x)
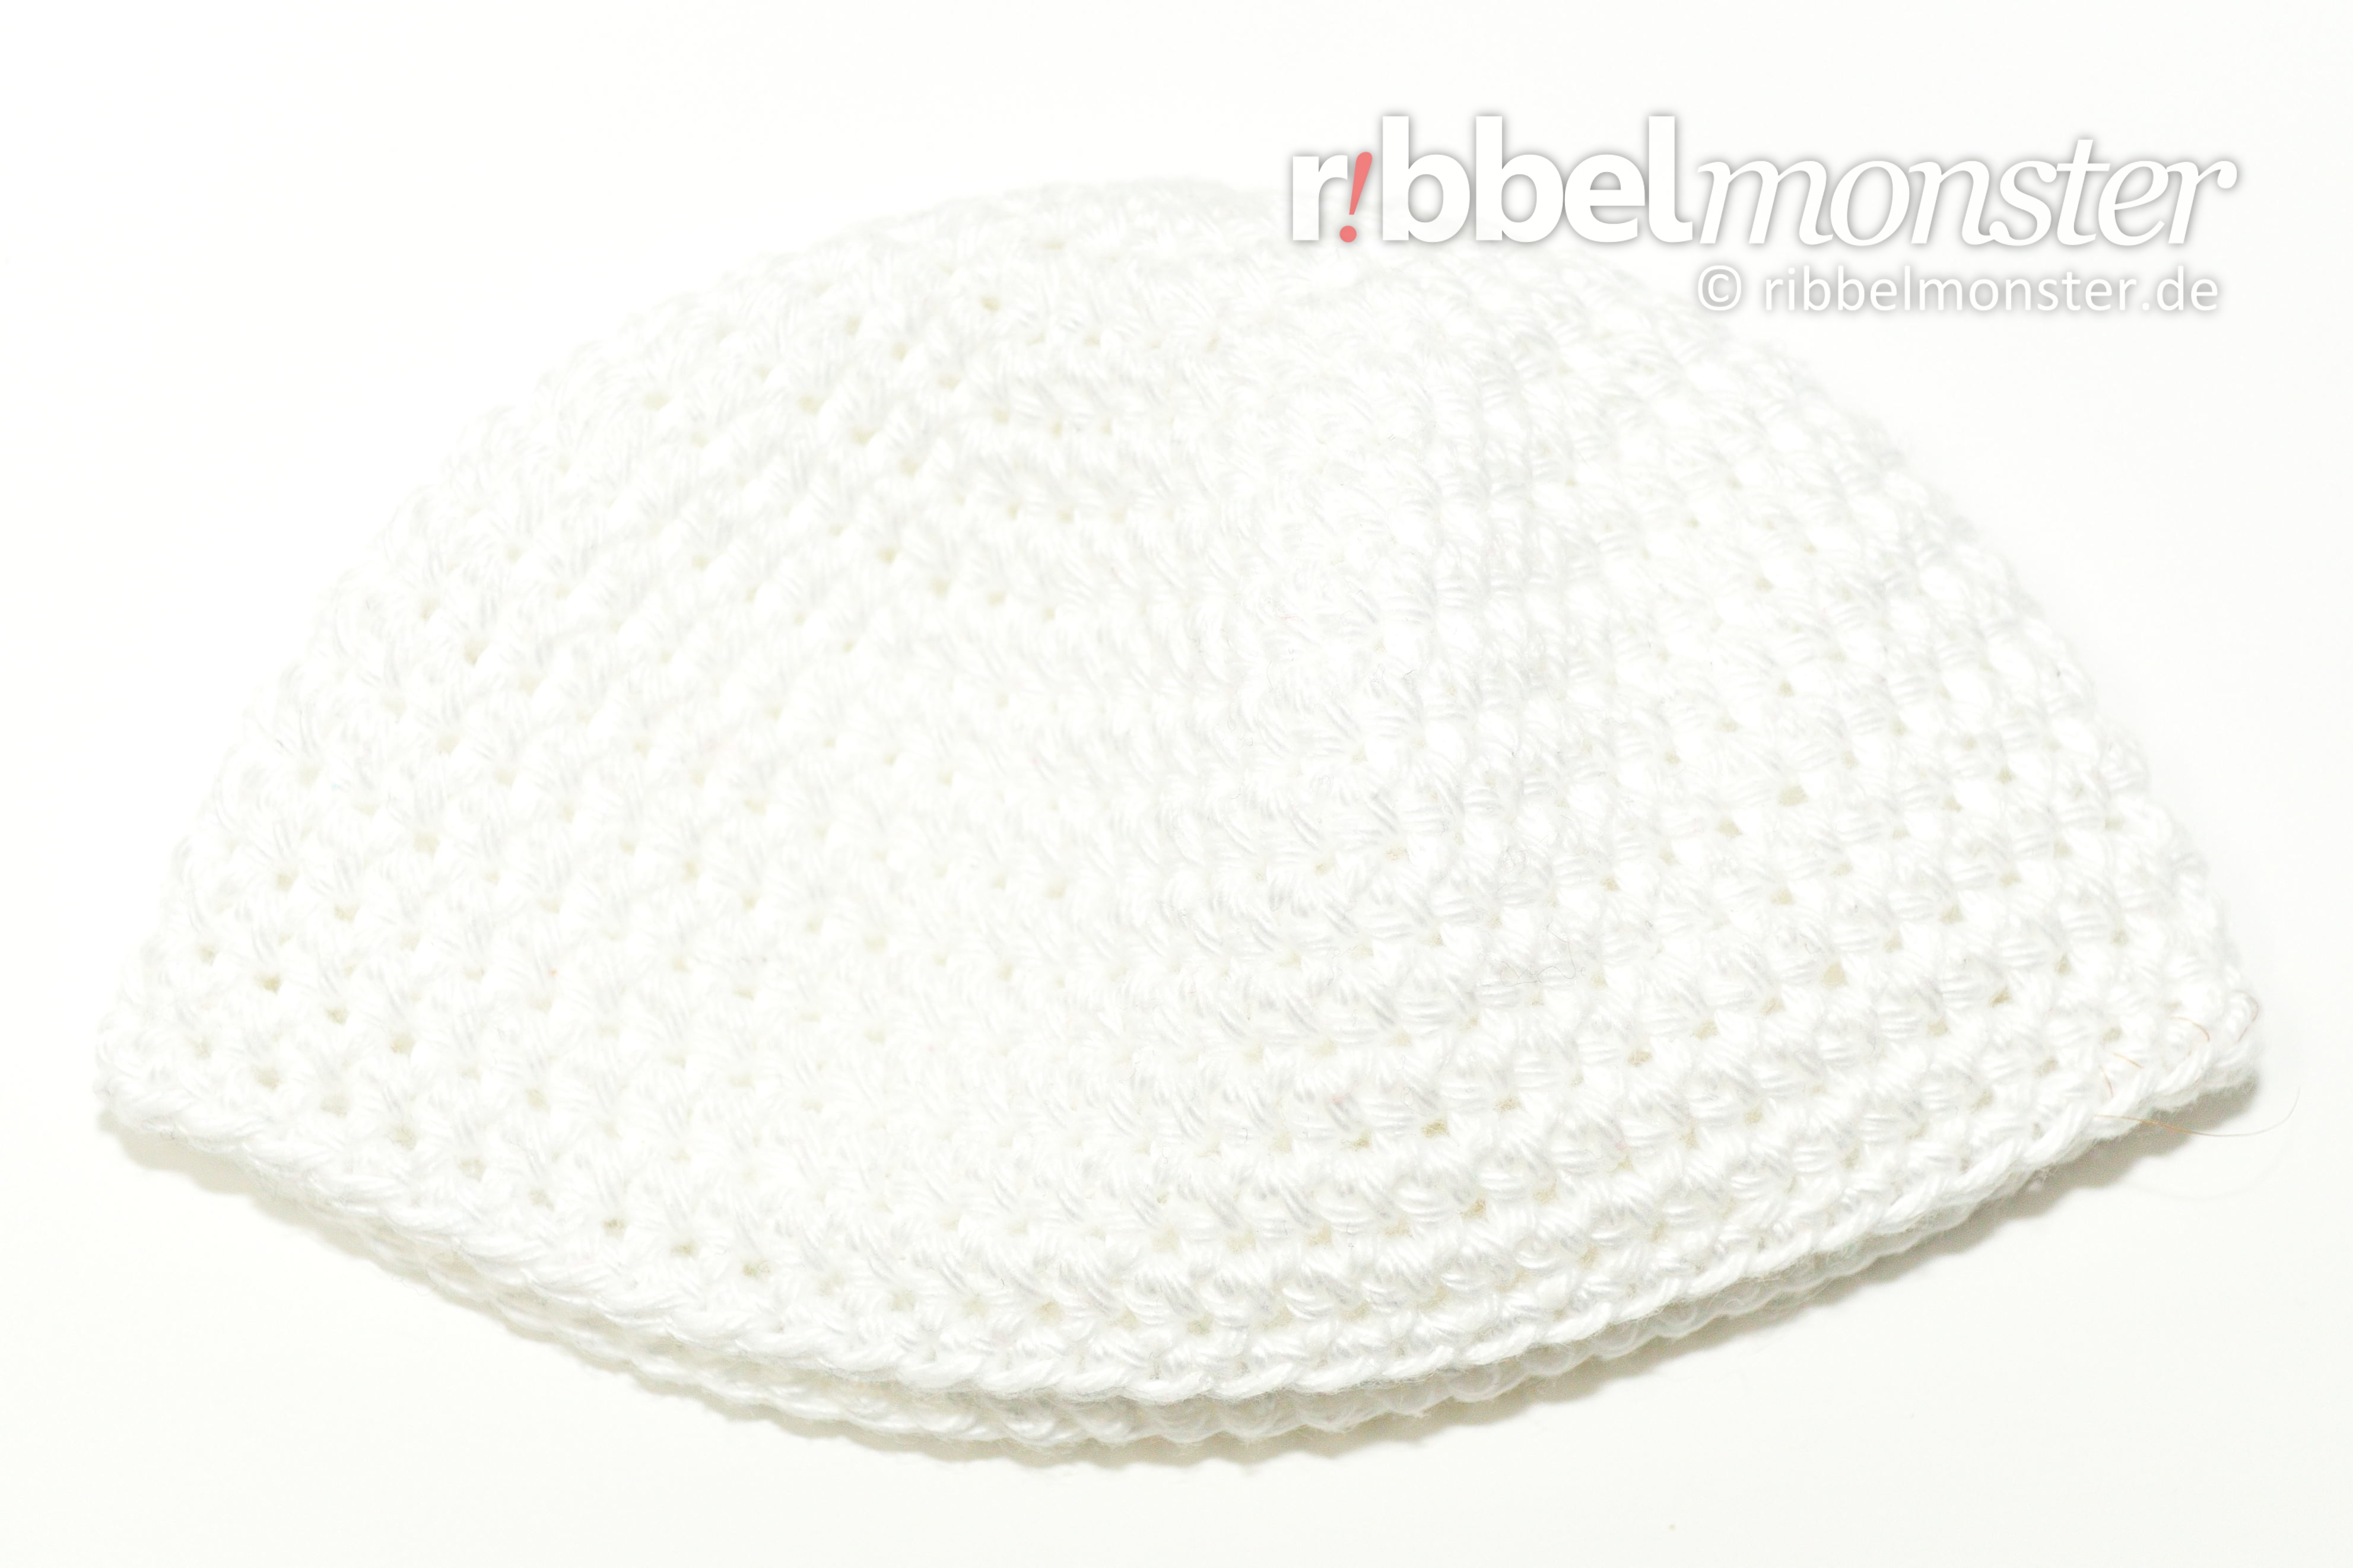
We crochet the beanie for the Cukado doll in circle rounds with half double crochet stitches (US!). . You simply use the universal pattern for the beanie with half double crochet stitches (US!). This way you can freely adjust the size of the beanie, if you use thicker yarn for the beanie or the hair of the doll.
You start with white and 8 8 half double crochet stitches (US!), so 9 stitches in the 1. round. Then crochet 7 rounds with increases to get at 63 stitches so the beanie will fit over your hair as well. This is followed by 7 more rounds without increases and the final round with single crochet stitches (US!).
Crochet ears for bunny beanie (2×2)

Next we want to crochet the ears for the bunny hat. We are crocheting in rows of different stitches. Each ear consists of an inner and an outer part.
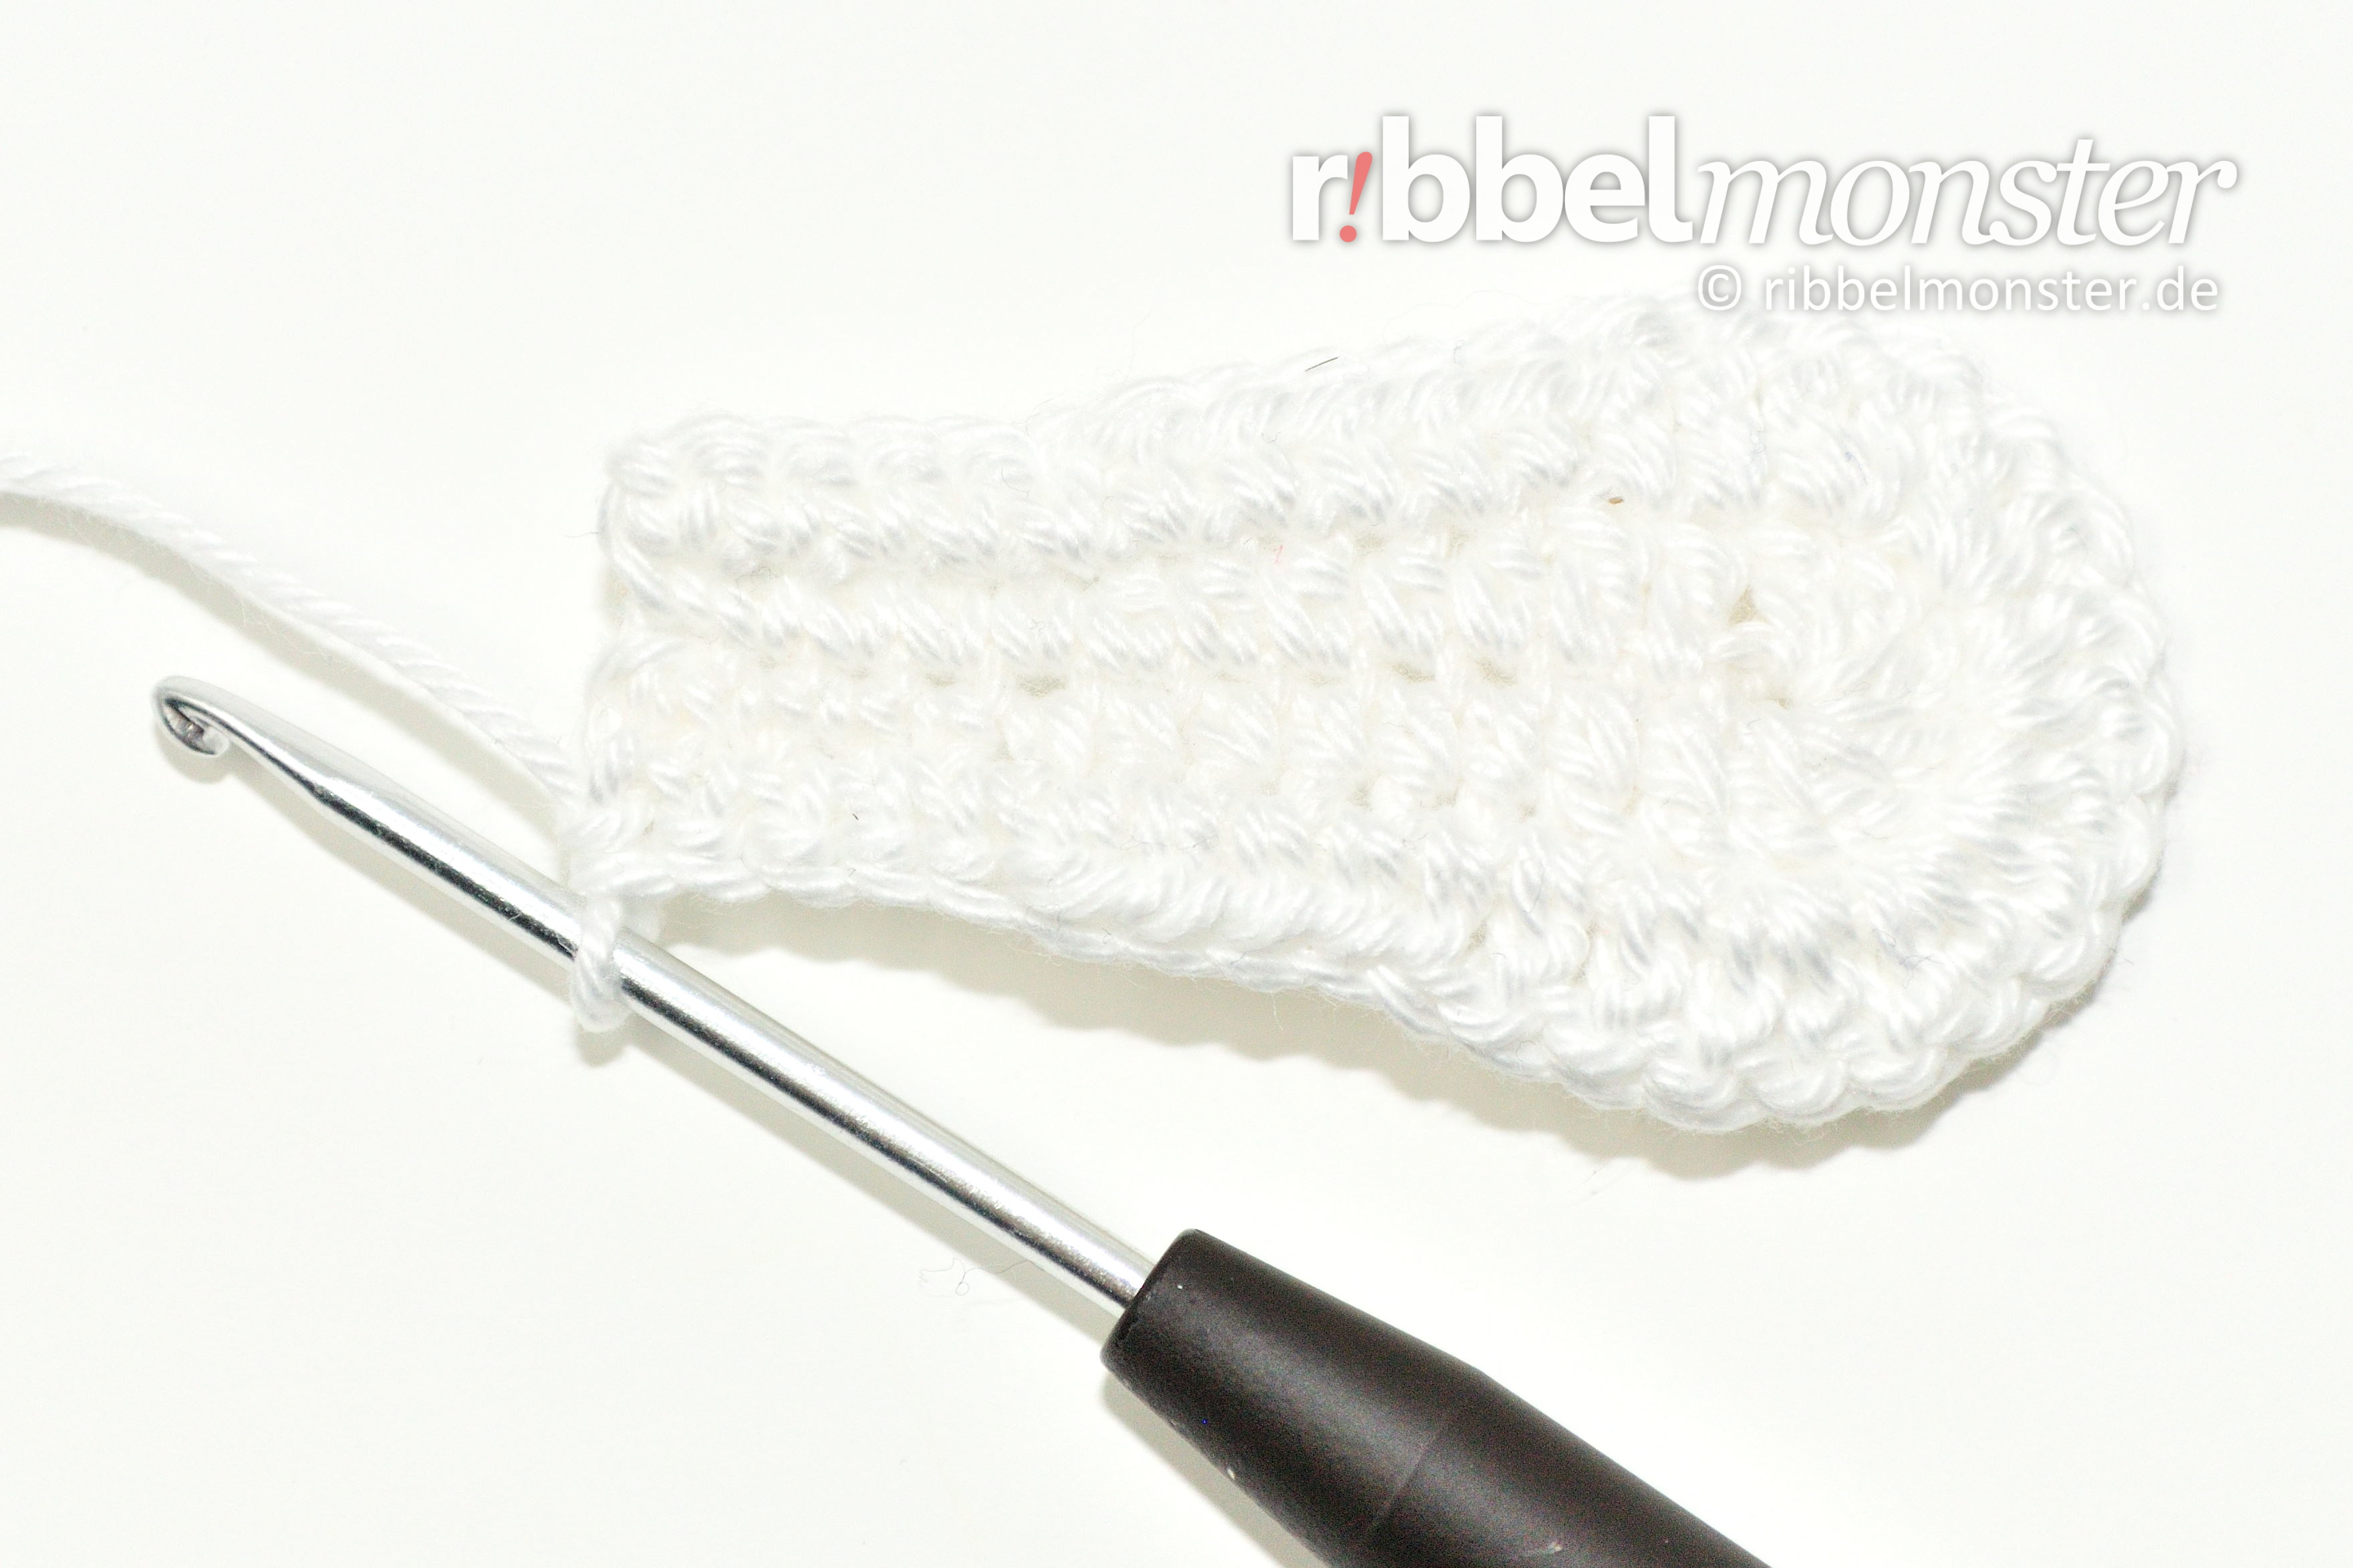
It’s best to first crochet the two inner parts in pink and then the two outer parts in white. Once the outer part is finished it is crocheted together directly with the inner part.
- Inner ear:
- rose:
- Outer ear:
- white:
- 1st row: 13 chain stitches + 1 lifting-chain stitch = 13 stitches
- 2nd row:
- 1 lifting-chain stitch
- 5x 1 single crochet stitch (US!) into one stitch
- 5x 1 half double crochet stitch (US!) into one stitch
- 2x 1 double crochet stitch (US!) into one stitch
- 1x 6 double crochet stitches (US!) in eine Masche
- rotate
- 2x 1 double crochet stitch (US!) into one stitch
- 5x 1 half double crochet stitch (US!) into one stitch
- 5x 1 single crochet stitch (US!) into one stitch
- turn
- = 30 stitches
- 3rd row:
- 1 lifting-chain stitch
- 5x 1 single crochet stitch (US!) into one stitch
- 5x 1 half double crochet stitch (US!) into one stitch
- 2x 1 double crochet stitch (US!) into one stitch
- 6x 2 double crochet stitches (US!) into one stitch
- rotate
- 2x 1 double crochet stitch (US!) into one stitch
- 5x 1 half double crochet stitch (US!) into one stitch
- 7x 1 single crochet stitch (US!) into one stitch
- turn
- = 36 stitches
- Inner ear:
- cut the thread, pull off the loop, secure and weave in the thread end
- Outer ear:
- DONT cut the thread end, continue with:
- Crochet ear together
- DONT cut the thread end, continue with:
Crochet ear together (2x)
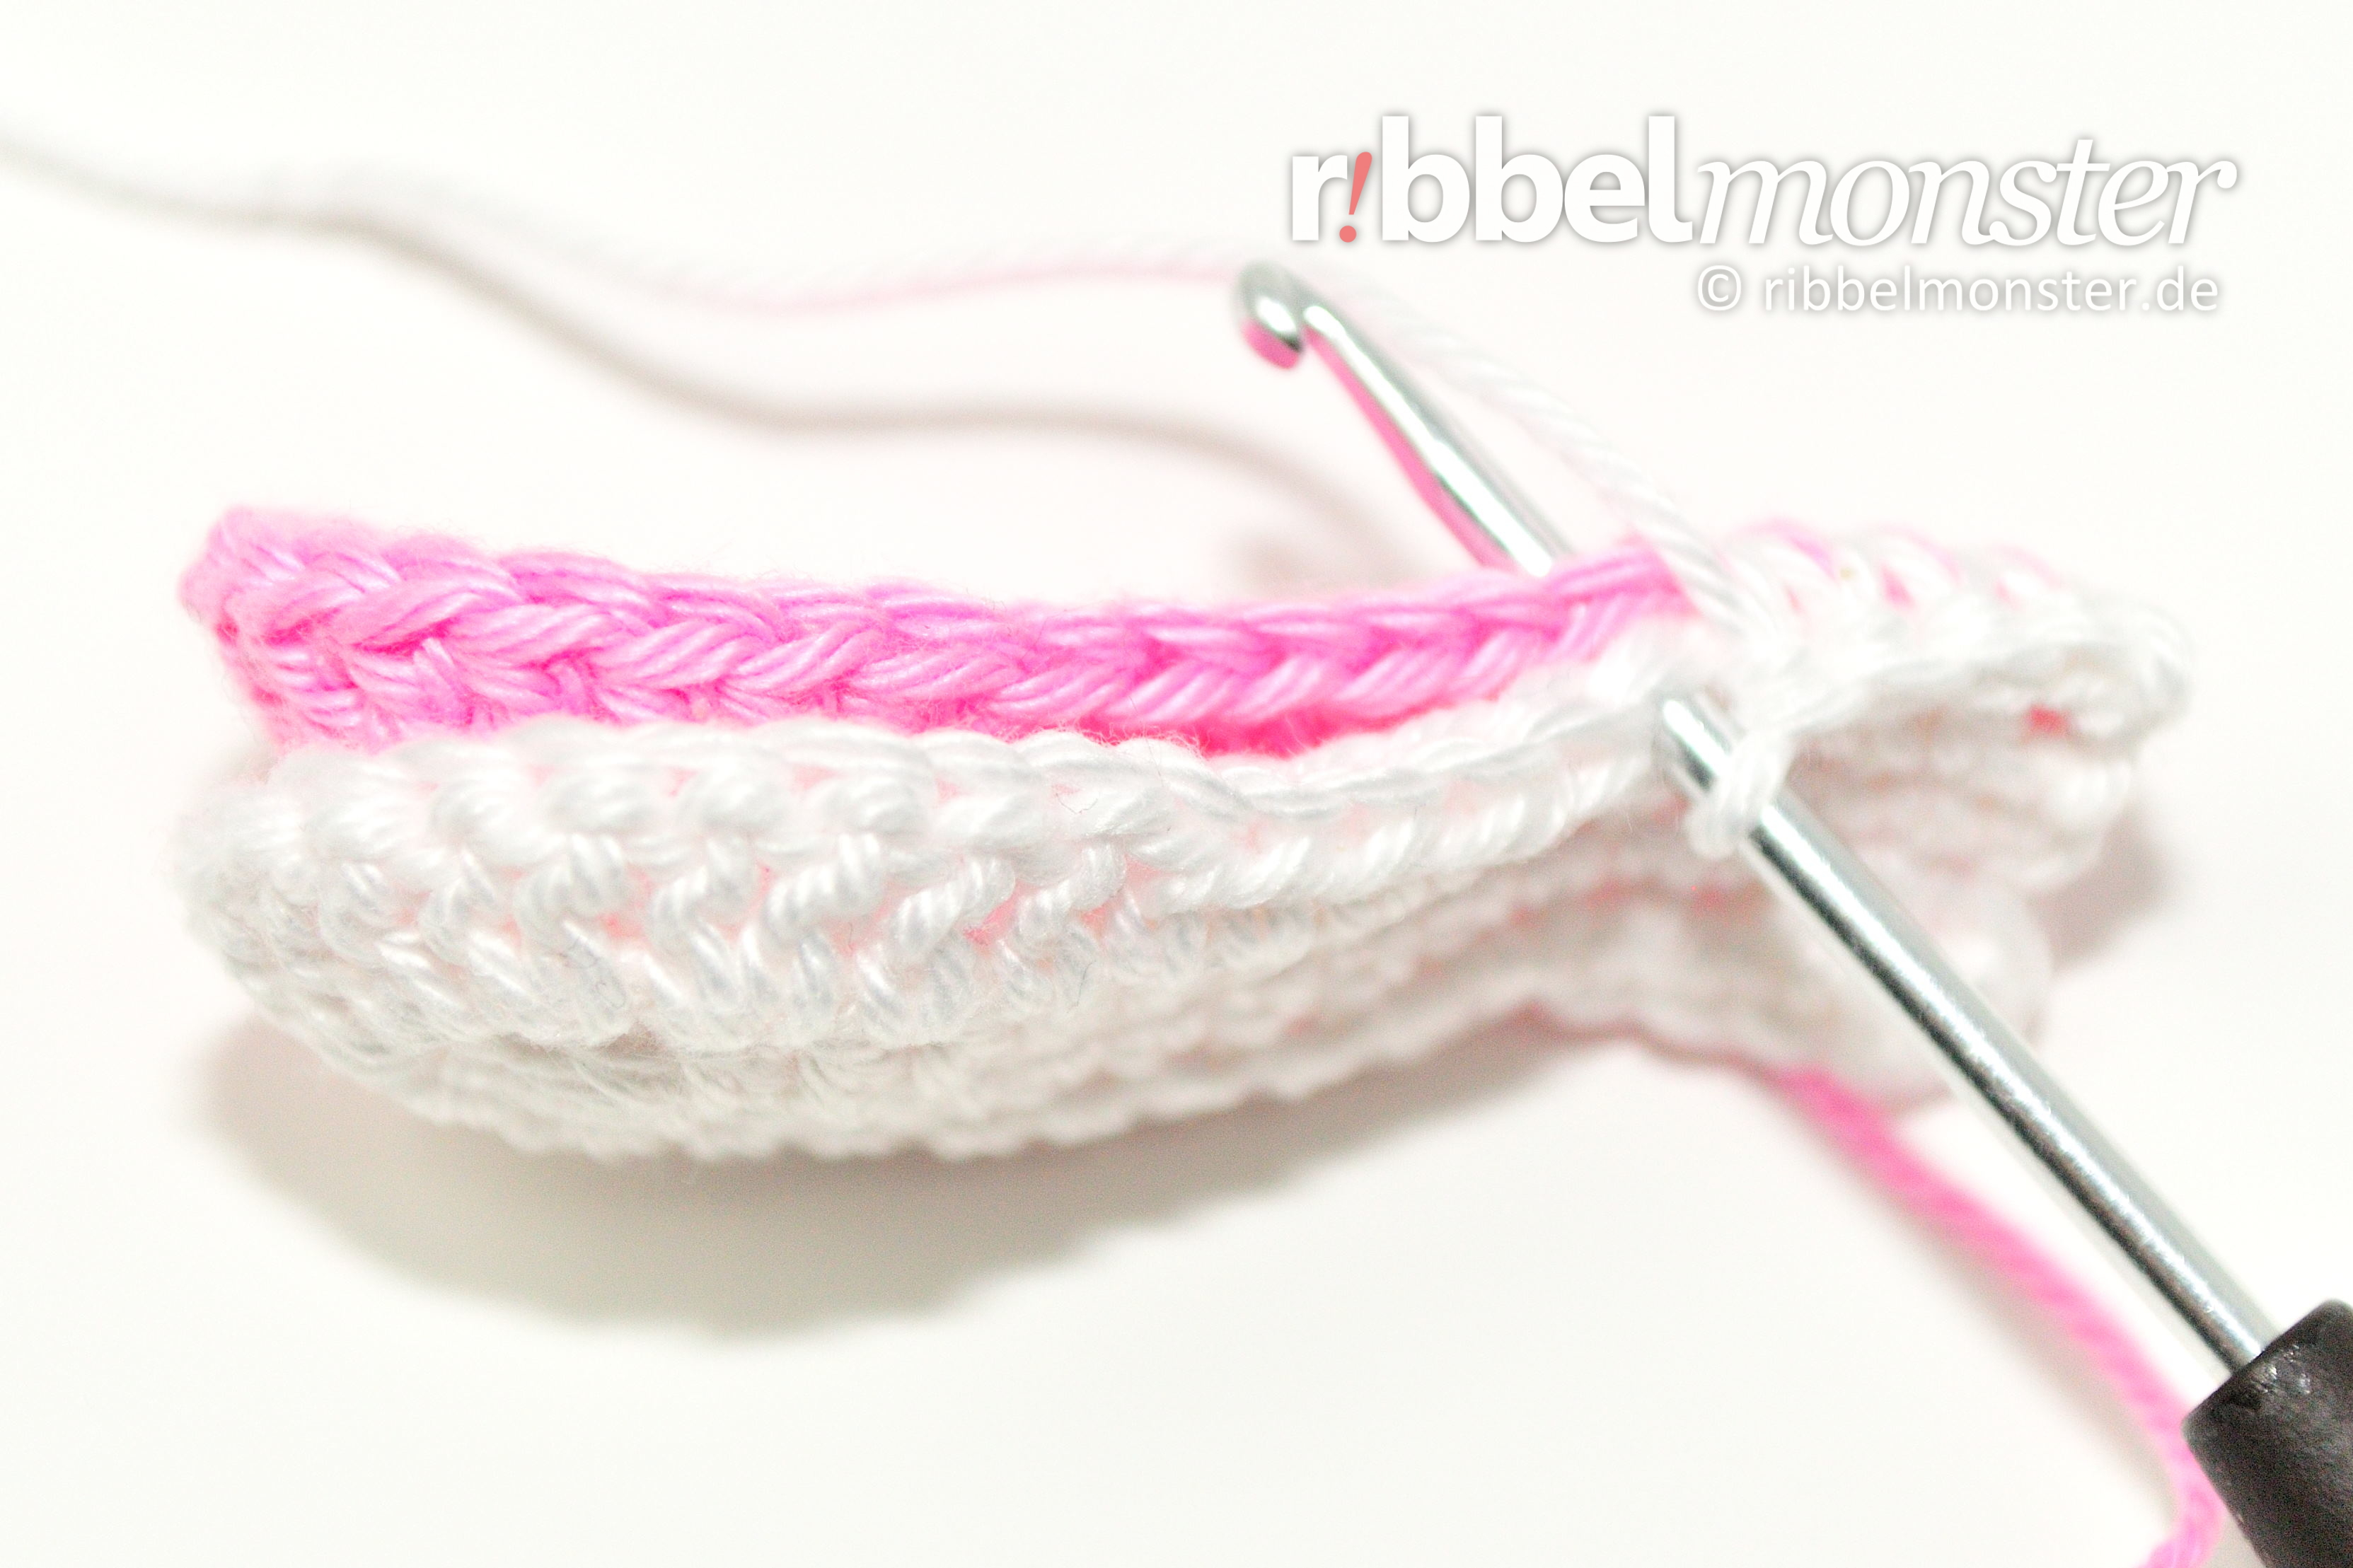
Now we can crochet the ears together by putting the inner and the outer part of the ear together so that the nice sides are facing outwards. Then you always stitch into both loops of both parts to crochet them together.
- 4th row:
- 1 lifting-chain stitch
- each stitch one single crochet stitch (US!
- turn
- = 28 stitches
Now crochet along the open edge to close the ear completely. Here you also always stab into two parts in order to crochet together.
- beyond the end of the row:
- 1 lifting-chain stitch
- 7x 1 single crochet stitch (US!) into one stitch
- = 7 stitches

Finish bunny beanie
Finally, you only have to sew the ears to the hat. To do this fold the ears halfway at the bottom edge and use the thread ends of the ears. The ears sit vertically around a stitch of the 9th round with a spacing of 8 stitches.
Ich wünsche dir einen sonnigen Tag!
Gefällt dir die Facebook Seite des Ribbelmonsters?