
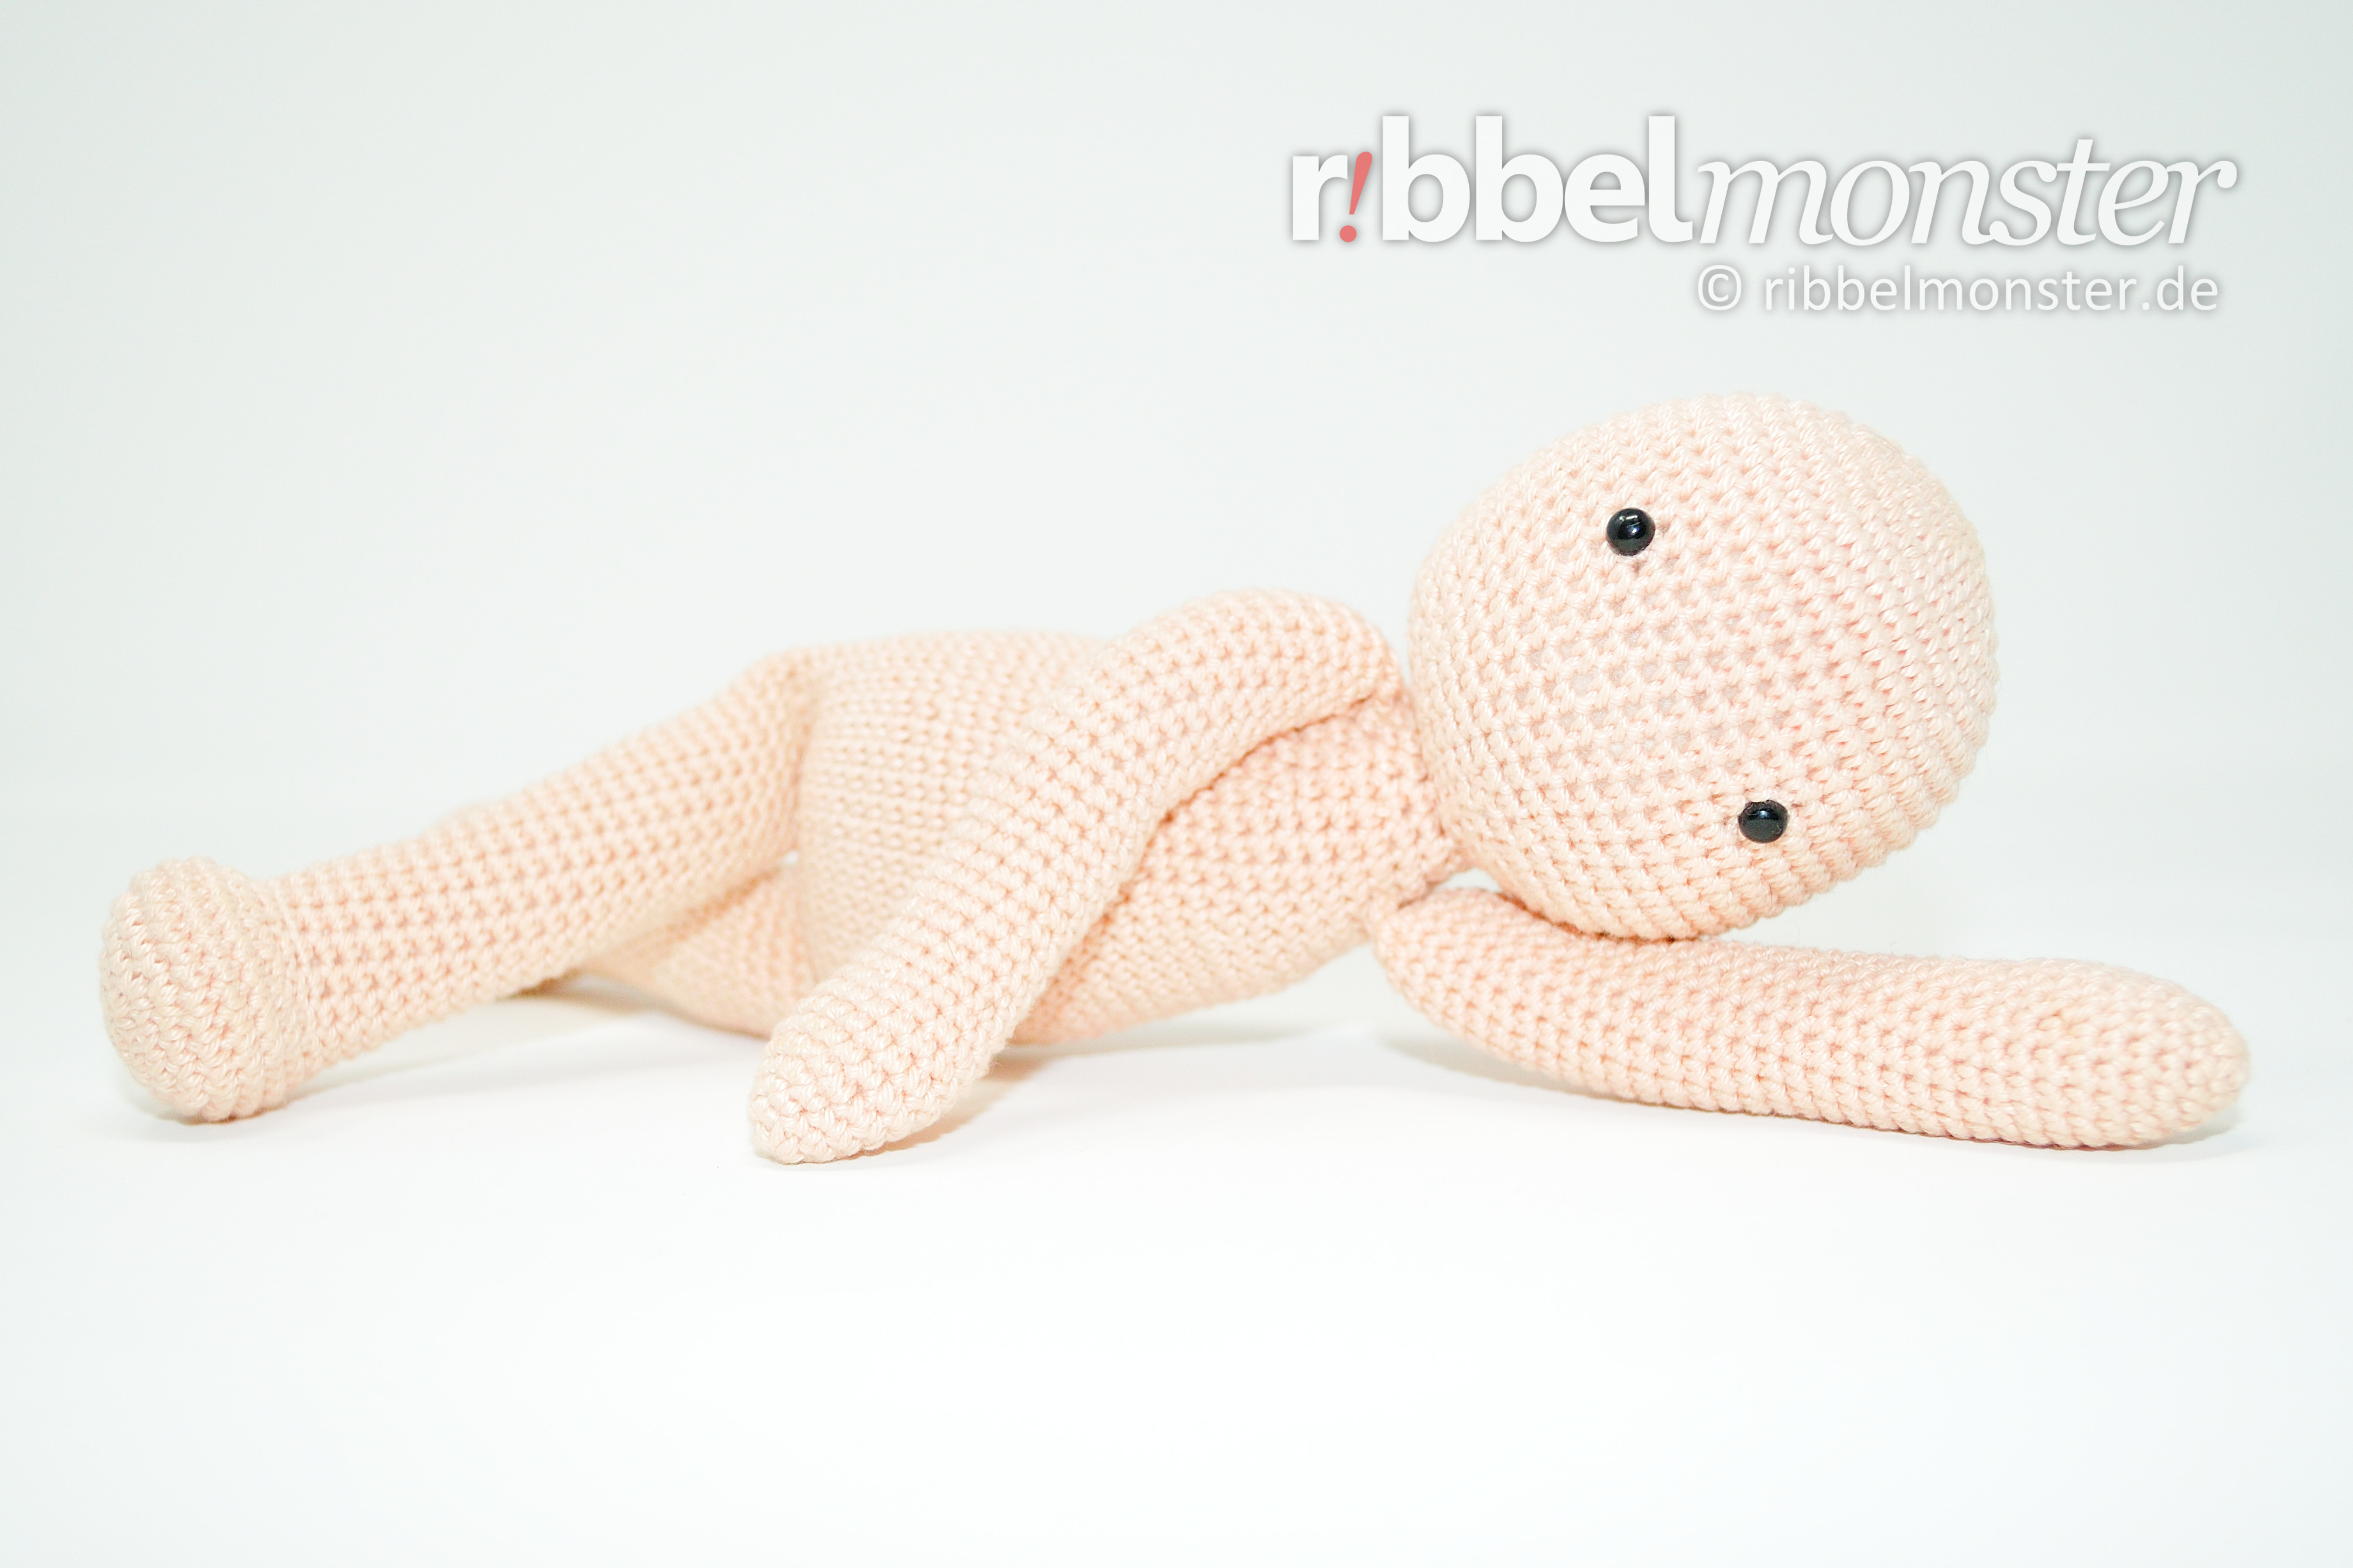
In this crochet pattern I show you how to crochet a pretty doll. The dangling doll hase overlong arms and legs, which make it ideal for carrying and dangling for children. The clothes can be changed and you will also find here patterns for different garments for the dolls and animals of the Slenana series.
Introduction: Crochet Doll – Dangling Doll
Knowledge: Crochet Doll – Dangling Doll
- Crochet Magic Ring
- Single Crochet Stitches (US!)
Supplies: Crochet Doll – Dangling Doll
Filling
For filling, I used synthetic filling made of 100% polyester. However, there are numerous alternatives for filling material. If you’ve run out of filling, I’ve prepared a refill for you here.
Safety Eyes
I used 2 safety eyes with a diameter of 1/4 inches. The eyes are completely black. However, there are countless alternatives for amigurumi eyes. You might prefer other safety eyes as well.
Scissors
You’ll need any scissors. It’s best to use your most beautiful scissors because it brings you joy. If you don’t have really nice scissors, I’ve picked out some lovely ones for you.
Wool Needle
You’ll need a wool needle with a blunt tip. The thickness of the wool needle should match the thickness of your yarn. You might like the set of wool needles I’ve picked out for you.
Size: Crochet Doll – Dangling Doll
Here you find the size specifications for the crocheted dangling doll.
| Needle Size | Yarn | Height |
| Crochet Hook 1 1/2 (shown example) | 137yds / 1.75oz, 100% cotton | 26cm |
| Crochet Hook 2 1/2 | 120yds / 1.75oz, 100% Cotton | 37cm |
Crochet Pattern: Crochet Doll – Dangling Doll
For our little doll we crochet first the head and then the legs and the body in one piece. Then crochet our arms and ears. Finally, all parts are sewn together and also embroidered a nose. If you want you can still crochet clothes for your doll.
Crochet Doll Head (1x)
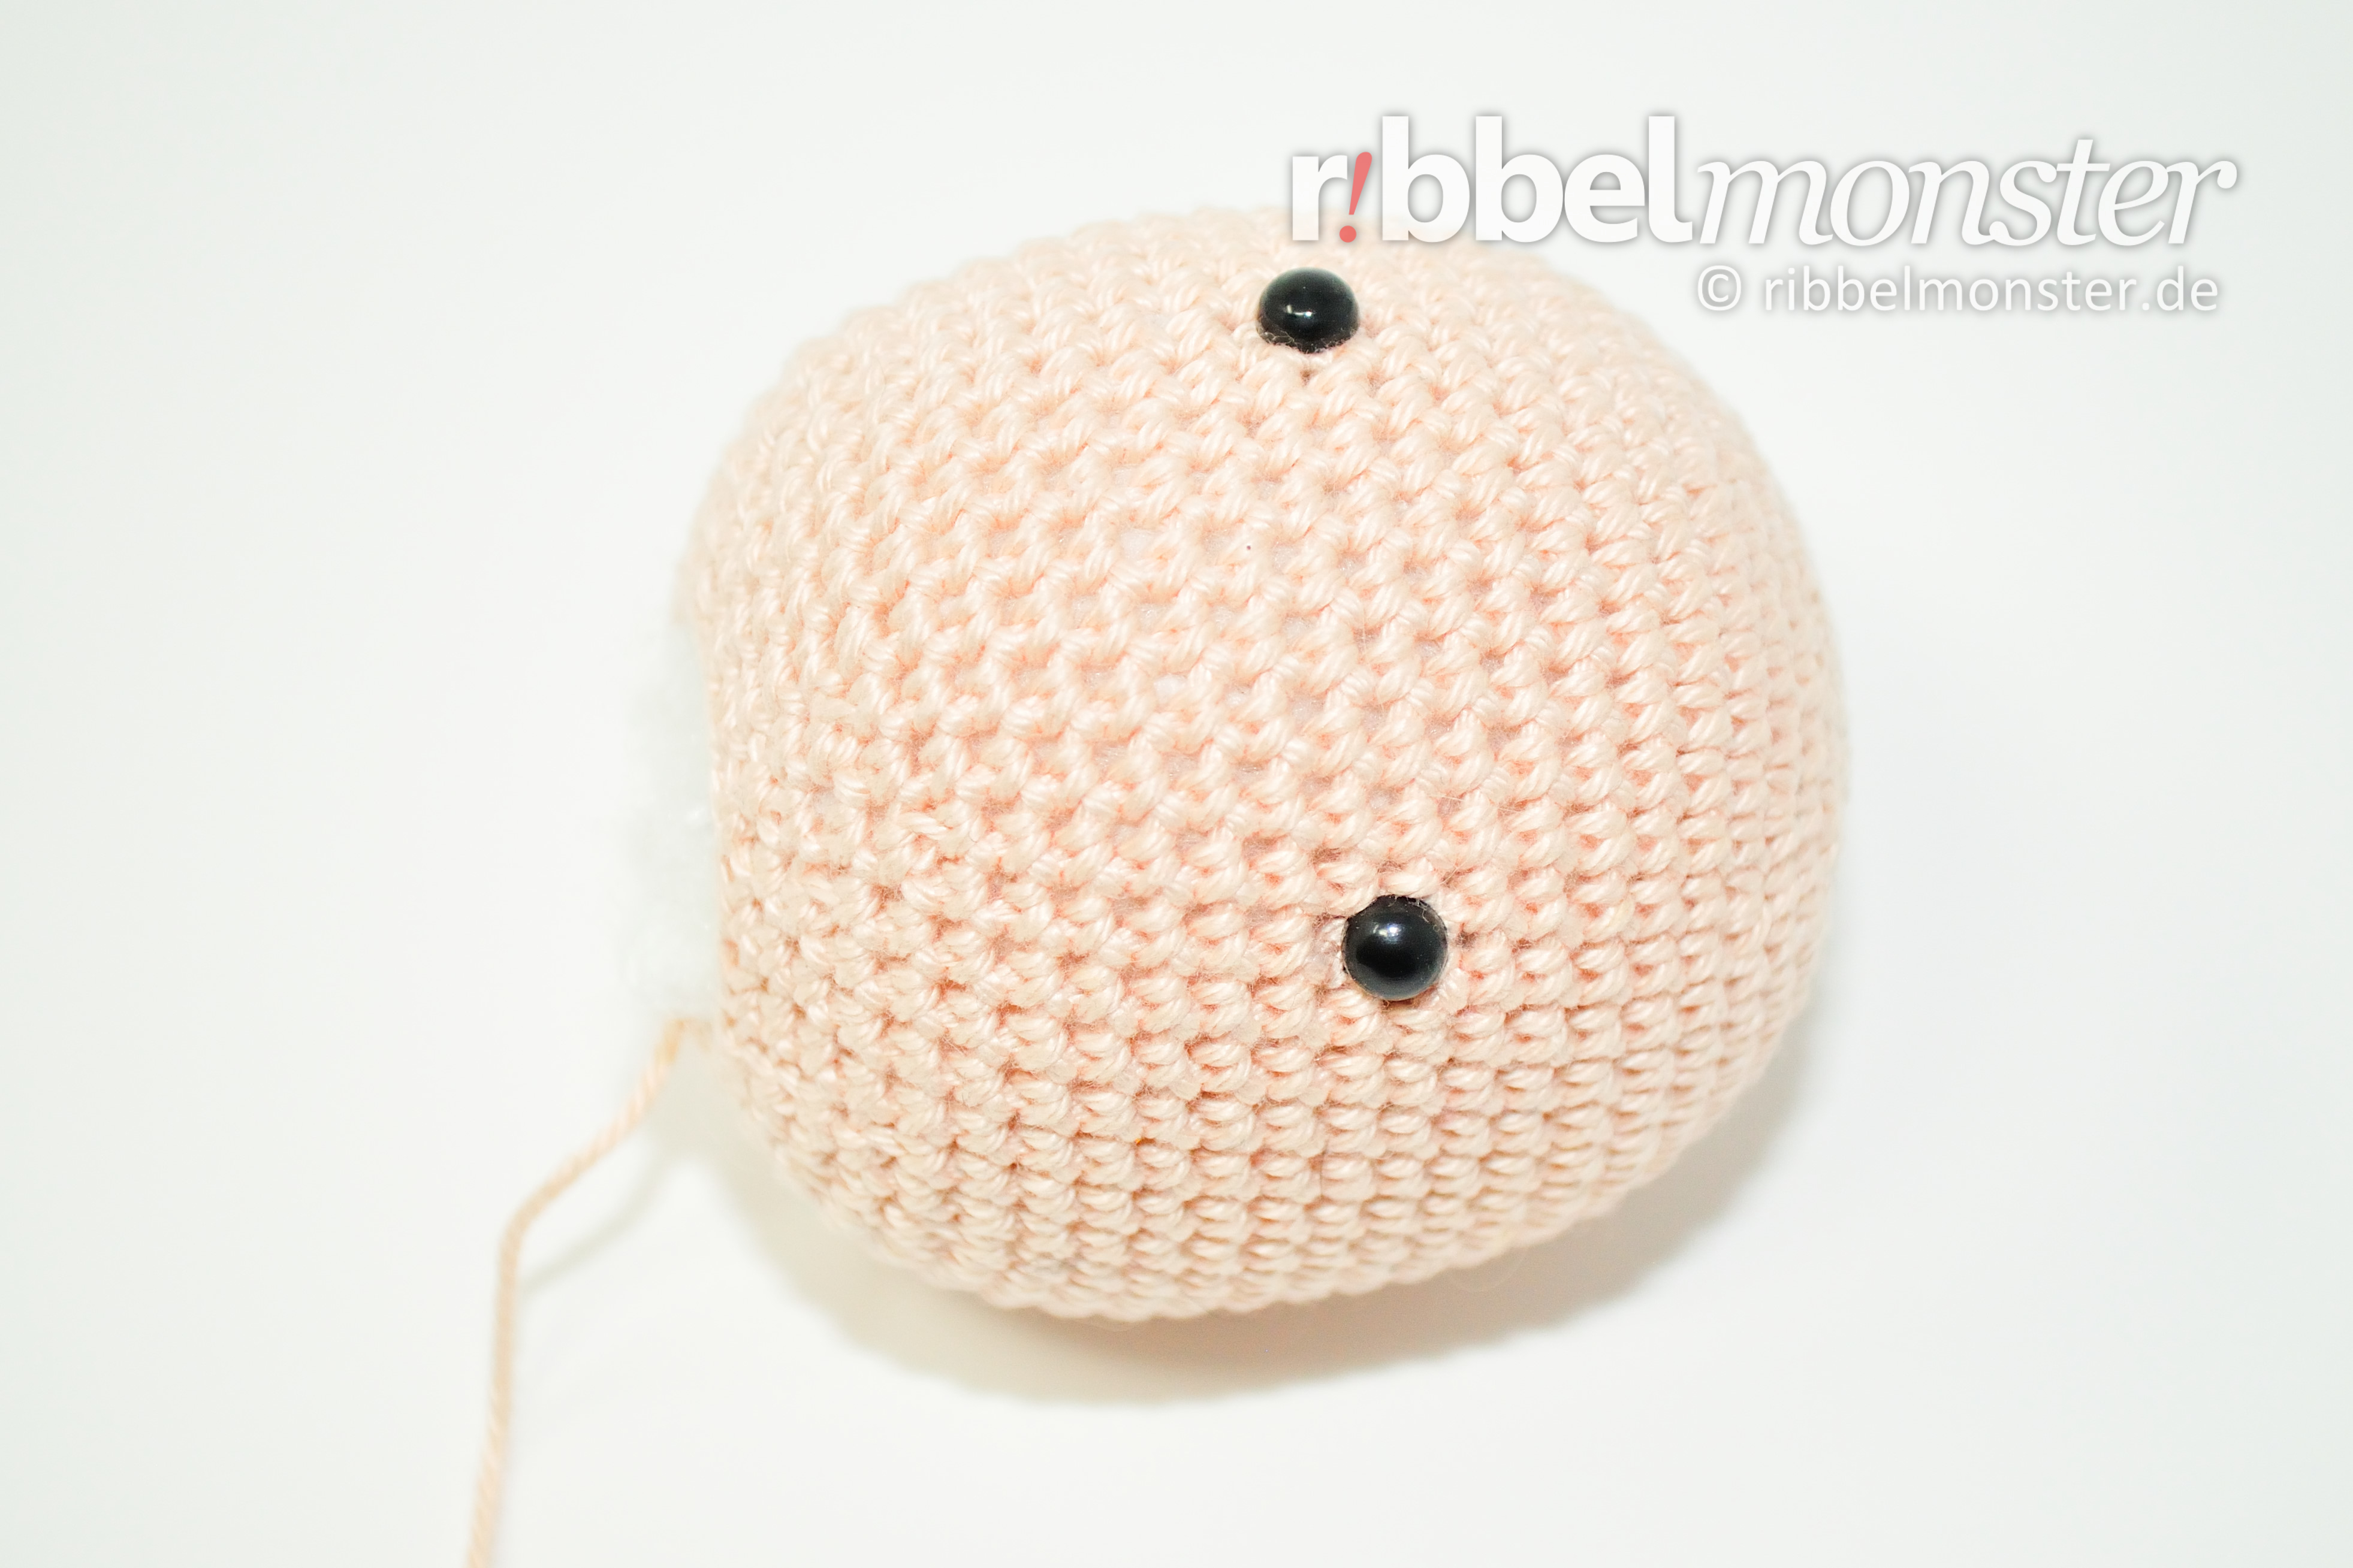
Crochet the head for the doll from top to bottom in spiral rounds with only single crochet stitches (US!). When crocheting you can attach safety eyes and the head is filled and stuffed.
- skin color:
- 1st round: magic ring + 6 single crochet stitches (US!) = 6 stitches
- 2nd round: double every stitch = 12 stitches
- 3rd round: double every 2nd stitch = 18 stitches
- 4th round: double every 3rd stitch = 24 stitches
- 5th round: double every 4th stitch = 30 stitches
- 6th round: double every 5th stitch = 36 stitches
- 7th round: double every 6th stitch = 42 stitches
- 8th round: double every 7th stitch = 48 stitches
- 9th – 21st round: (= 13 rounds) each stitch one stitch = 48 stitches
- Attach Safety Eyes, Position:
- after the 14th round
- 8 stitches distance
- 22nd round: crochet together every 7th and 8th stitch = 42 stitches
- 23rd round: crochet together every 6th and 7th stitch = 36 stitches
- 24th round: crochet together every 5th and 6th stitch = 30 stitches
- 25th round: crochet together every 4th and 5th stitch = 24 stitches
- 26th round: crochet together every 3rd and 4th stitch = 18 stitches
- fill and stuff completely
- cut the thread generous, pull off the loop, DONT cut the thread end, will be needed for sewing later
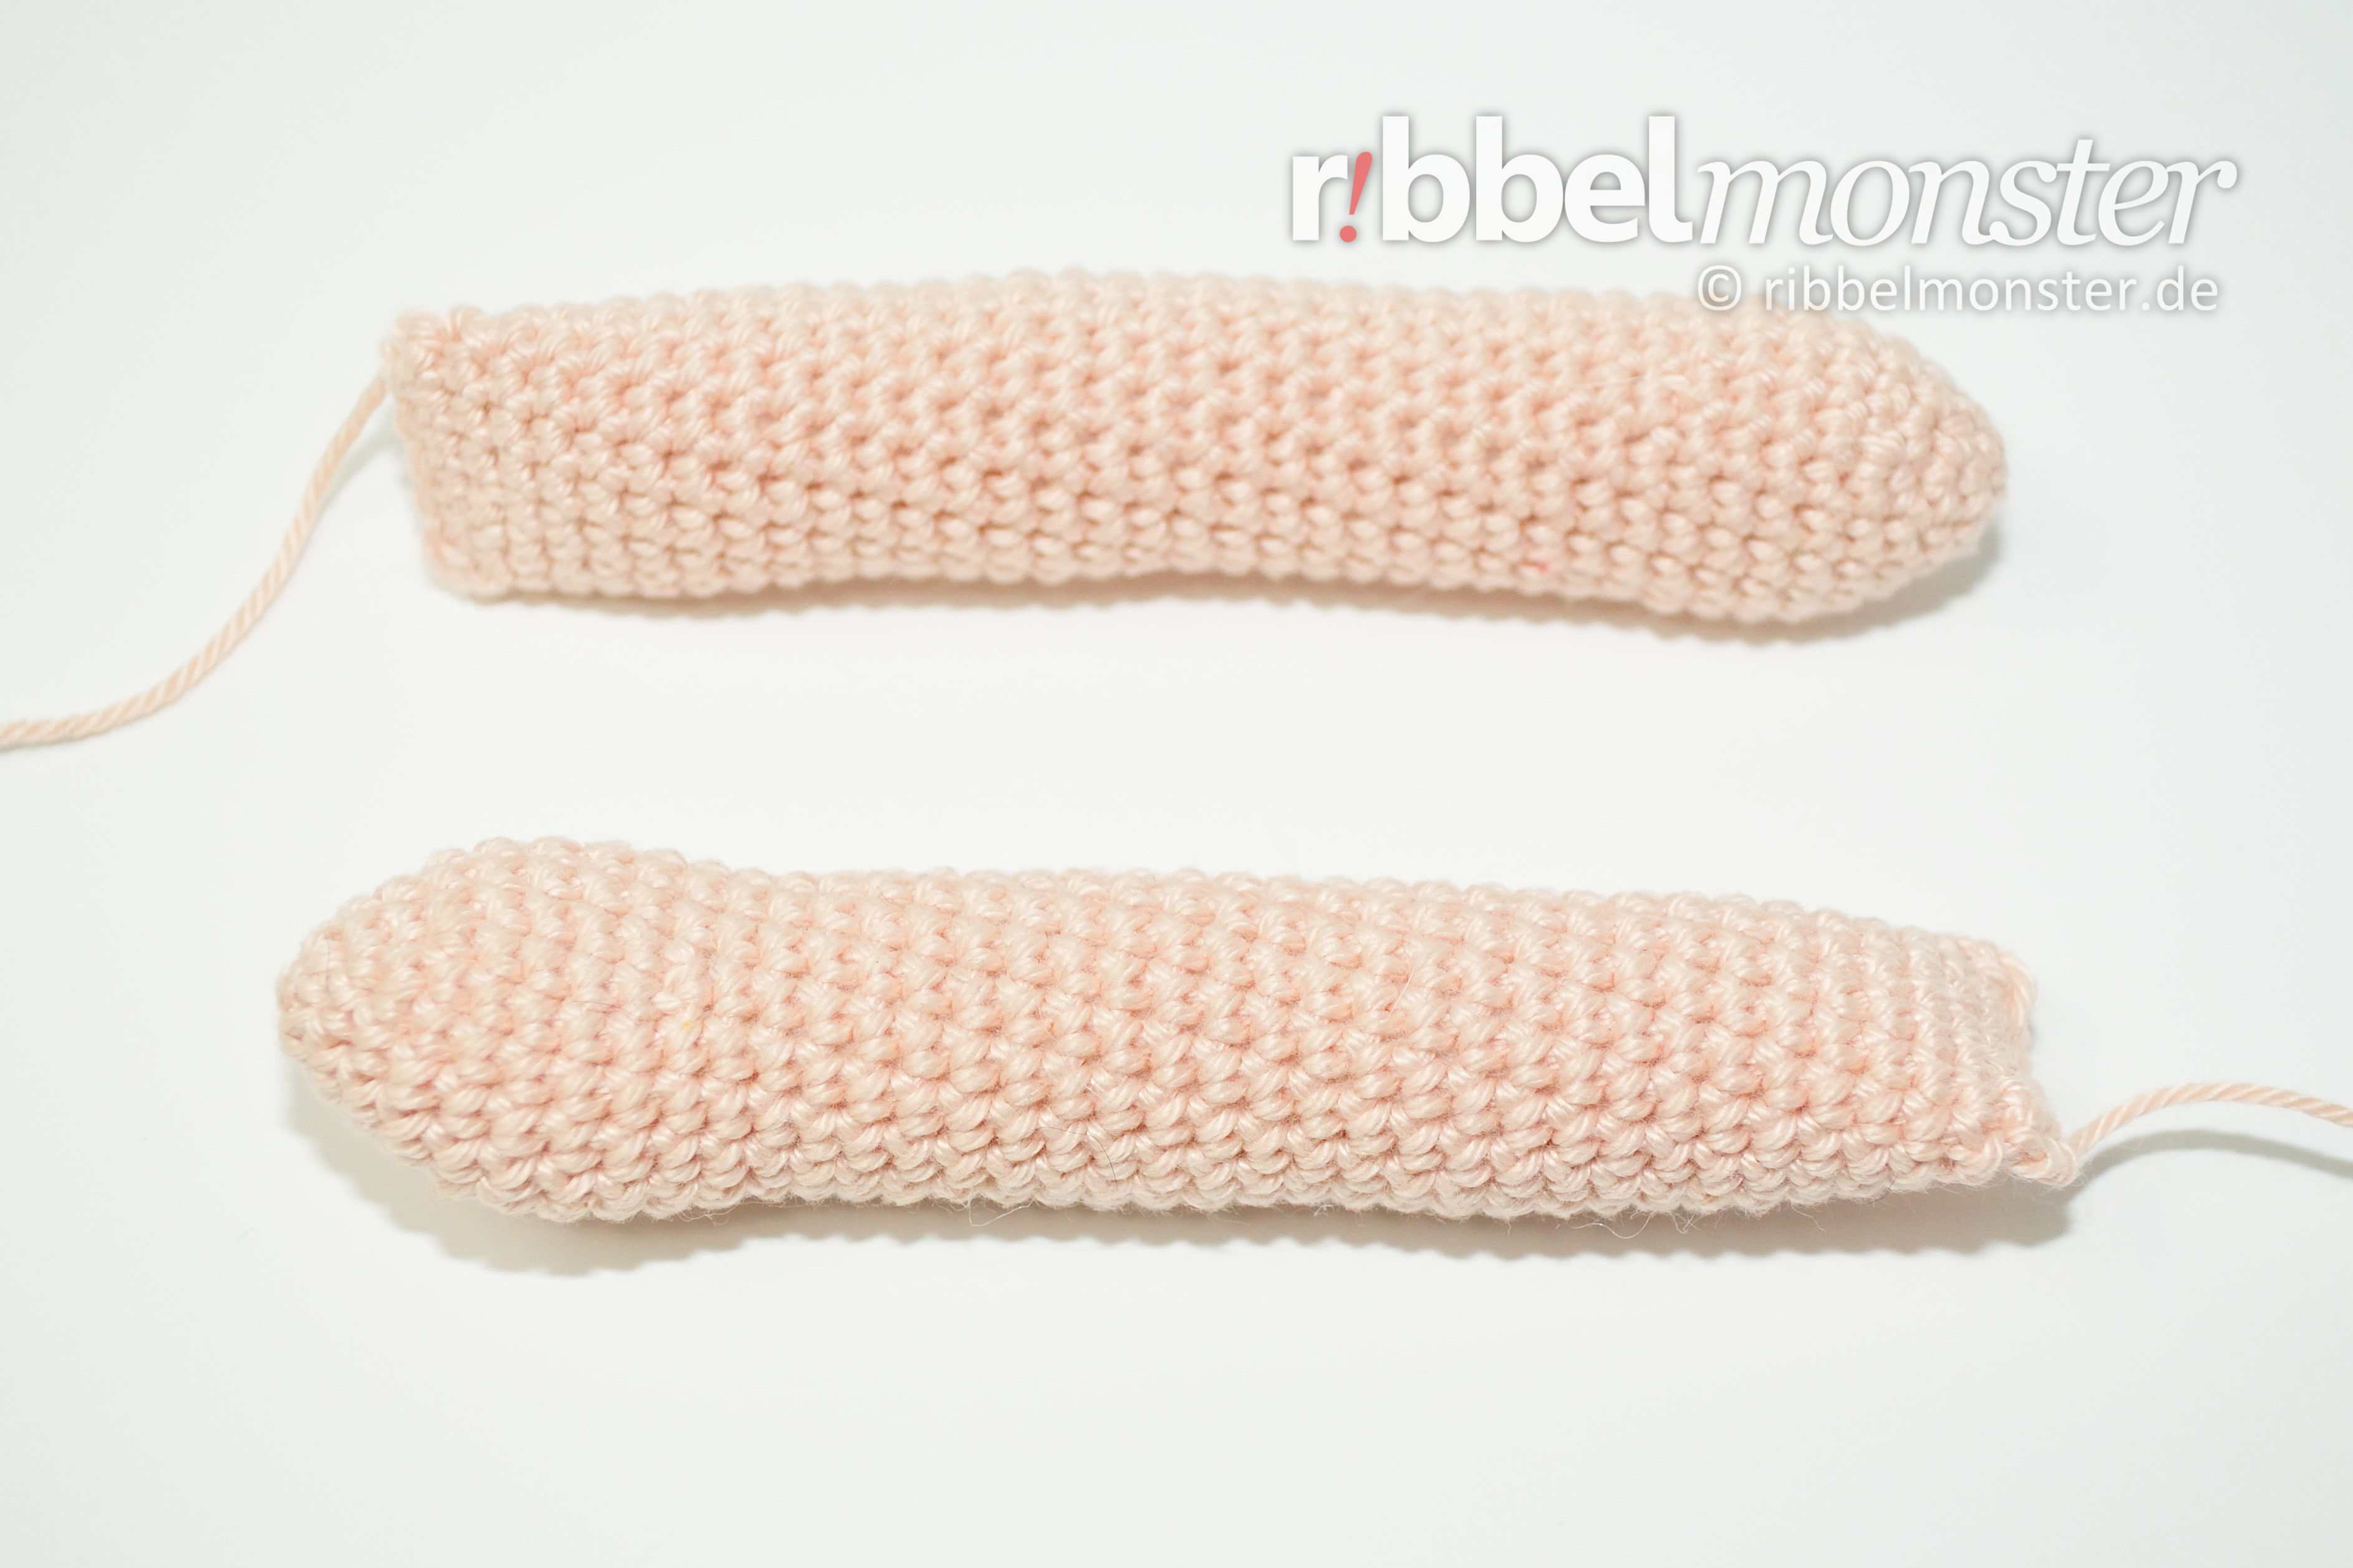
Crochet Doll Legs (2x)
Crochet the legs for the doll from bottom to top in spiral rounds with only single crochet stitches (US!). Then the legs are filled and stuffed. Cut off the thread of the first leg but not at the second to go on with the body.
- skin color:
- 1st round: magic ring + 6 single crochet stitches (US!) = 6 stitches
- 2nd round: double every stitch = 12 stitches
- 3rd round: double every 2nd stitch = 18 stitches
- 4th round: double every 3rd stitch = 24 stitches
- 5th round: double every 4th stitch = 30 stitches
- 6th – 8th round: (= 3 rounds) each stitch one stitch = 30 stitches
- 9th round:
- 9x 1 single crochet stitch (US!) into one stitch
- 6x crochet together two stitches with 1 single crochet stitch (US!)
- 9x 1 single crochet stitch (US!) into one stitch
- = 24 stitches
- 10th round:
- 6x 1 single crochet stitch (US!) into one stitch
- 6x crochet together two stitches with 1 single crochet stitch (US!)
- 6x 1 single crochet stitch (US!) into one stitch
- = 18 stitches
- 11th – 35th round: (= 25 rounds) each stitch one stitch = 18 stitches
- beyond the end of the round:
- 1x 1 slip stitch into one stitch
- fill and stuff completely
- 1st leg:
- cut the thread, pull off the loop, secure and weave in the thread end
- 2nd leg:
- DONT cut the thread end, continue with
- crochet body
- DONT cut the thread end, continue with
Crochet Doll Body (1x)
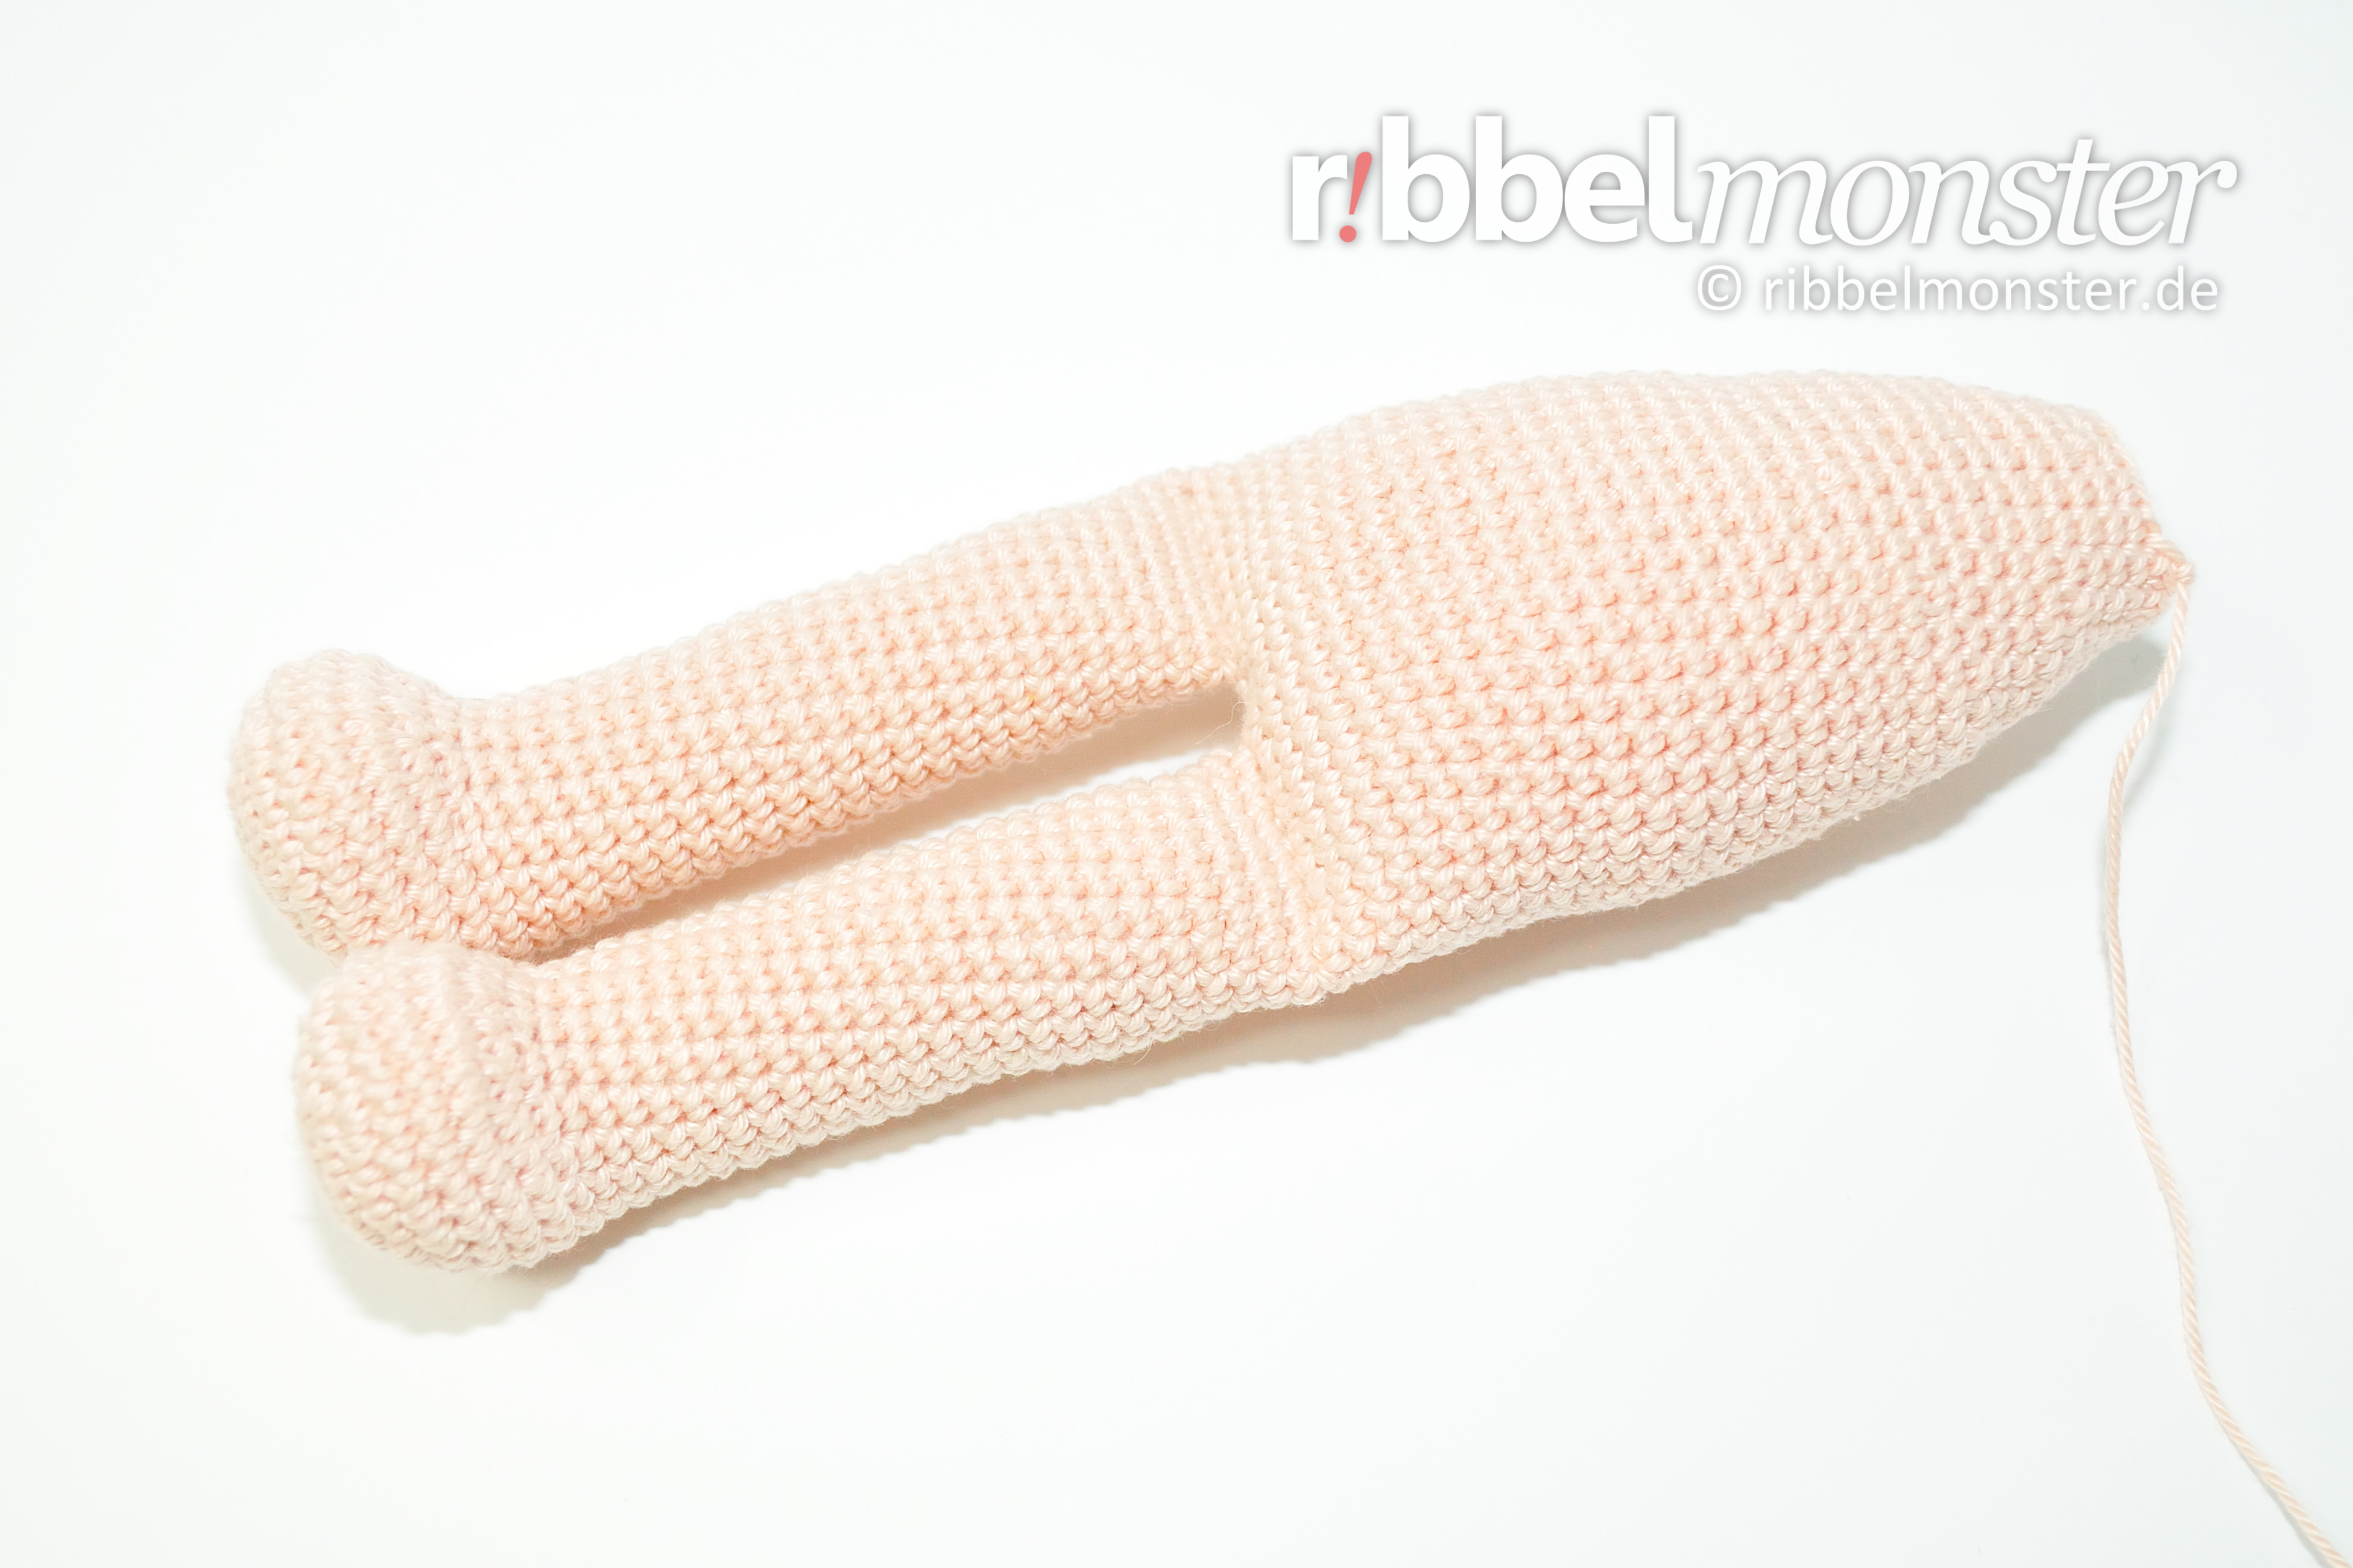
Before we can start with the body we have to crochet together both legs. How to do this I show you step by step in the tutorial for crocheting the legs together.
- skin color:
- 1st – 18th round: (= 18 rounds) each stitch one stitch = 42 stitches
- 19th round: crochet together every 20th and 21st stitch = 40 stitches
- 20th round: crochet together every 19th and 20th stitch = 38 stitches
- 21st round: crochet together every 18th and 19th stitch = 36 stitches
- 22nd round: crochet together every 17th and 18th stitch = 34 stitches
- 23rd round: crochet together every 16th and 17th stitch = 32 stitches
- 24th round: crochet together every 15th and 16th stitch = 30 stitches
- 25th round: crochet together every 14th and 15th stitch = 28 stitches
- 26th round: crochet together every 13th and 14th stitch = 26 stitches
- 27th round: crochet together every 12th and 13th stitch = 24 stitches
- 28th round: crochet together every 11th and 12th stitch = 22 stitches
- 29th round: crochet together every 10th and 11th stitch = 20 stitches
- 30th round: crochet together every 9th and 10th stitch = 18 stitches
- 31st round: each stitch one stitch = 18 stitches
- beyond the end of the round:
- 1x 1 slip stitch into one stitch
- fill and stuff completely
- cut the thread generous, pull off the loop, DONT cut the thread end, will be needed for sewing later
Crochet Doll Arms (2x)
Crochet the arms for the doll from the finger tips to the shoulders in spiral rounds with single crochet stitches (US!).
- skin color:
- 1st round: magic ring + 6 single crochet stitches (US!) = 6 stitches
- 2nd round: double every 2nd stitch = 9 stitches
- 3rd round: double every 3rd stitch = 12 stitches
- 4th round: double every 4th stitch = 15 stitches
- 5th round: double every 5th stitch = 18 stitches
- 6th – 9th round: (= 4 rounds) each stitch one stitch = 18 stitches
- 10th round: crochet together every 5th and 6th stitch = 15 stitches
- 11th – 35th round: (= 25 rounds) each stitch one stitch = 15 stitches
- fill and stuff completely
- 36th round: crochet together every 4th and 5th stitch = 12 stitches
Now fold the opening flat that the hook is on the right side. Then always stitch into the front and the back to crochet the opening together.
- 37th row: 6 single crochet stitches (US!) = 6 stitches
- cut the thread generous, pull off the loop, DONT cut the thread end, will be needed for sewing later
Crochet Doll Ears (2x)

If you want, you can still crochet ears for your dangling doll, but you do not have to. Crochet the ears for the doll in just one round and tie them later with the thread ends to the head.
- skin color:
- left ear:
- magic ring
- into the magic ring:
- 1 double crochet stitch (US!)
- 1 half double crochet stitch (US!)
- 3 single crochet stitches (US!)
- 1 slip stitch
- = 6 stitches
- right ear:
- magic ring
- into the magic ring:
- 3 single crochet stitches (US!)
- 1 half double crochet stitch (US!)
- 1 double crochet stitch (US!)
- 1 slip stitch
- = 6 stitches
- cut the thread generous, pull off the loop, DONT cut the thread end, will be needed to tie on later
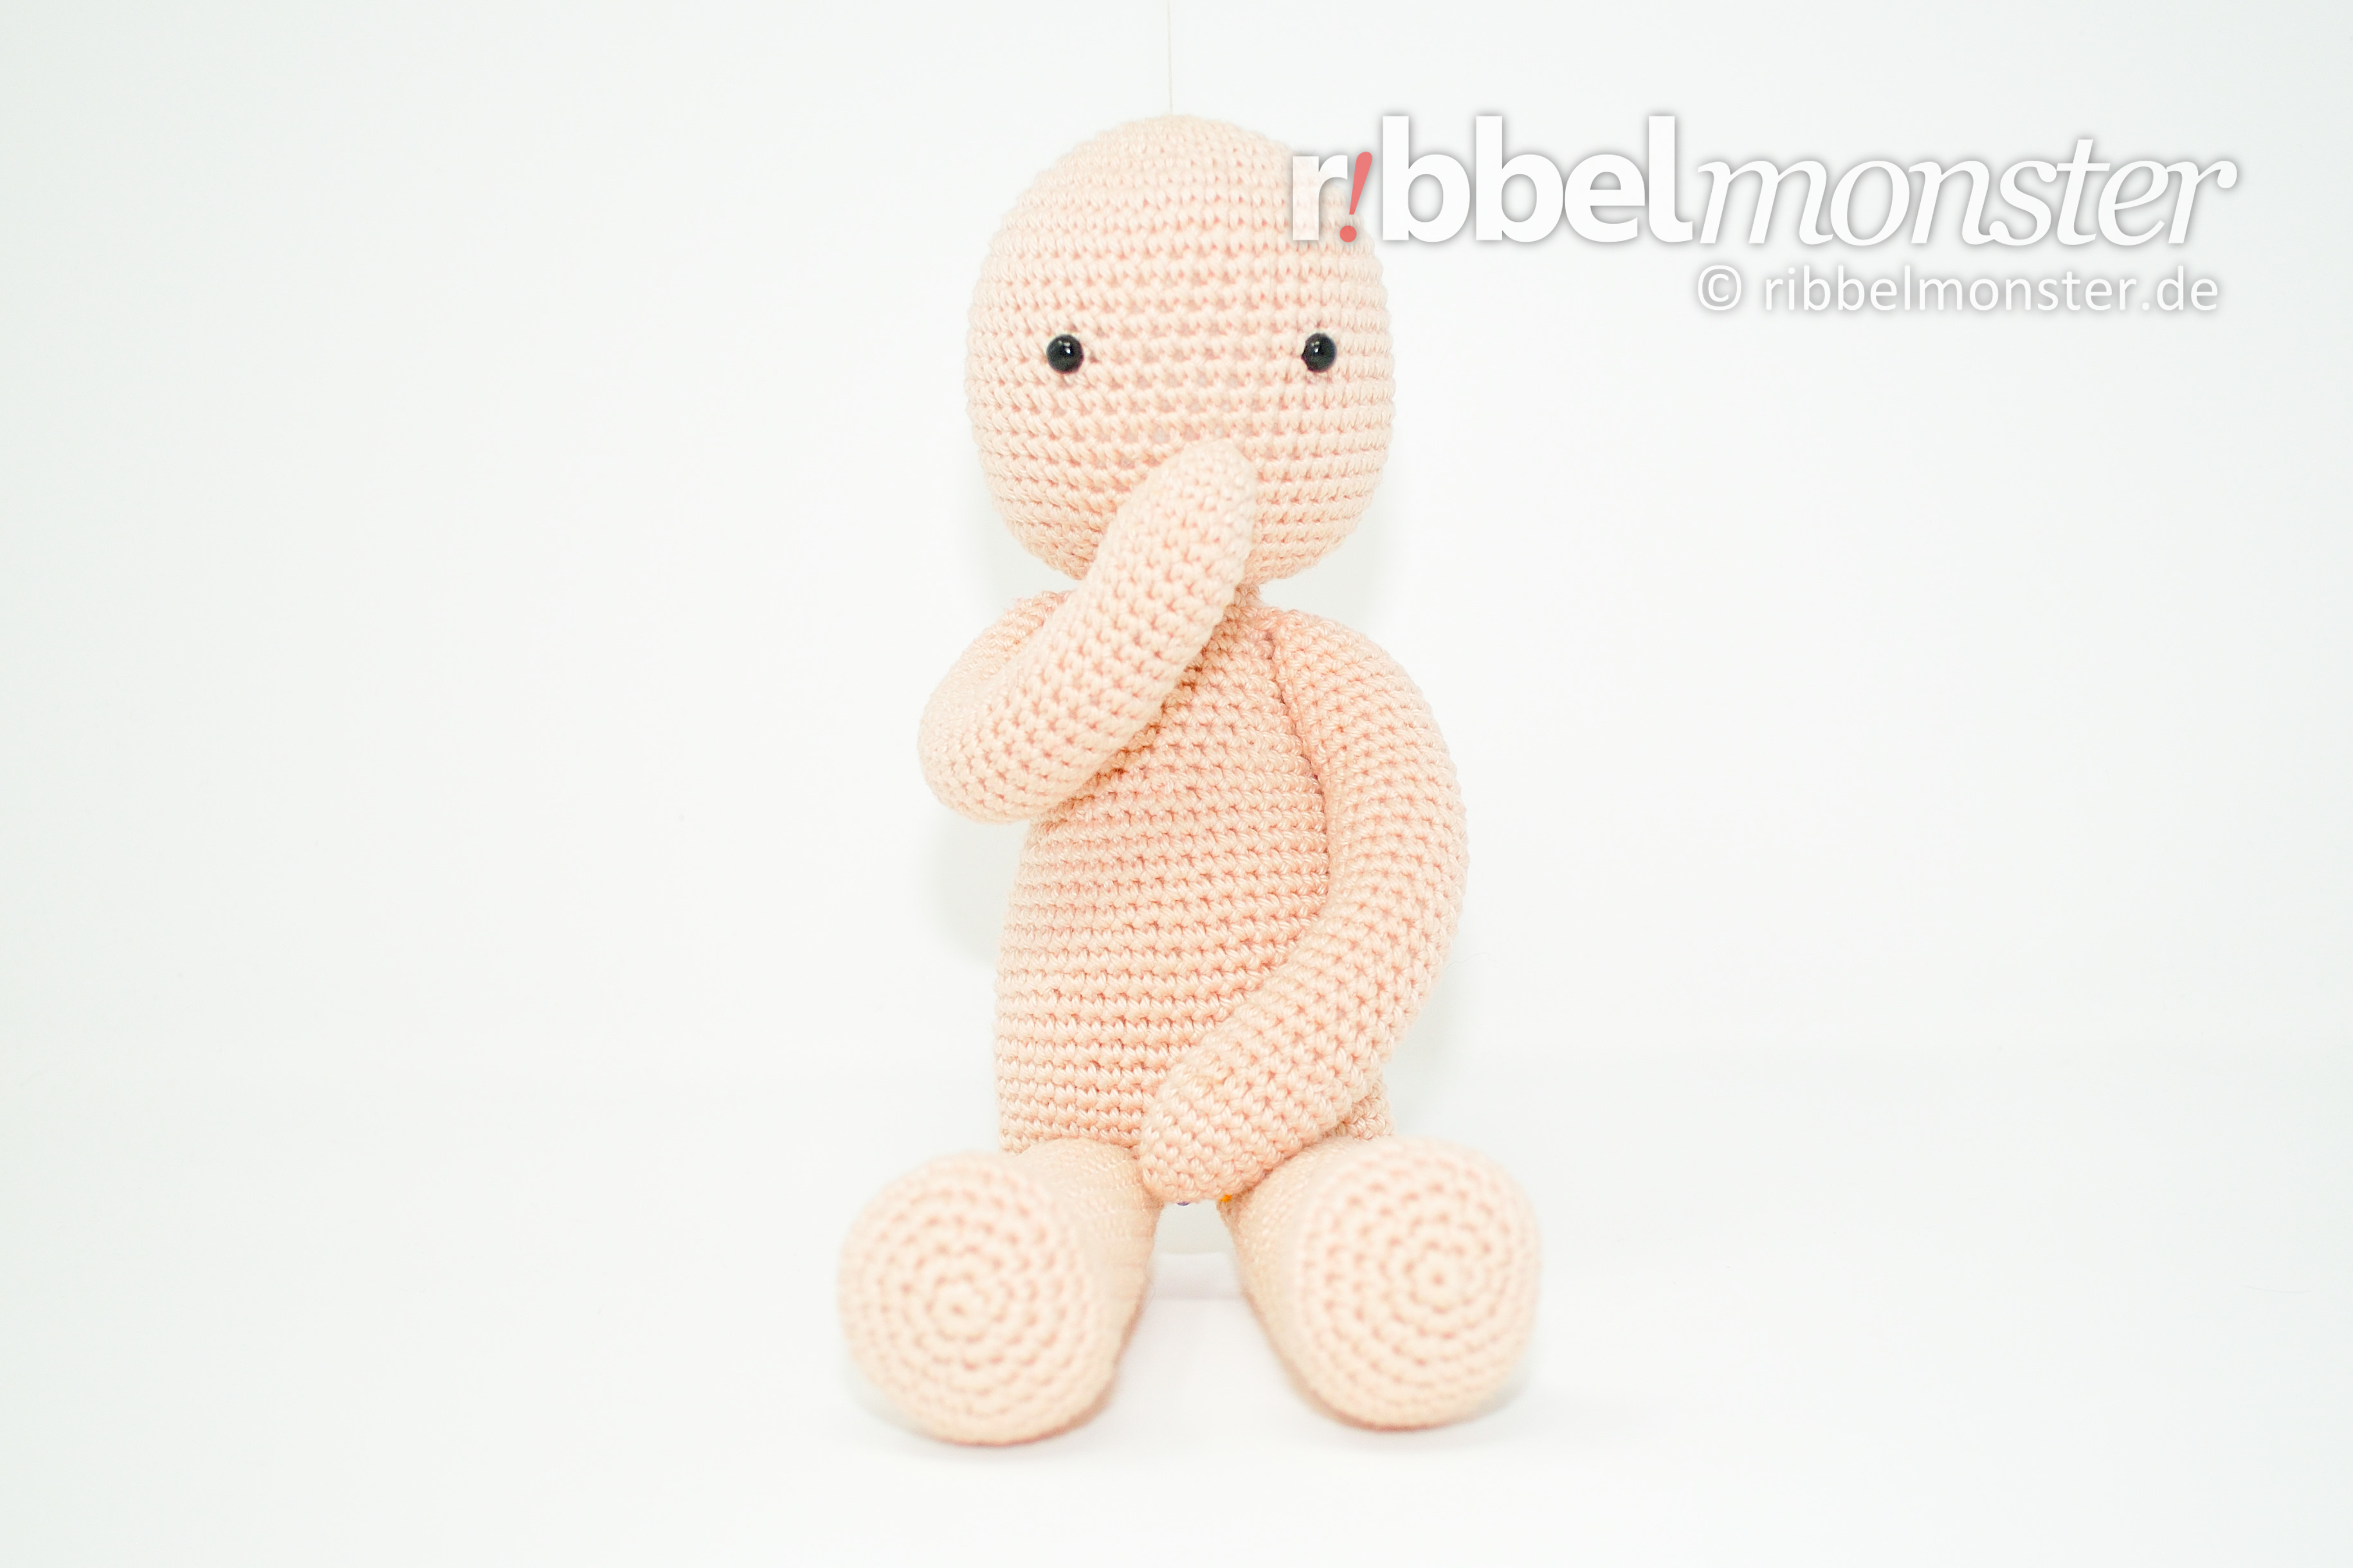
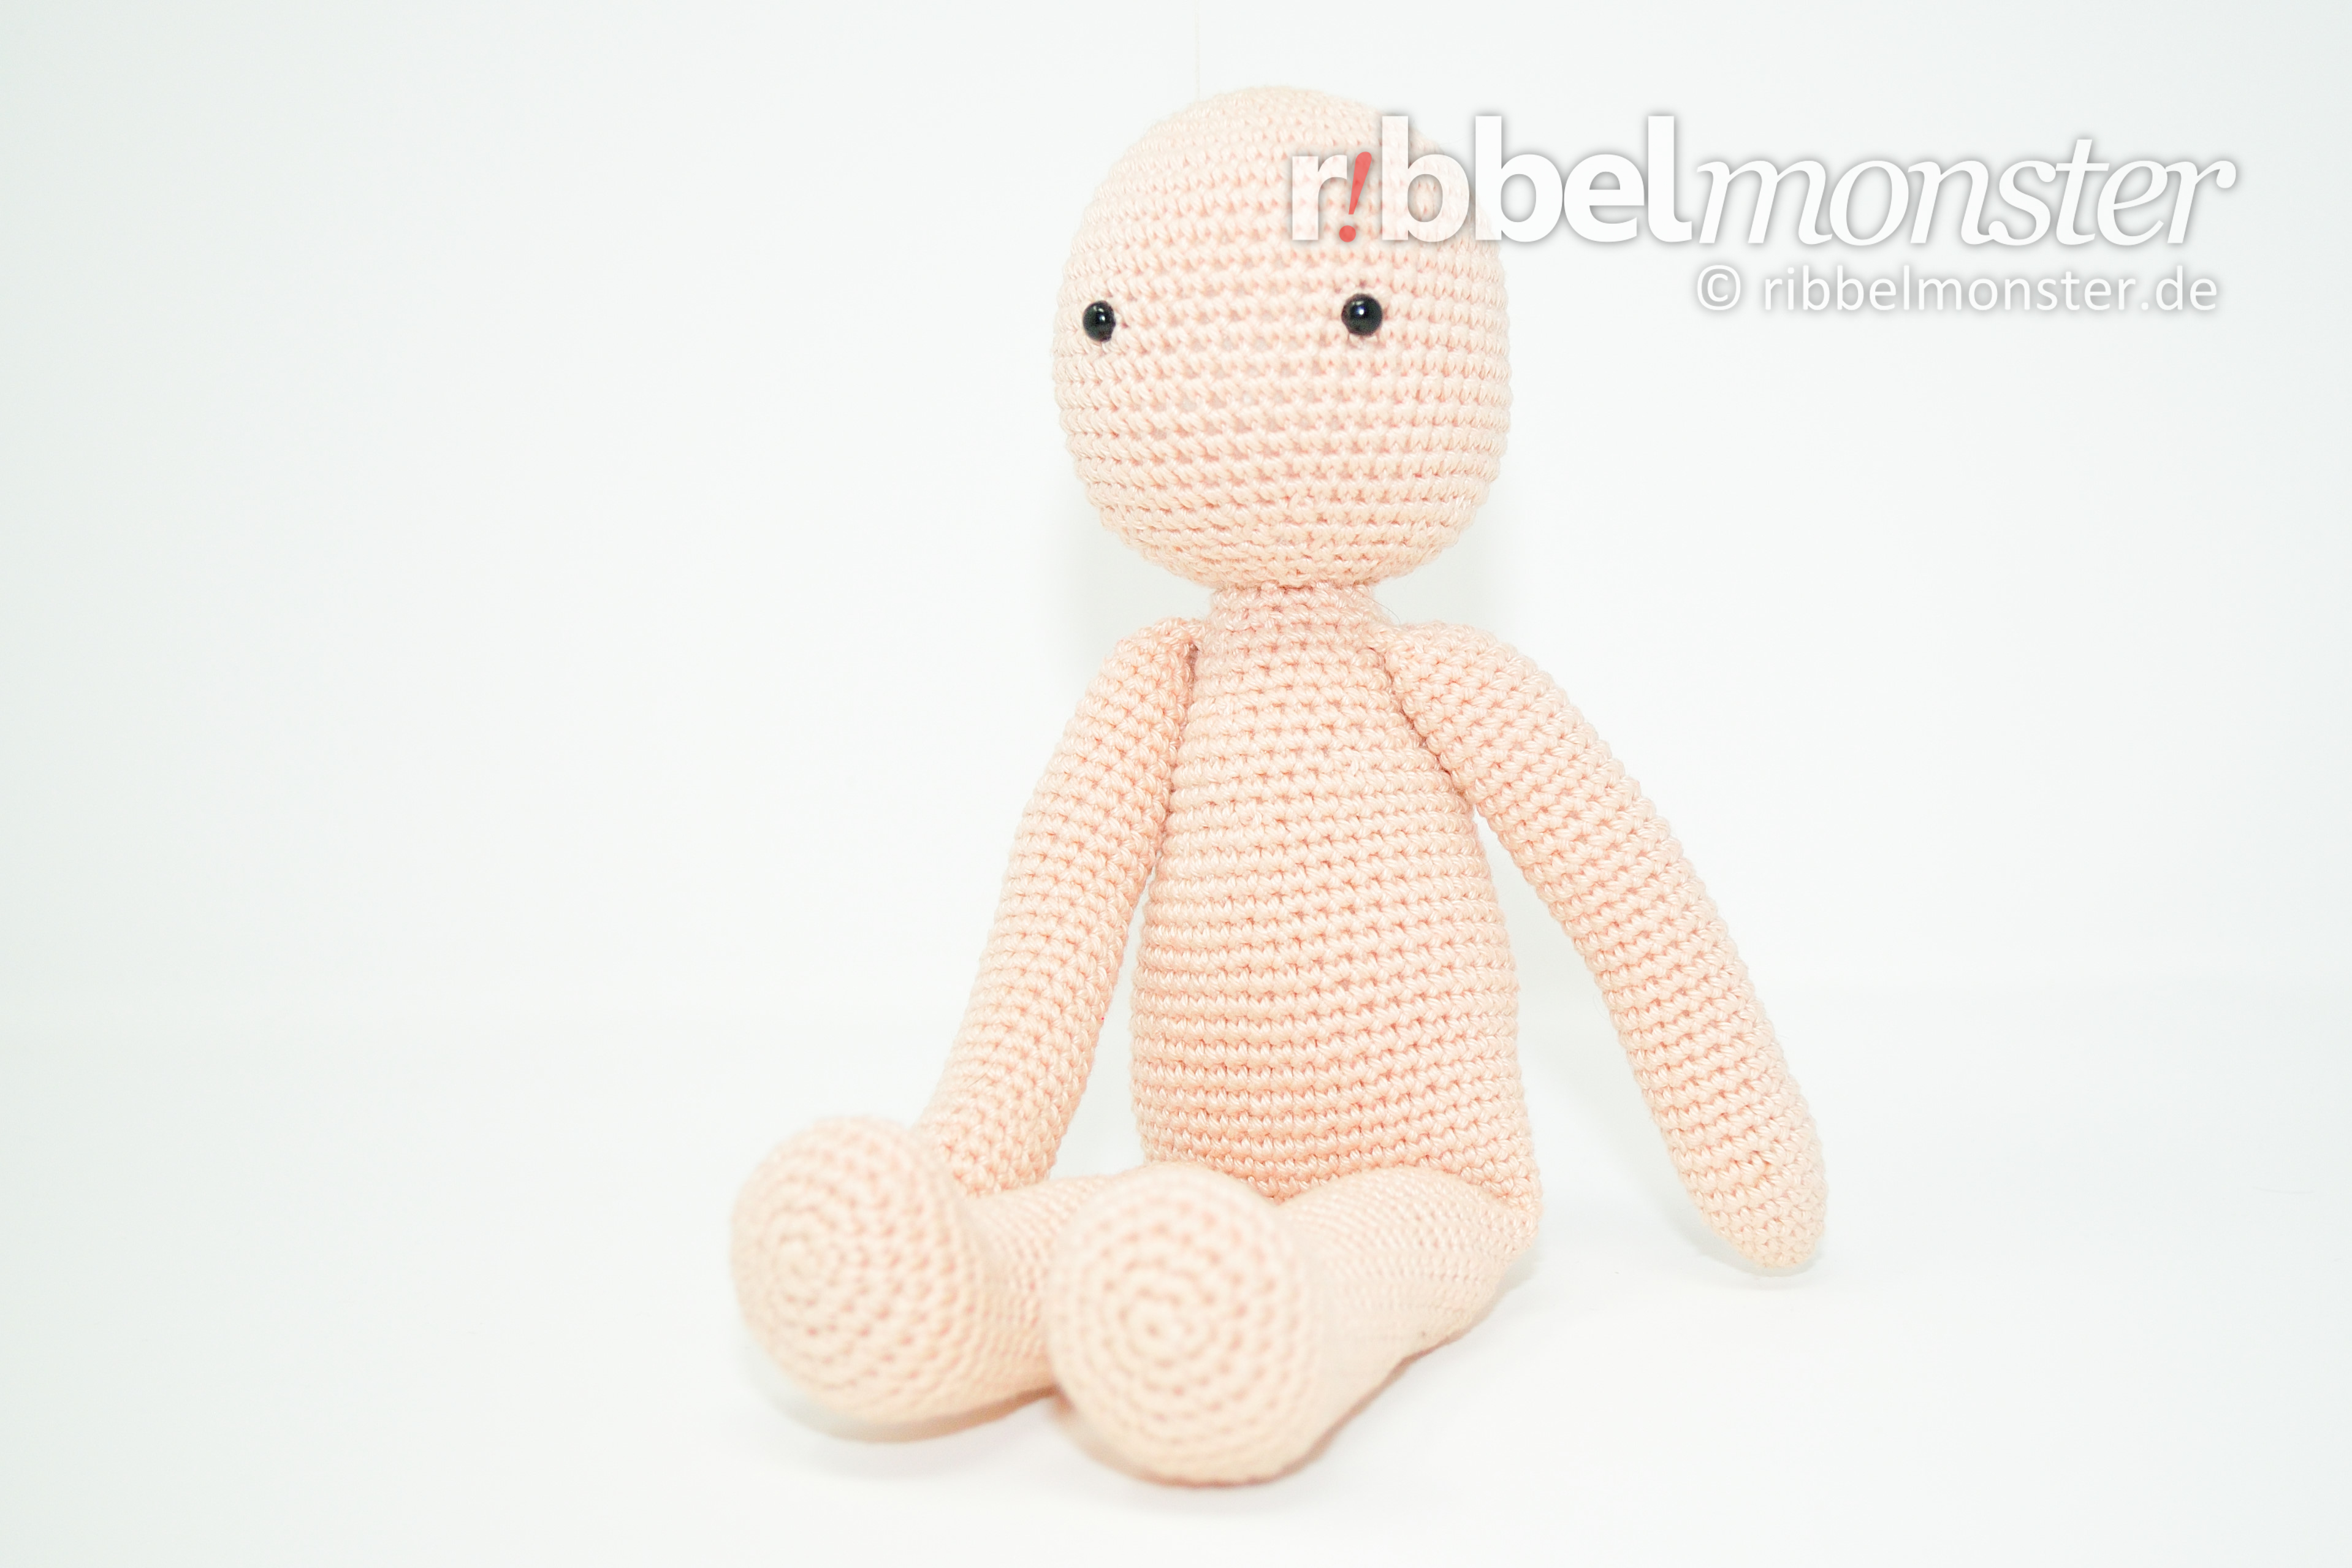
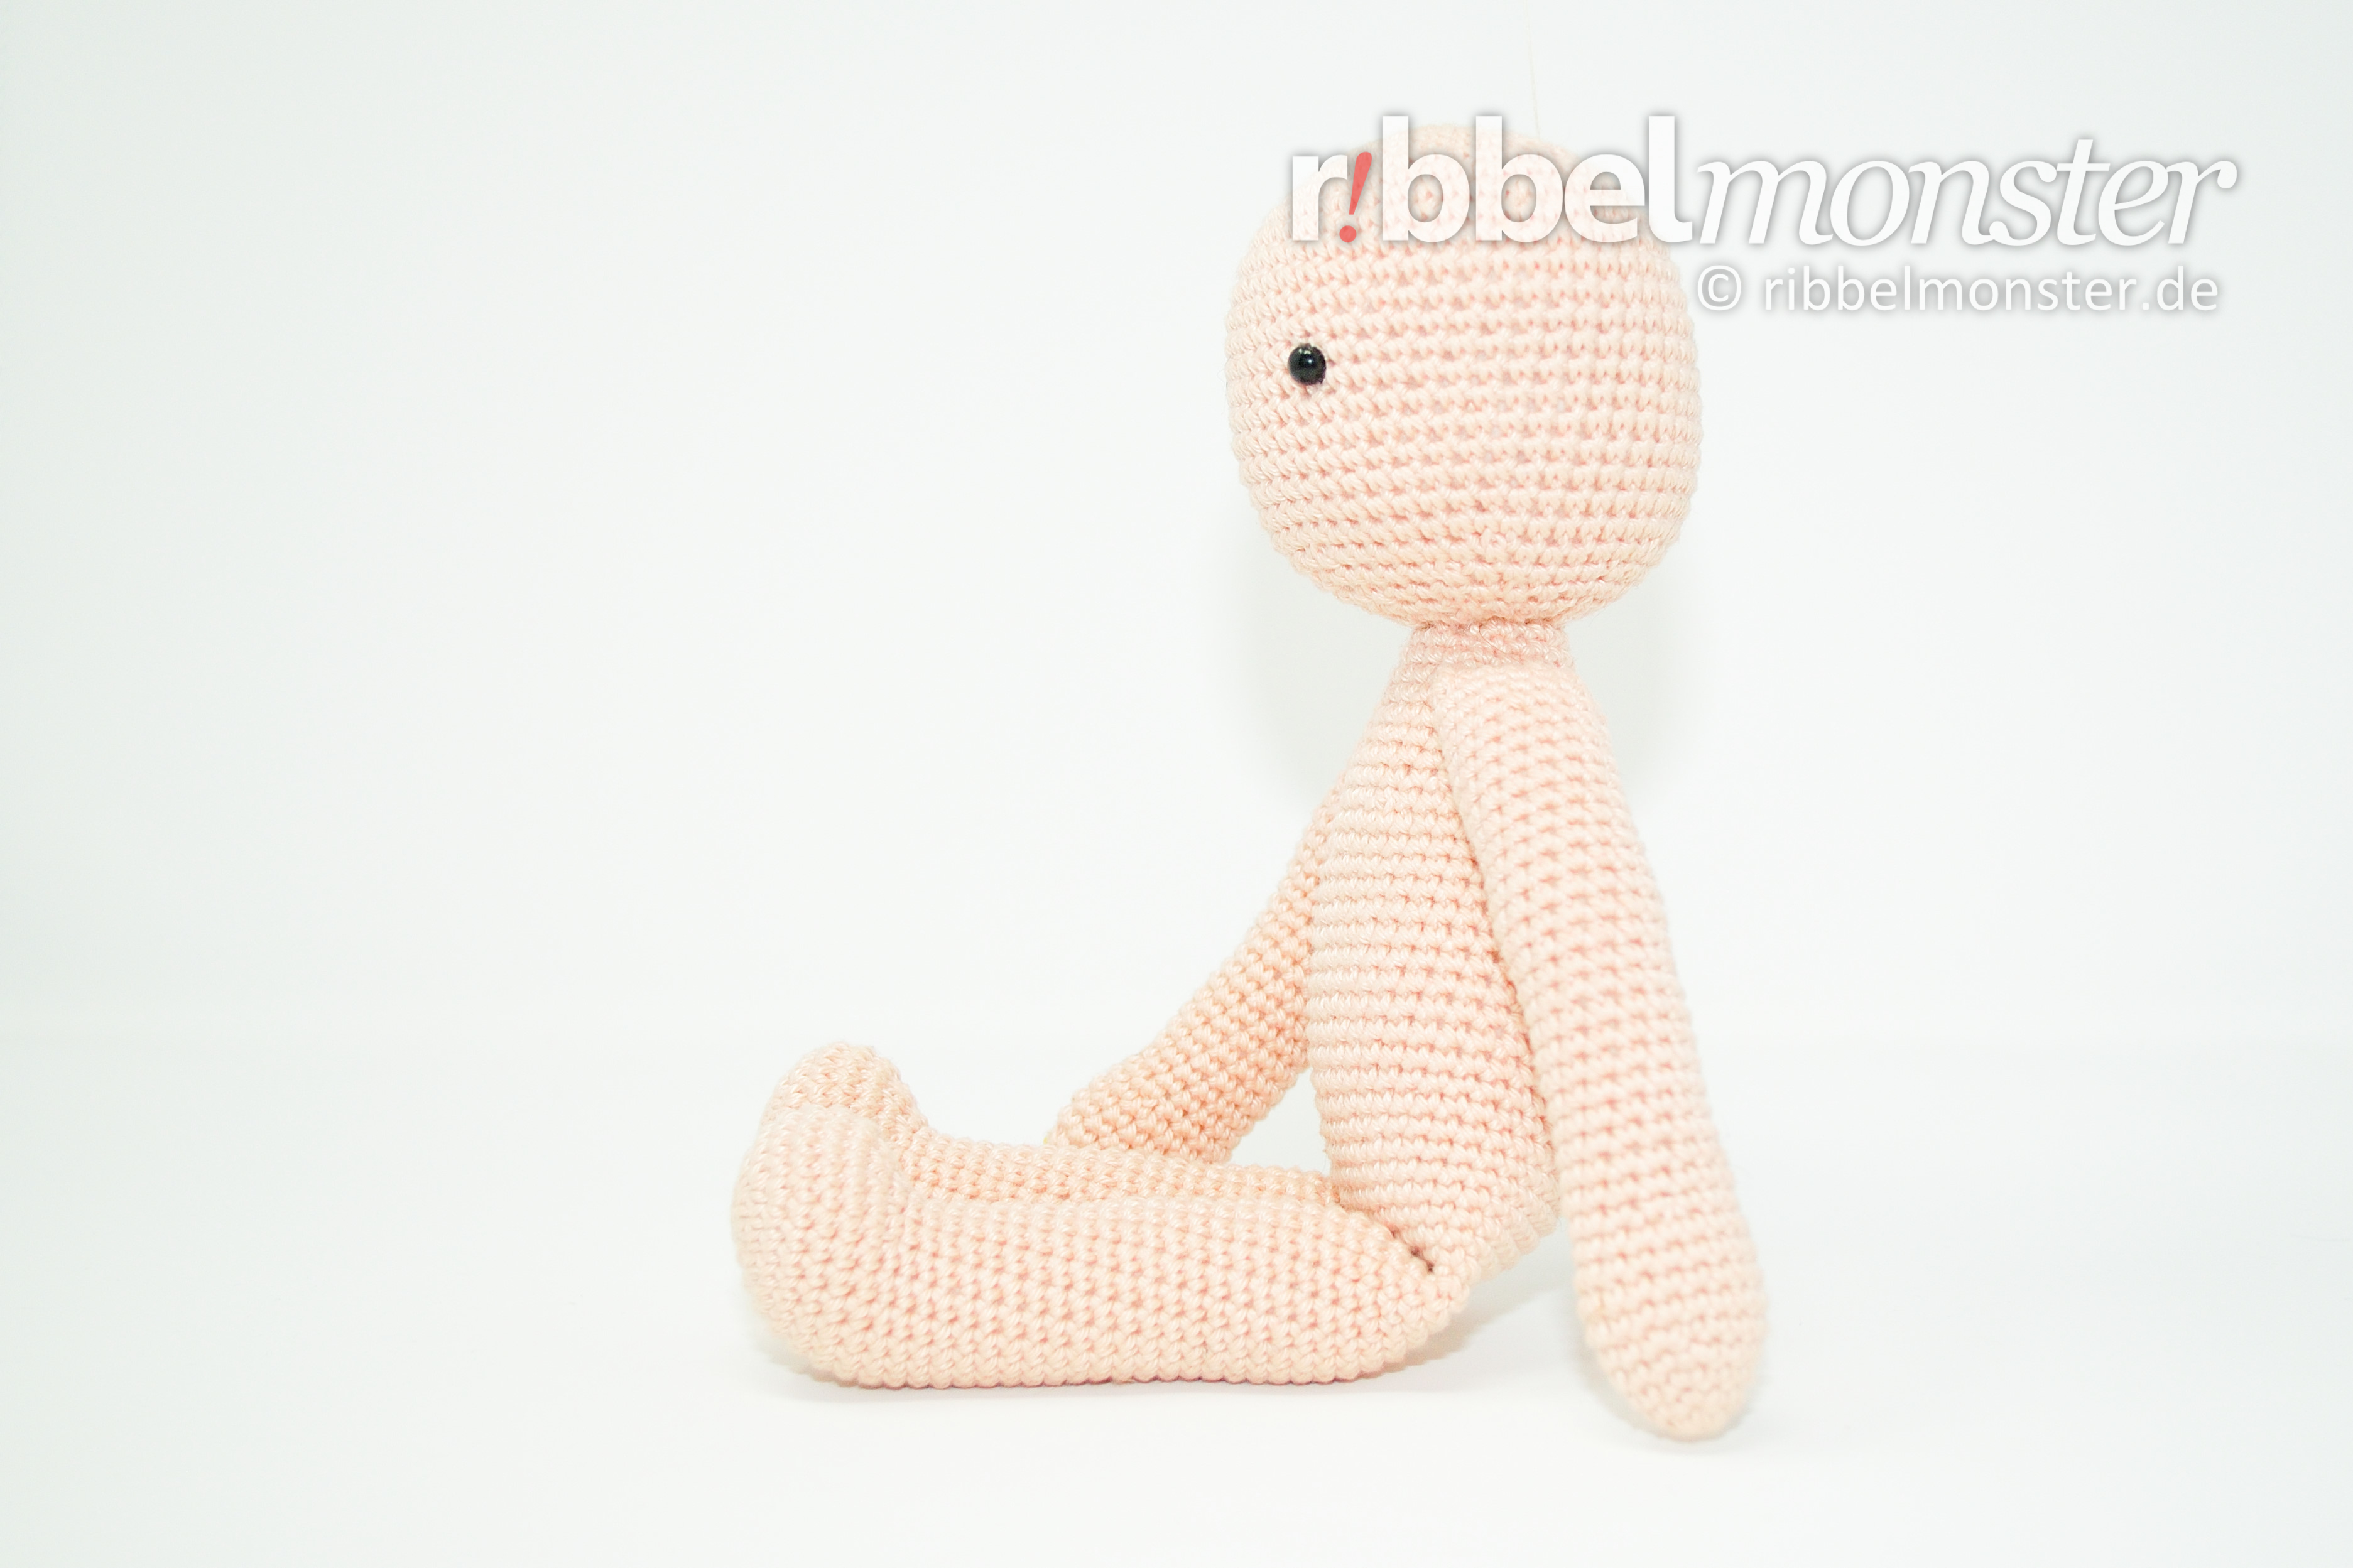
Finish Dangling Doll
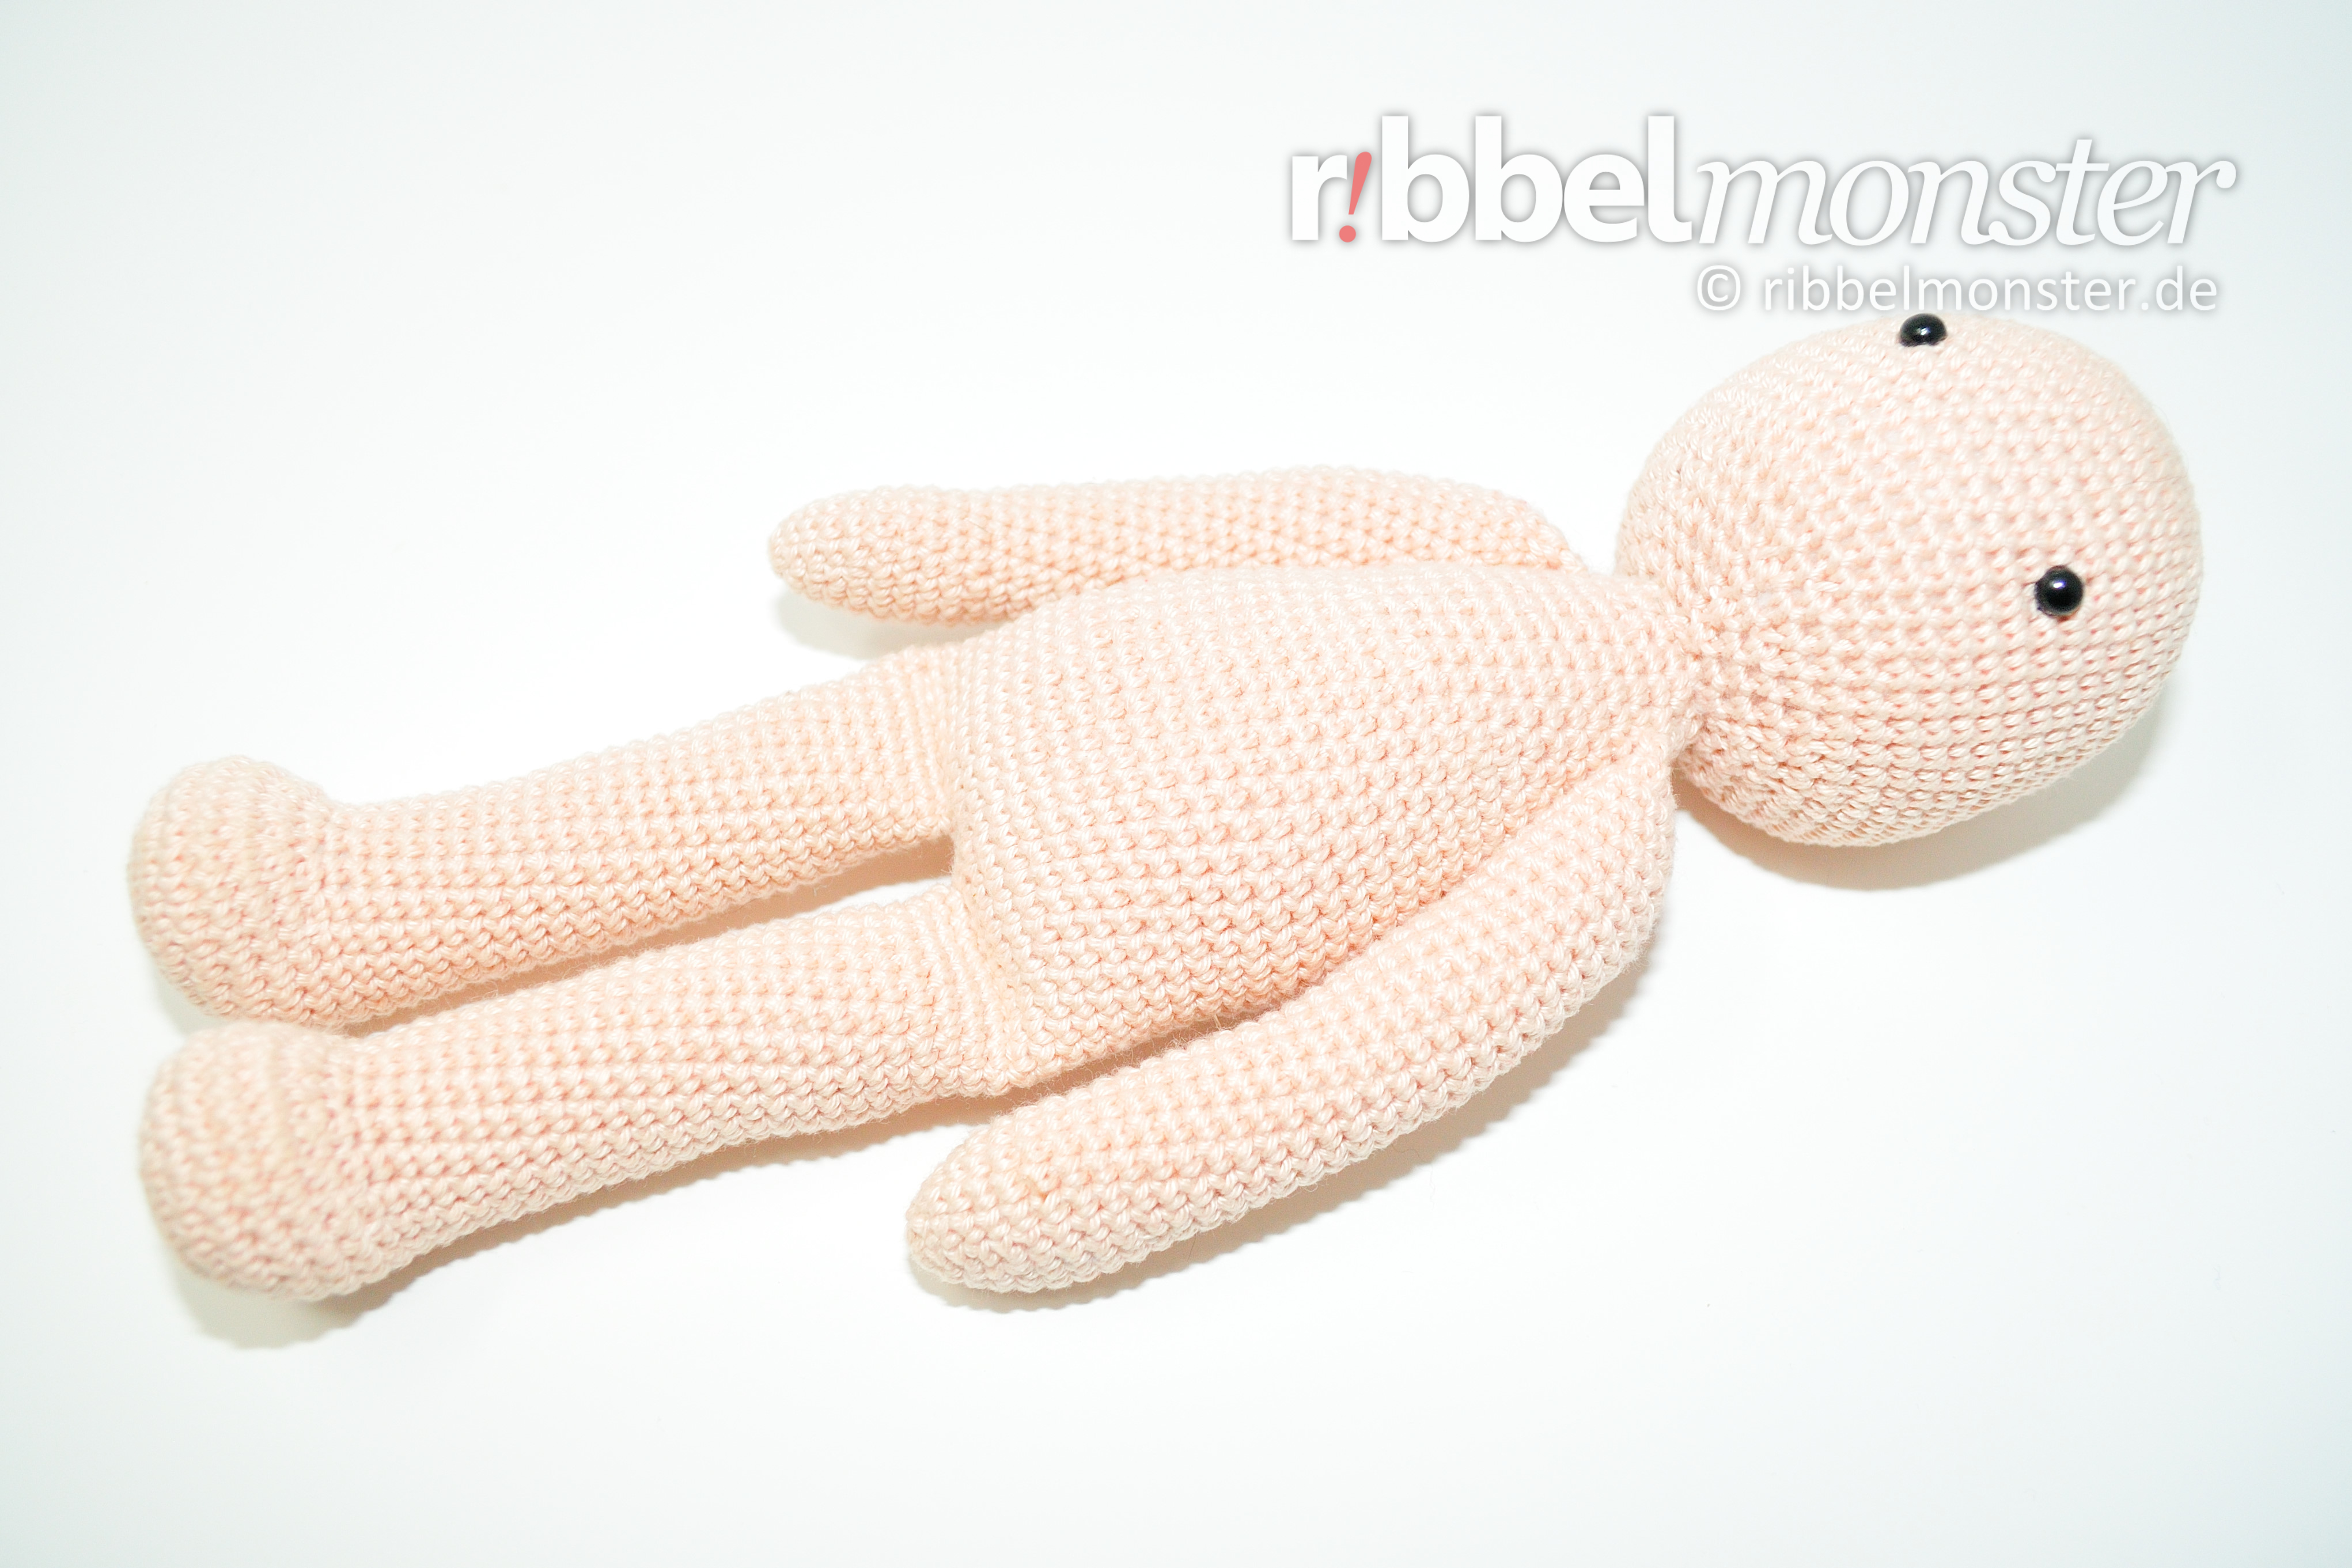
After you have crocheted all the parts we can finish the dankling doll. I recommend you to fix all parts with pins to see if the positions are correct. So you can quickly adjust the individual parts, if something is wrong.
In addition you should make sure to keep the positions exactly, so that later also all the clothes for the Slenana series will fit.
First we sew the head with the long end of the thread around to the body. In this case, both openings are positioned so that the center of the front coincides. If you’ve never done this before, the tutorial for sewing open parts together will help you.
Now you can also sew the arms to the body by using the appropriate thread ends. They are sewn horizontally around the 29th round of the body, ie 2 rounds under the head. They are 7 stitches apart on the front and are located on the right and left sides of the body.
Individualize Dangling Doll
This way you have completed a simple dangling doll, which can serve as the basis for very individual dangling dolls. Because by simply creating a few very individual details your dangling doll gets a very personal touch and you can make almost everything out of it.
If you want you can crochet ears for your dangling doll and tie them around the round under the eyes with 5 stitches distance to the eye on the right and left of the head. Be careful not to swap your ears and point the longer earlobes down. Perhaps you will get help in the tutorial to tie up small parts.
First, we will make the hair, which will completely change the look of your dangling doll. You can create long, short, thin, thick, smooth or textured hair in a variety of colors to create a unique character. If you’ve never done this before, the hair tie tutorial will probably help you.
Now you can customize the face as you like by adding small details that have a big impact.
Darning yarn makes it easy to embroider eyebrows, eyelashes, a mouth or freckles in matching colors.
A nose you simply design with the yarn from the body with horizontal stitches around several stitches in the middle between the eyes until it has the desired volume.
With textile paint or acrylic paint, you can easily make cheeks and shades.
Lastly finish the clothes for your dangling doll and give it a distinctive look. There are different instructions for very different clothes available that fit all dolls and animals of the Slenana series! If that’s not all that easy for you just look for one of the ready-made designs for Slenana Dolls.
Ich wünsch dir was!
Möchtest du dem Ribbelmonster noch ein Foto deiner Arbeit da lassen?