
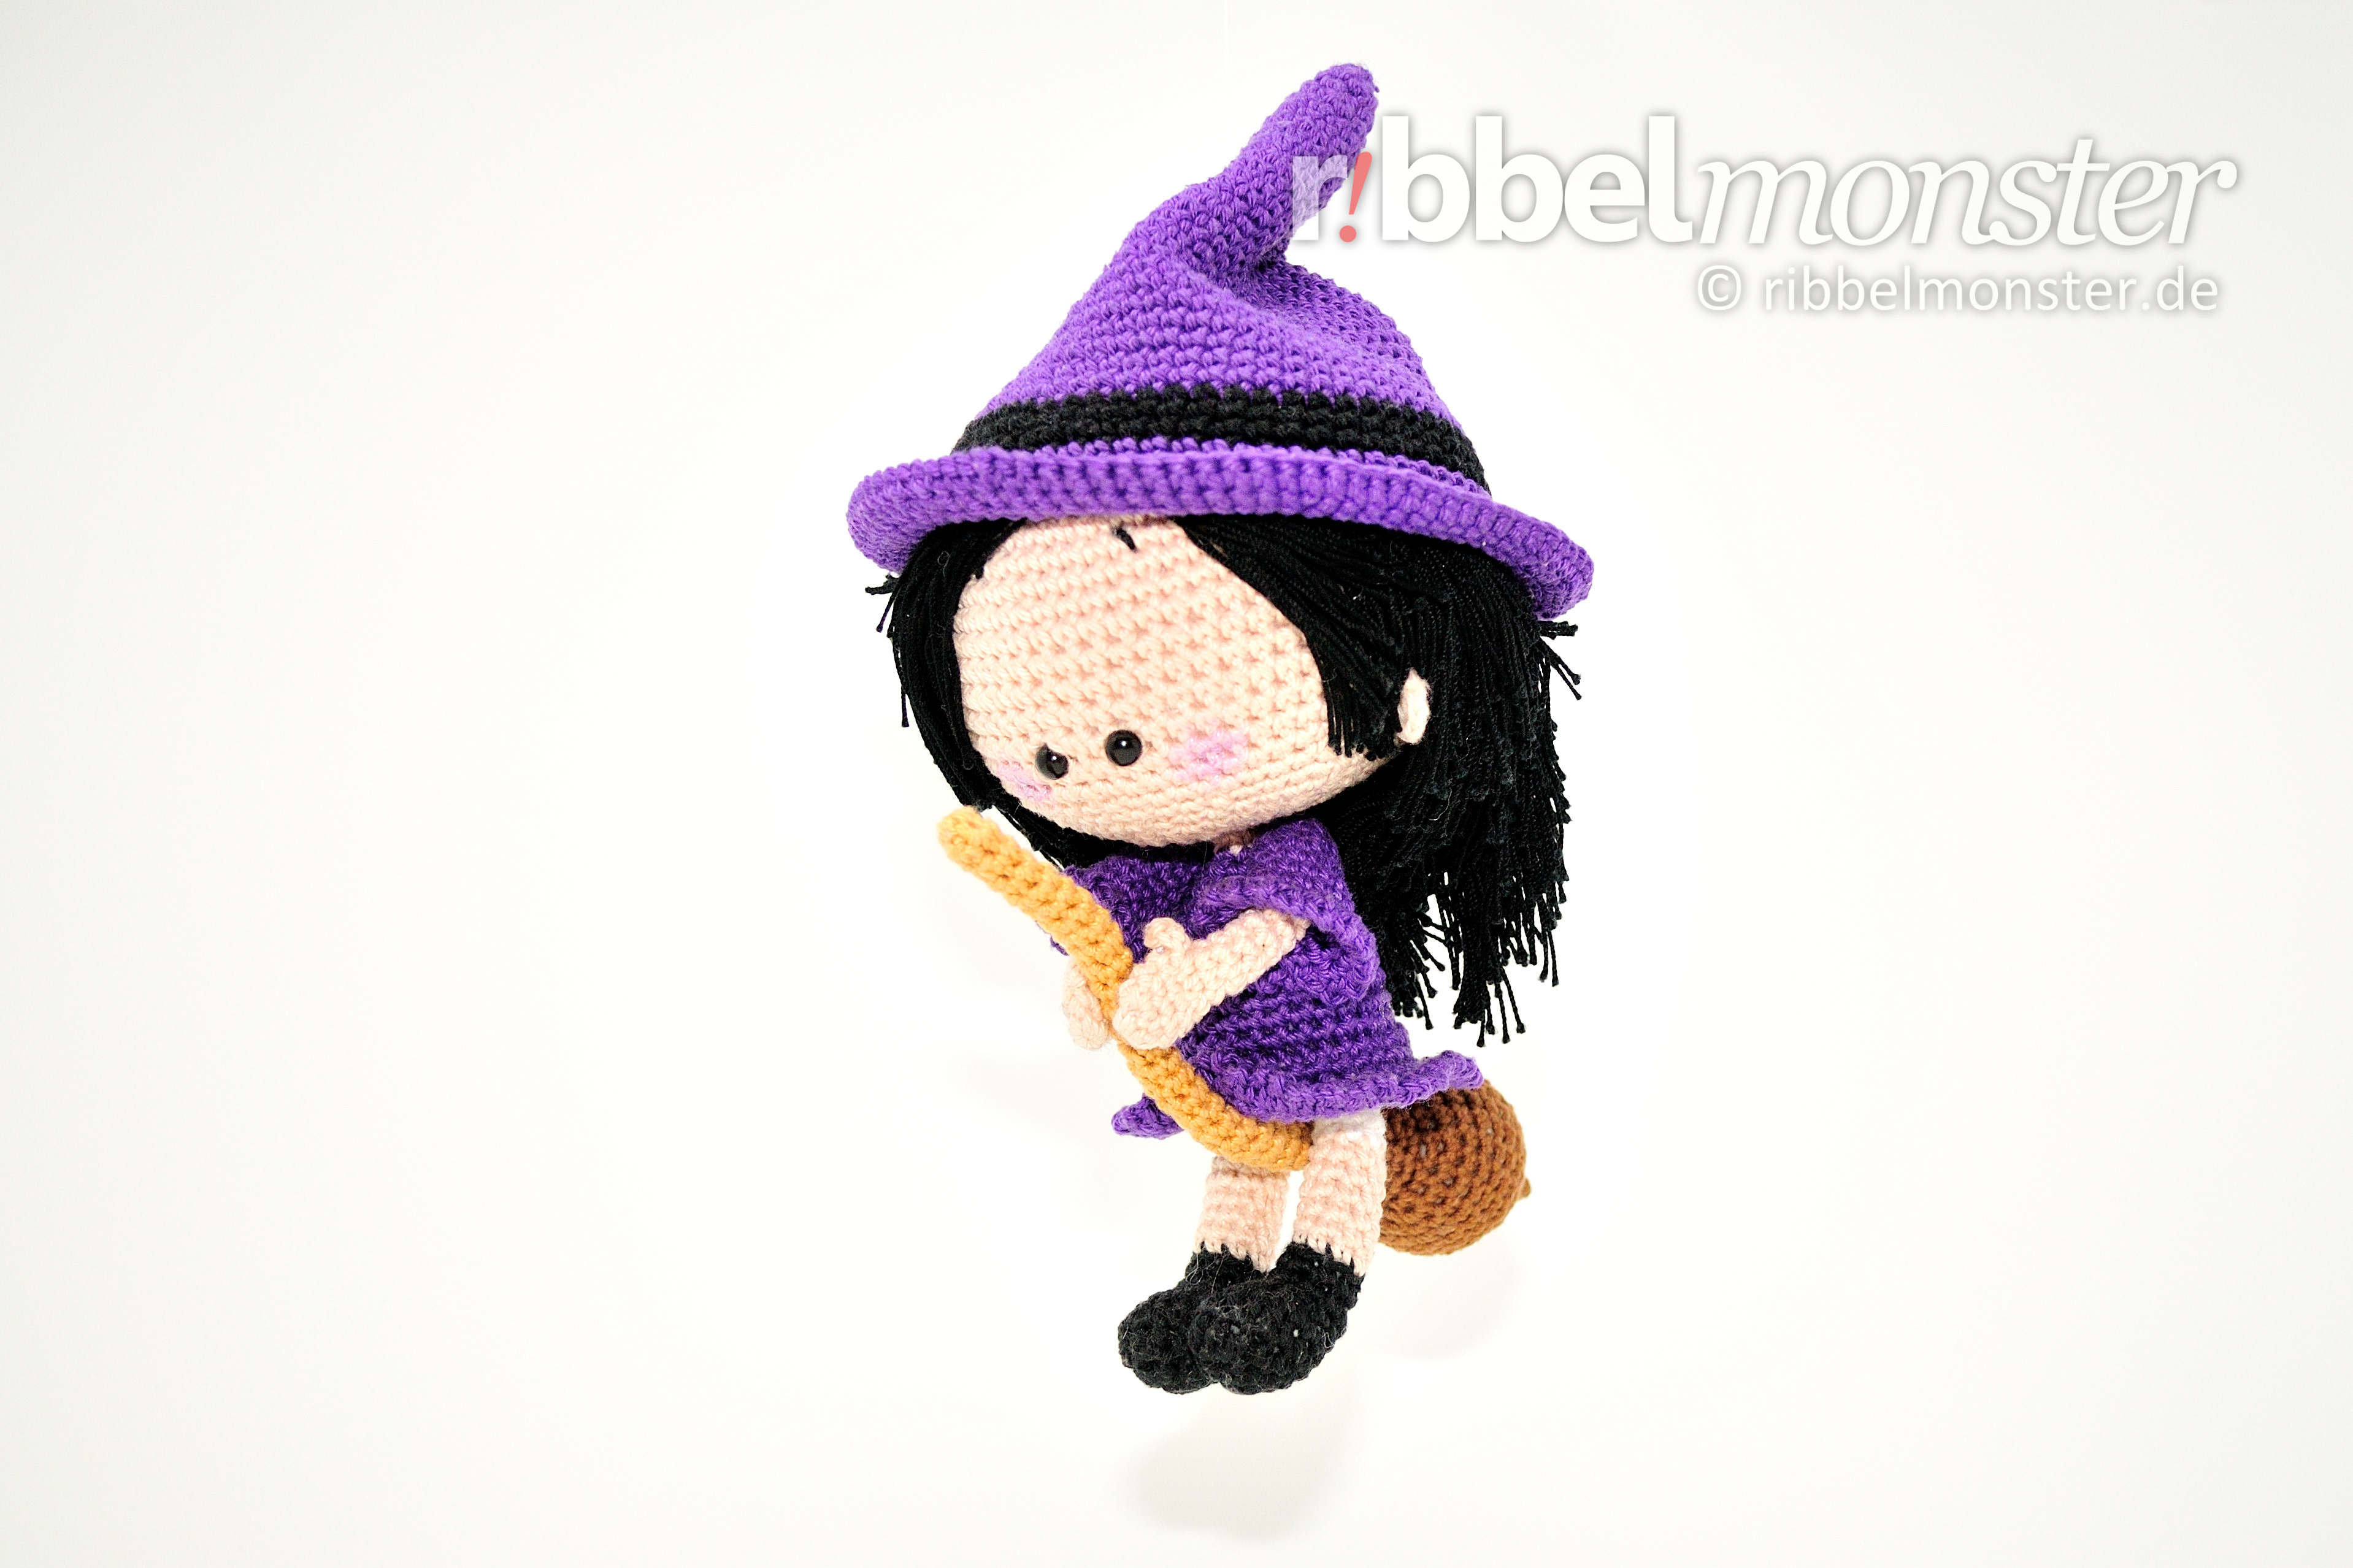
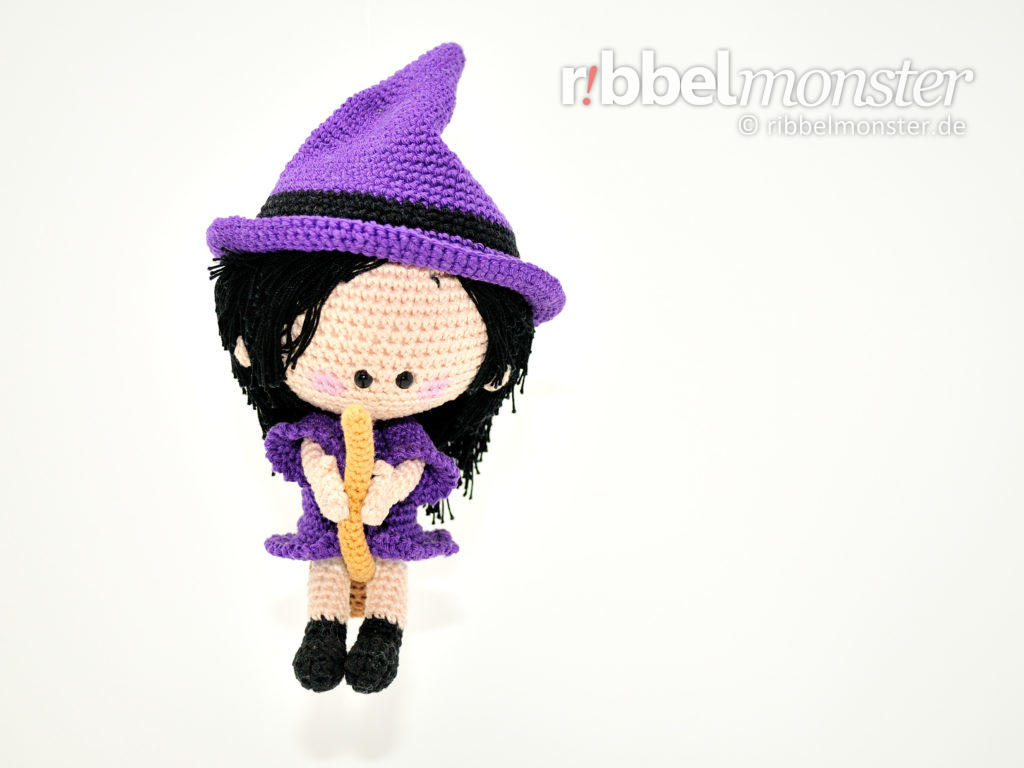
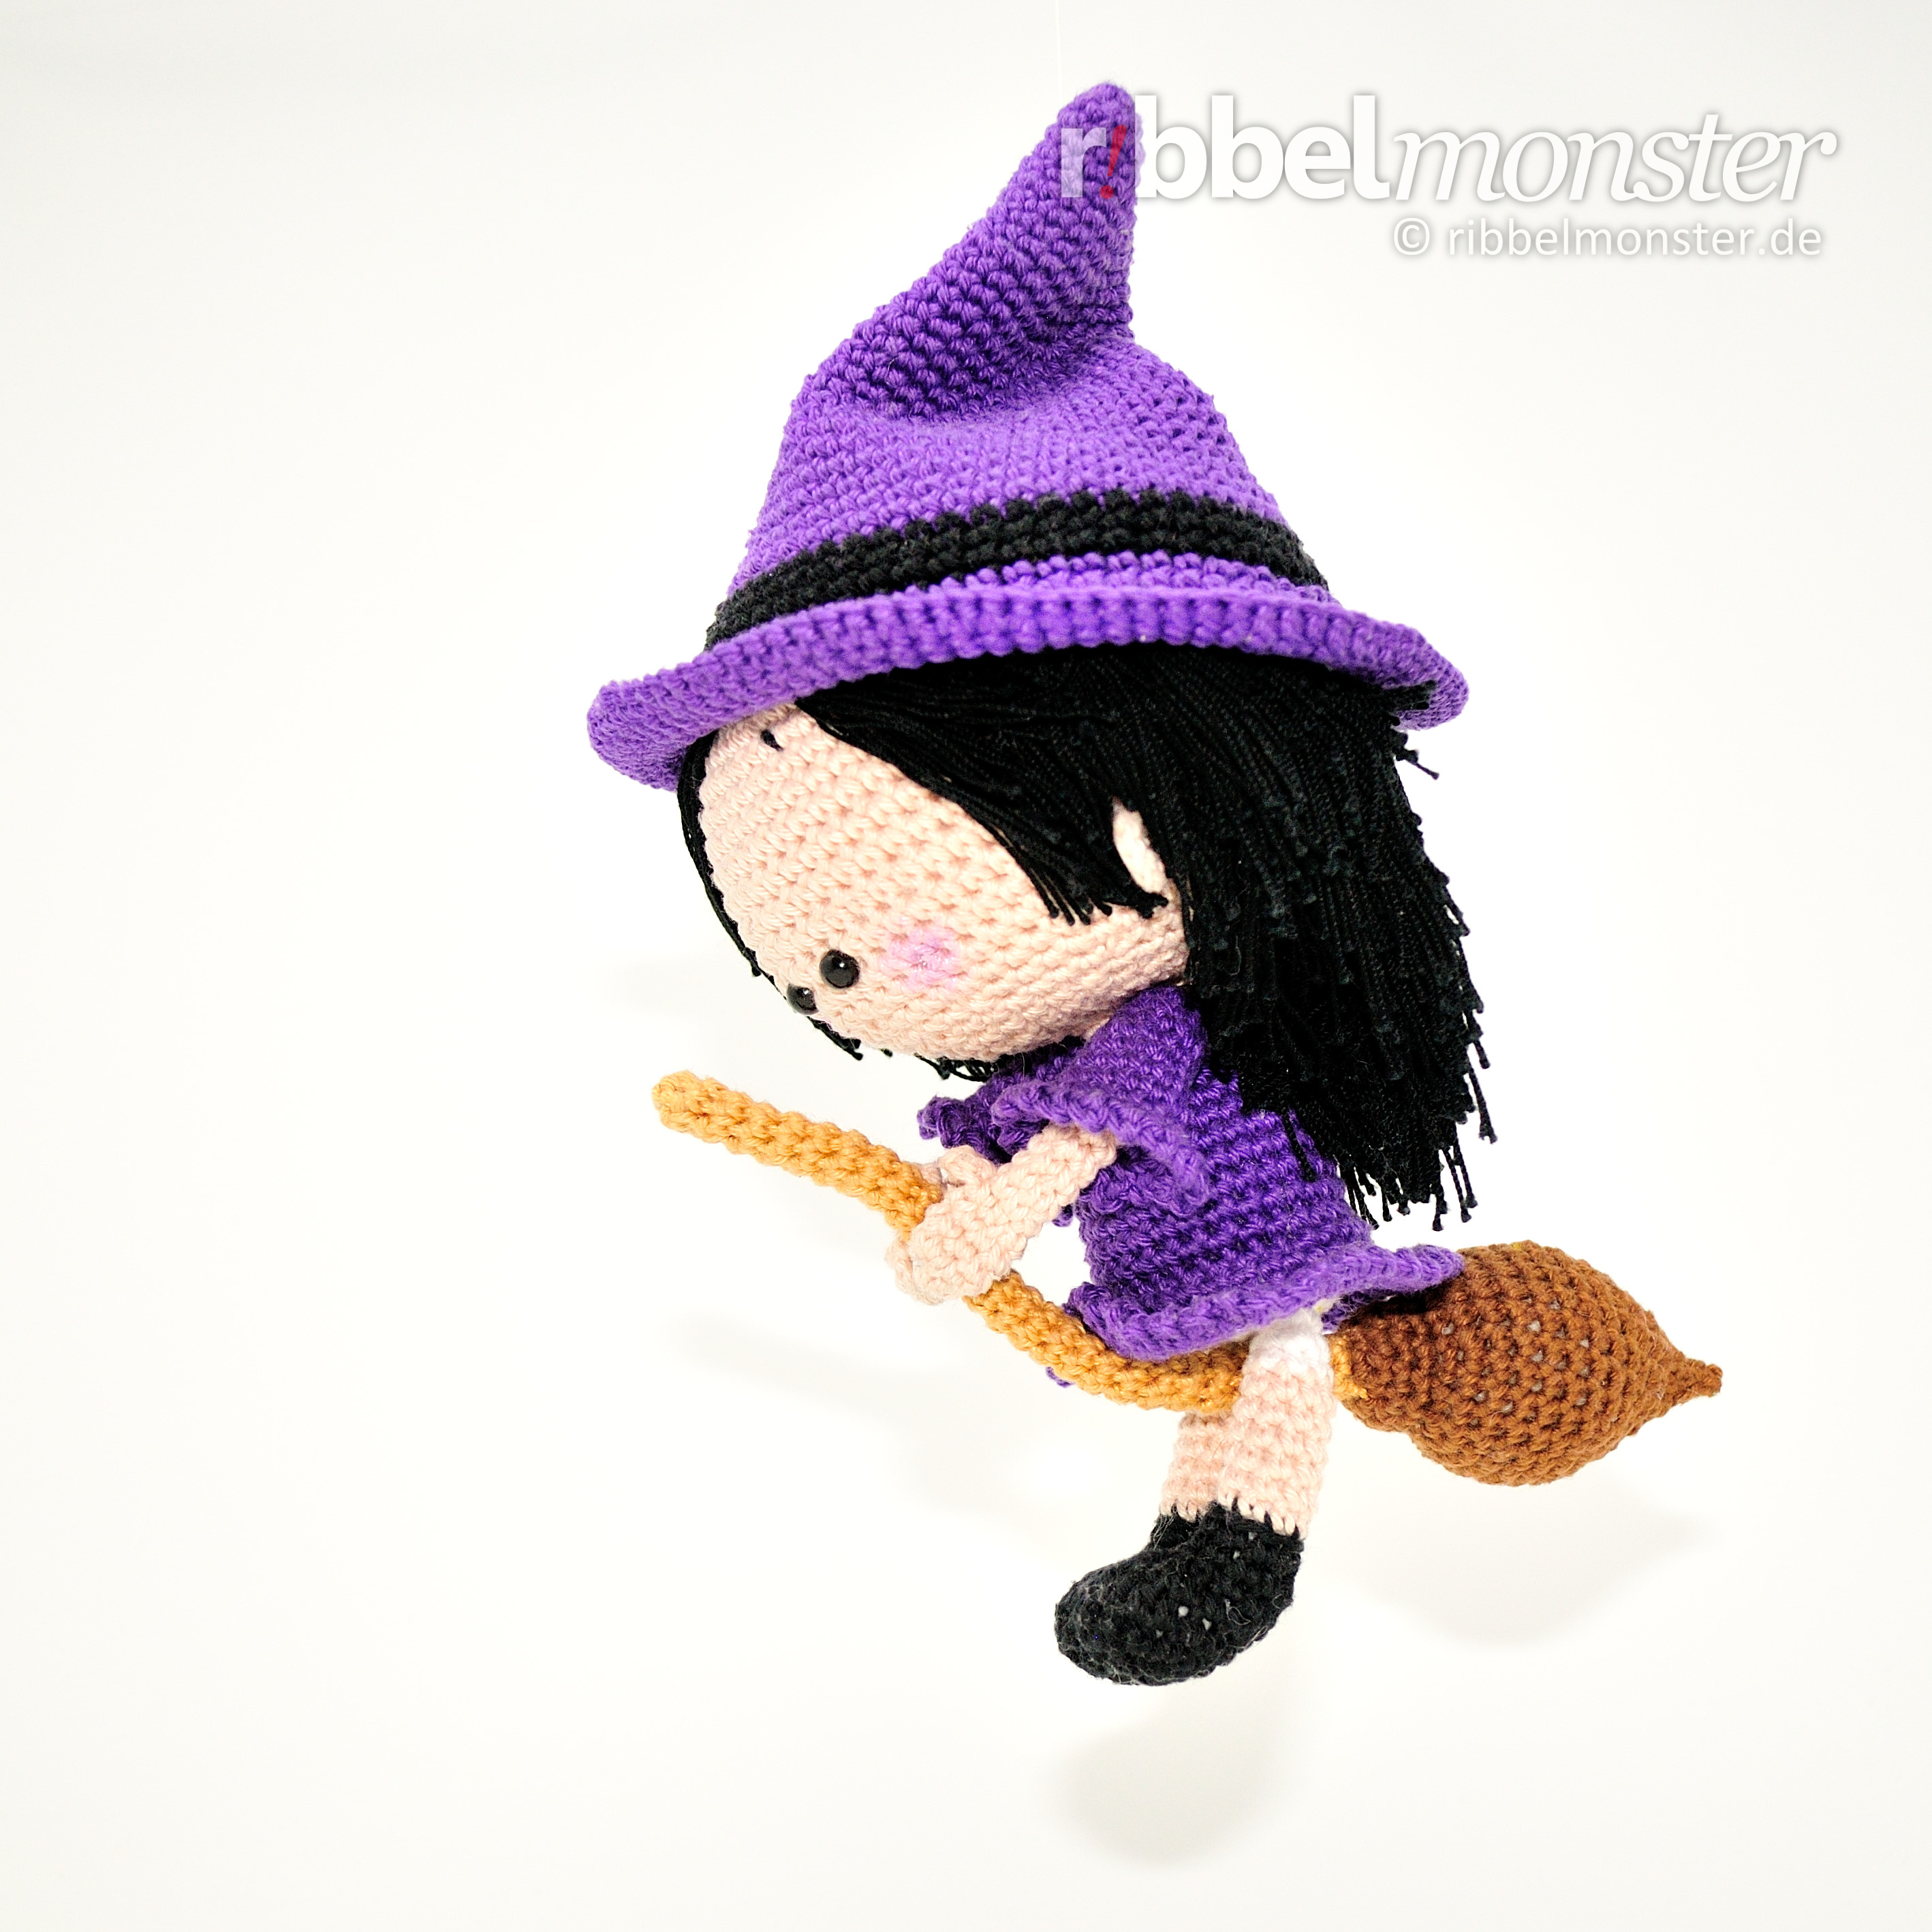
With this crochet pattern, we want to introduce Mechthild, the little Crochet Witch. Mechthild is a diligent young witch who sometimes gets quite a setback. The crocheted witch is, of course, a great decoration in the eerie season.
You see, young witches have it tough,
often eager to be enough
a real witch, bright and keen,
but mostly still too small, it seems.

Yet some are quite bright,
and quickly grasp the insight:
that the art of trickery
is not just for the big to see.
As soon as the elders are away,
she tries her luck without delay.
With oversized courage so grand,
reaching for wand and hat she’ll stand.
She almost achieved her feat,
when the ground suddenly did retreat.
With a big crash, a tumble and sprawl,
everything quickly starts to fall.
After a bit of crying’s fuss
over the new, big bump with us,
the witch wants to risk once more,
trying out what’s in store.

What nobody thought she’d try,
she simply copied on the sly.
Some practice in falling brings,
the art of flying, it seems.

Look at our little witch!
What the little witch can pitch!
Trust the little ones, it’s true,
they learn fast, just like they do.


Content
Introduction: Amigurumi – Crochet Witch “Mechthild”
Before we start crocheting the Amigurumi Witch, some preparation is needed. Here you will find all necessary information about prerequisites, materials, and size that you need. If you need help, you can find additional links in the corresponding sections.
Attention! Amigurumis are very cute and, therefore, not only popular among adults. Children often see them as toys, so you should be especially careful. Amigurumis that are not intended for play should be kept out of the reach of children. If an Amigurumi is meant to be played with by children, you should strictly adhere to the guidelines for toys. If you plan to give away or sell Amigurumis (license for sellers), you must strictly adhere to the legal requirements for toys and display the required CE marking.
Prerequisites
For successfully replicating this crochet pattern for an Amigurumi Witch, it is crucial that you are already familiar with the following crochet techniques. For each technique, you will find a detailed tutorial here so that you can quickly learn it yourself.
- Color Change
- Crochet Chain Stitches
- Crochet Double Crochet Stitches (US!)
- Crochet Magic Ring
- Crochet Slip Stitches
- Decreases
- Half Double Crochet Stitches (US!)
- Increases
- Loops of a Stitch
- Single Crochet Stitches (US!)
- spiral rounds
- Turning Chain Stitches
Note! By offsetting regular increases and decreases, they become almost invisible. You can recognize regular increases by the phrase “double every … stitch,” and regular decreases by the phrase “crochet together every … and … stitch”. The stitch chart for spheres and circles might also be helpful for you.
Note! Using a special technique for invisible decreases makes them nearly invisible. Although this technique requires a bit of practice, it’s worth giving it a try.
Supplies
The Amigurumi Witch shown here was crocheted with the following materials. In general, you can crochet the Amigurumi Witch with any yarn and an appropriate hook size. For an authentic result, it is recommended to use materials as similar as possible. In addition to the materials, you will also find a list of the necessary tools and supplies here.
Crochet Hook
You will need a crochet hook with a size of B or C (alphabetic) or 1 1/2 (numeric). For converting to other sizes, the crochet hook size converter will help you. I have selected some great crochet hooks for you here.
Filling
For filling, I used synthetic filling made of 100% polyester. However, there are numerous alternatives for filling material. If you’ve run out of filling, I’ve prepared a refill for you here.
Acrylic Paint
I used acrylic paint in the shade of purple here. This paint is non-toxic, water-dilutable, waterproof, and adheres to almost any surface. I found a great set of acrylic paints for you to try out here.
Pins
You’ll also need a few pins. The more colorful your collection, the better. If you need more, I’ve found something for you.
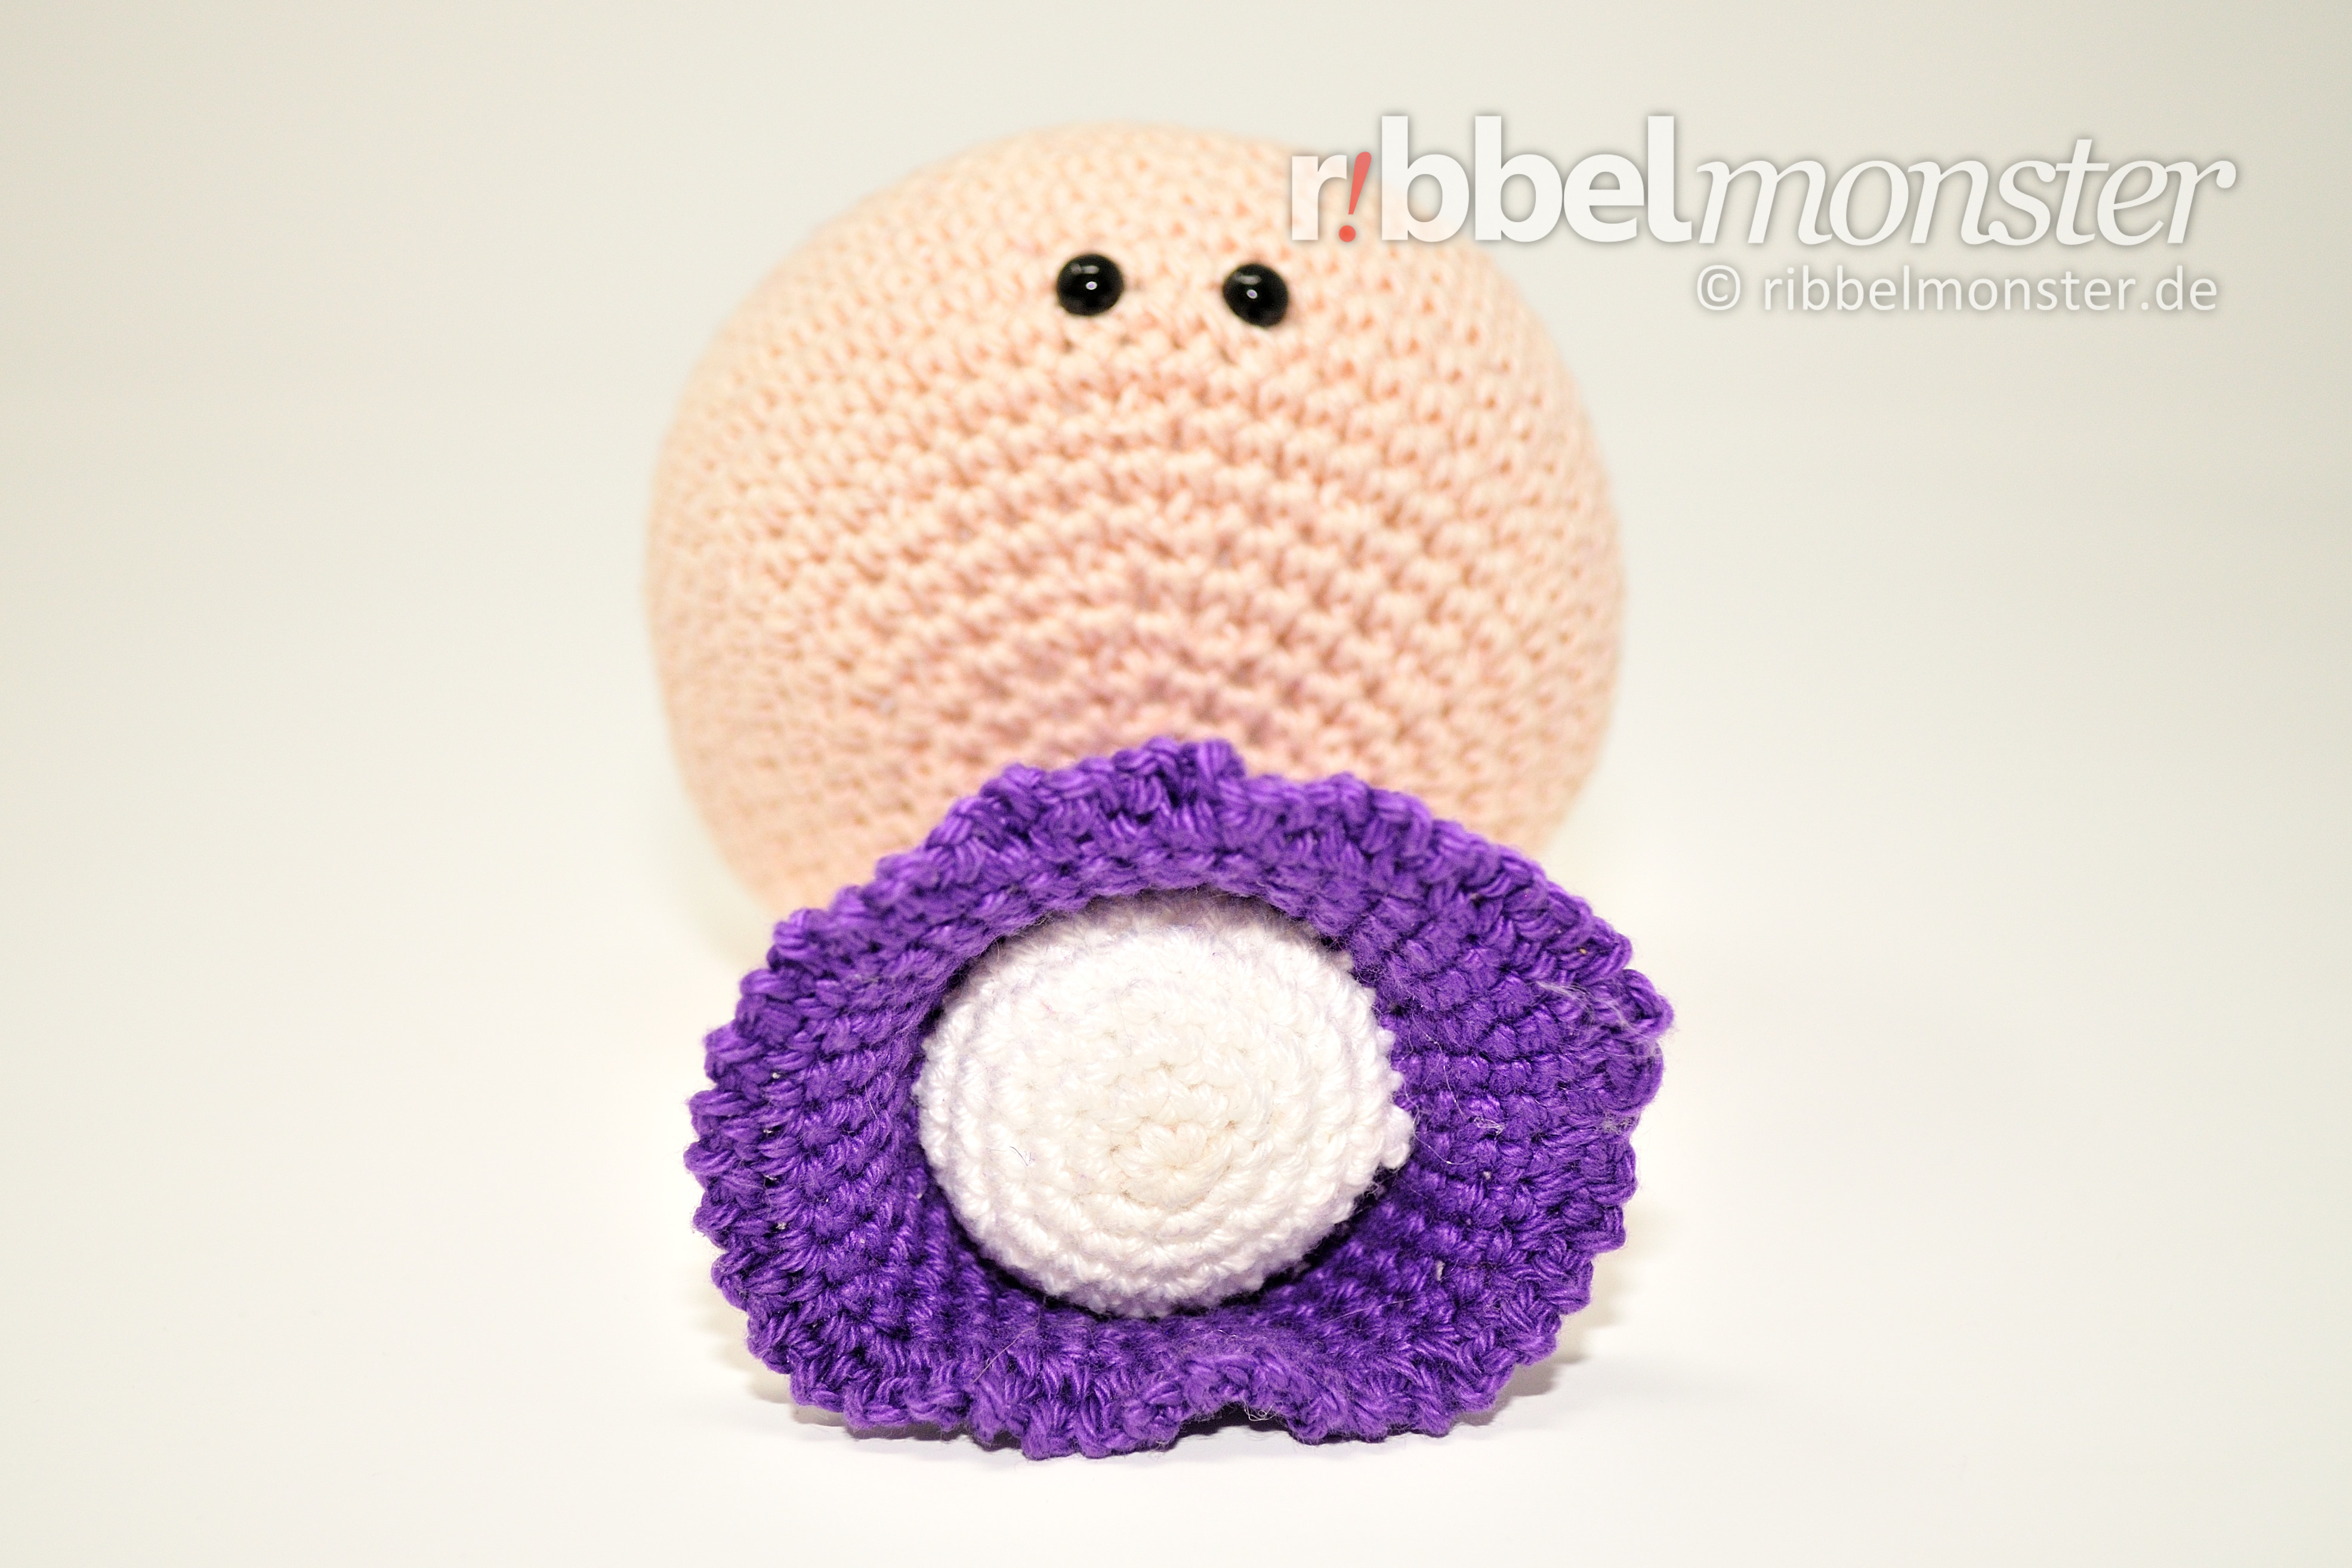
Safety Eyes
I used 2 safety eyes with a diameter of 1/4 inches. The eyes are completely black. However, there are countless alternatives for amigurumi eyes. You might prefer other safety eyes as well.
Scissors
You’ll need any scissors. It’s best to use your most beautiful scissors because it brings you joy. If you don’t have really nice scissors, I’ve picked out some lovely ones for you.
Wool Needle
You’ll need a wool needle with a blunt tip. The thickness of the wool needle should match the thickness of your yarn. You might like the set of wool needles I’ve picked out for you.
Yarn – Gründl – Crochet Thread 100 – black – 129
Color: black Size: ca. 619yds / 3.5oz Material: 100% cotton Help? View example
Yarn – Schachenmayr – Catania – 113 – violett
I used yarn in the shade Violet. The material is 100% cotton. The yardage is 137 yds / 1.75 oz. If you want to replenish your supply, I’ve already picked out the matching yarn for you here.
Yarn – Schachenmayr – Catania – 263 – softaprikot (hautfarbe)
I used yarn in the shade Soft Apricot. The material is 100% cotton. The yardage is 137 yds / 1.75 oz. If you want to replenish your supply, I’ve already picked out the matching yarn for you here.
Yarn – Schachenmayr – Catania – black – 110
I used yarn in the shade Black. The material is 100% cotton. The yardage is 137 yds / 1.75 oz. If you want to replenish your supply, I’ve already picked out the matching yarn for you here.
Yarn – Schachenmayr – Catania – white – 106
I used yarn in the shade White. The material is 100% cotton. The yardage is 137 yds / 1.75 oz. If you want to replenish your supply, I’ve already picked out the matching yarn for you here.
Note! In this pattern, a shade referred to as “skin colour” is used. I chose the shade based on my personal preference. However: The world is diverse! There are many other possible skin colours you can use. Feel free to adjust the yarn selection to your personal taste!
Note! I have used safety eyes here. If you have never attached safety eyes before, you can also find detailed instructions on how to attach safety eyes here. In addition to a wide selection of other safety eyes, there are also numerous alternatives for amigurumi eyes. Simply use the eyes that you like best.
Note! The specified yarn was used for the example shown here. In principle, you can use any yarn and an appropriate needle size. However, the quality of the material also affects the quality of the result, so you should avoid cutting corners in the wrong place. Also, the thickness of the yarn and the needle will influence the size of the outcome, which you can, of course, intentionally take advantage of.
Size
Here are the size specifications for the crocheted Amigurumi Witch. The height was measured standing without the hat. The diameter was measured. Please note that the actual size depends on the yarn used, the size of the crochet hook, and individual crochet tension.
| Needle Size | Yardage | Size |
|---|---|---|
| Crochet Hook B, C or 1 1/2 | 137 yds / 1.75 oz | 6 1/5 inch |
| Crochet Hook C, D or 2 1/2 | 120 yds / 1.75 oz | ? |
| Crochet Hook E or 4 | 93 yds / 1.75 oz | ? |
Note! If you want to change the size, you can simply use a thicker or thinner yarn with a suitable needle size. Simply doubling the rounds, rows, and stitches, on the other hand, will only result in an uneven outcome.
Crochet Pattern: Amigurumi – Crochet Witch “Mechthild”
For our Amigurumi Crochet Witch, we first crochet the lower part of the body and then the head and the upper part of the body in one piece, attaching the lower part at the same time. Then we crochet arms, sleeves, legs, and ears. After that, you can also crochet a witch hat and a witch broom. Finally, all parts are assembled, the hair is attached, and the cheeks are painted. Then your crocheted witch is ready!
Lower part of the body for Crochet Witch (1x)
The lower part of the body for the Crochet Witch is crocheted from bottom to top exclusively with single crochet stitches (US!) in spiral rounds. The lower part of the body will later be crocheted to the upper part of the body.
Tip: Wenn du ein besonders schönes Ergebnis erhalten möchtest, kannst du die regelmäßigen Zunahmen durch Versetzen ein wenig verstecken. Dazu verwendest du einfach die Maschentabelle für Kugeln und Kreise.
(Redaktion: Block ersetzen)
- white:
- 1st round:
- magic ring
- into the magic ring:
- 6 single crochet stitches (US!)
- = 6 stitches
- 2nd round:
- double every stitch
- = 12 stitches
- 3rd round:
- double every 2nd stitch
- = 18 stitches
- 4th round:
- double every 3rd stitch
- = 24 stitches
- 5th round:
- double every 4th stitch
- = 30 stitches
- 6th round:
- every stitch one stitch
- = 30 stitches
- cut the thread, pull off the loop
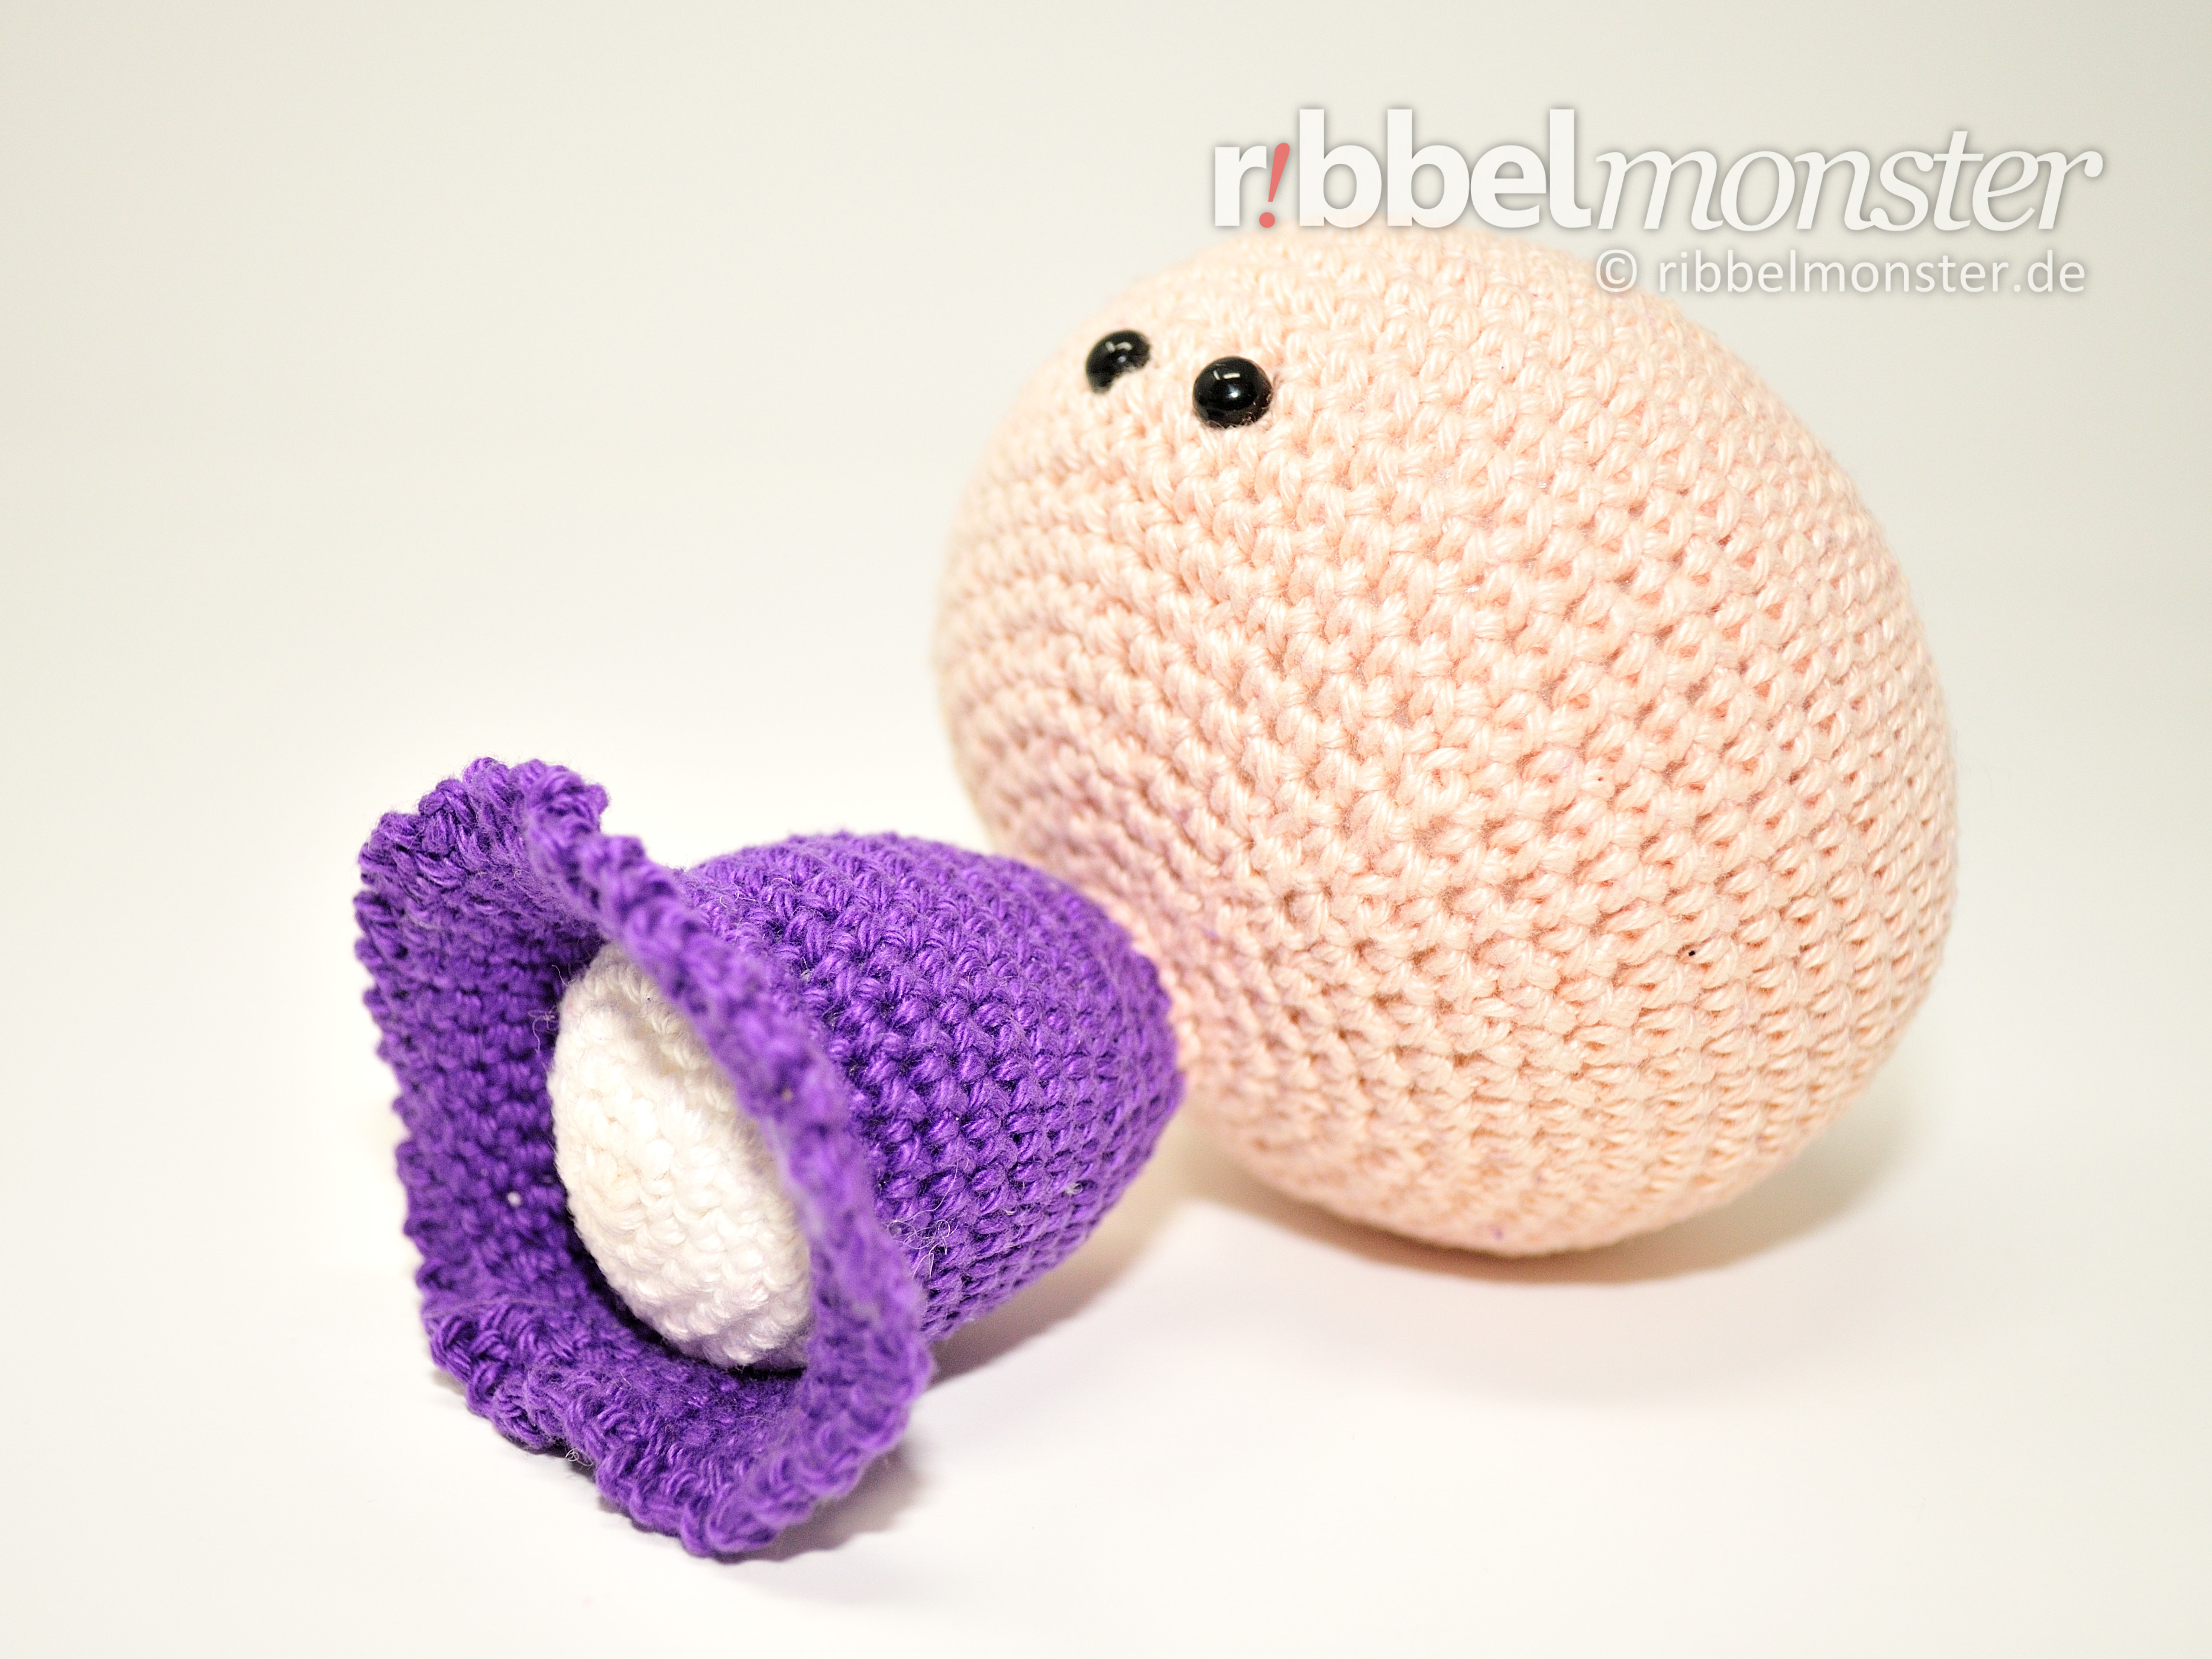
Head for Crochet Witch (1x)
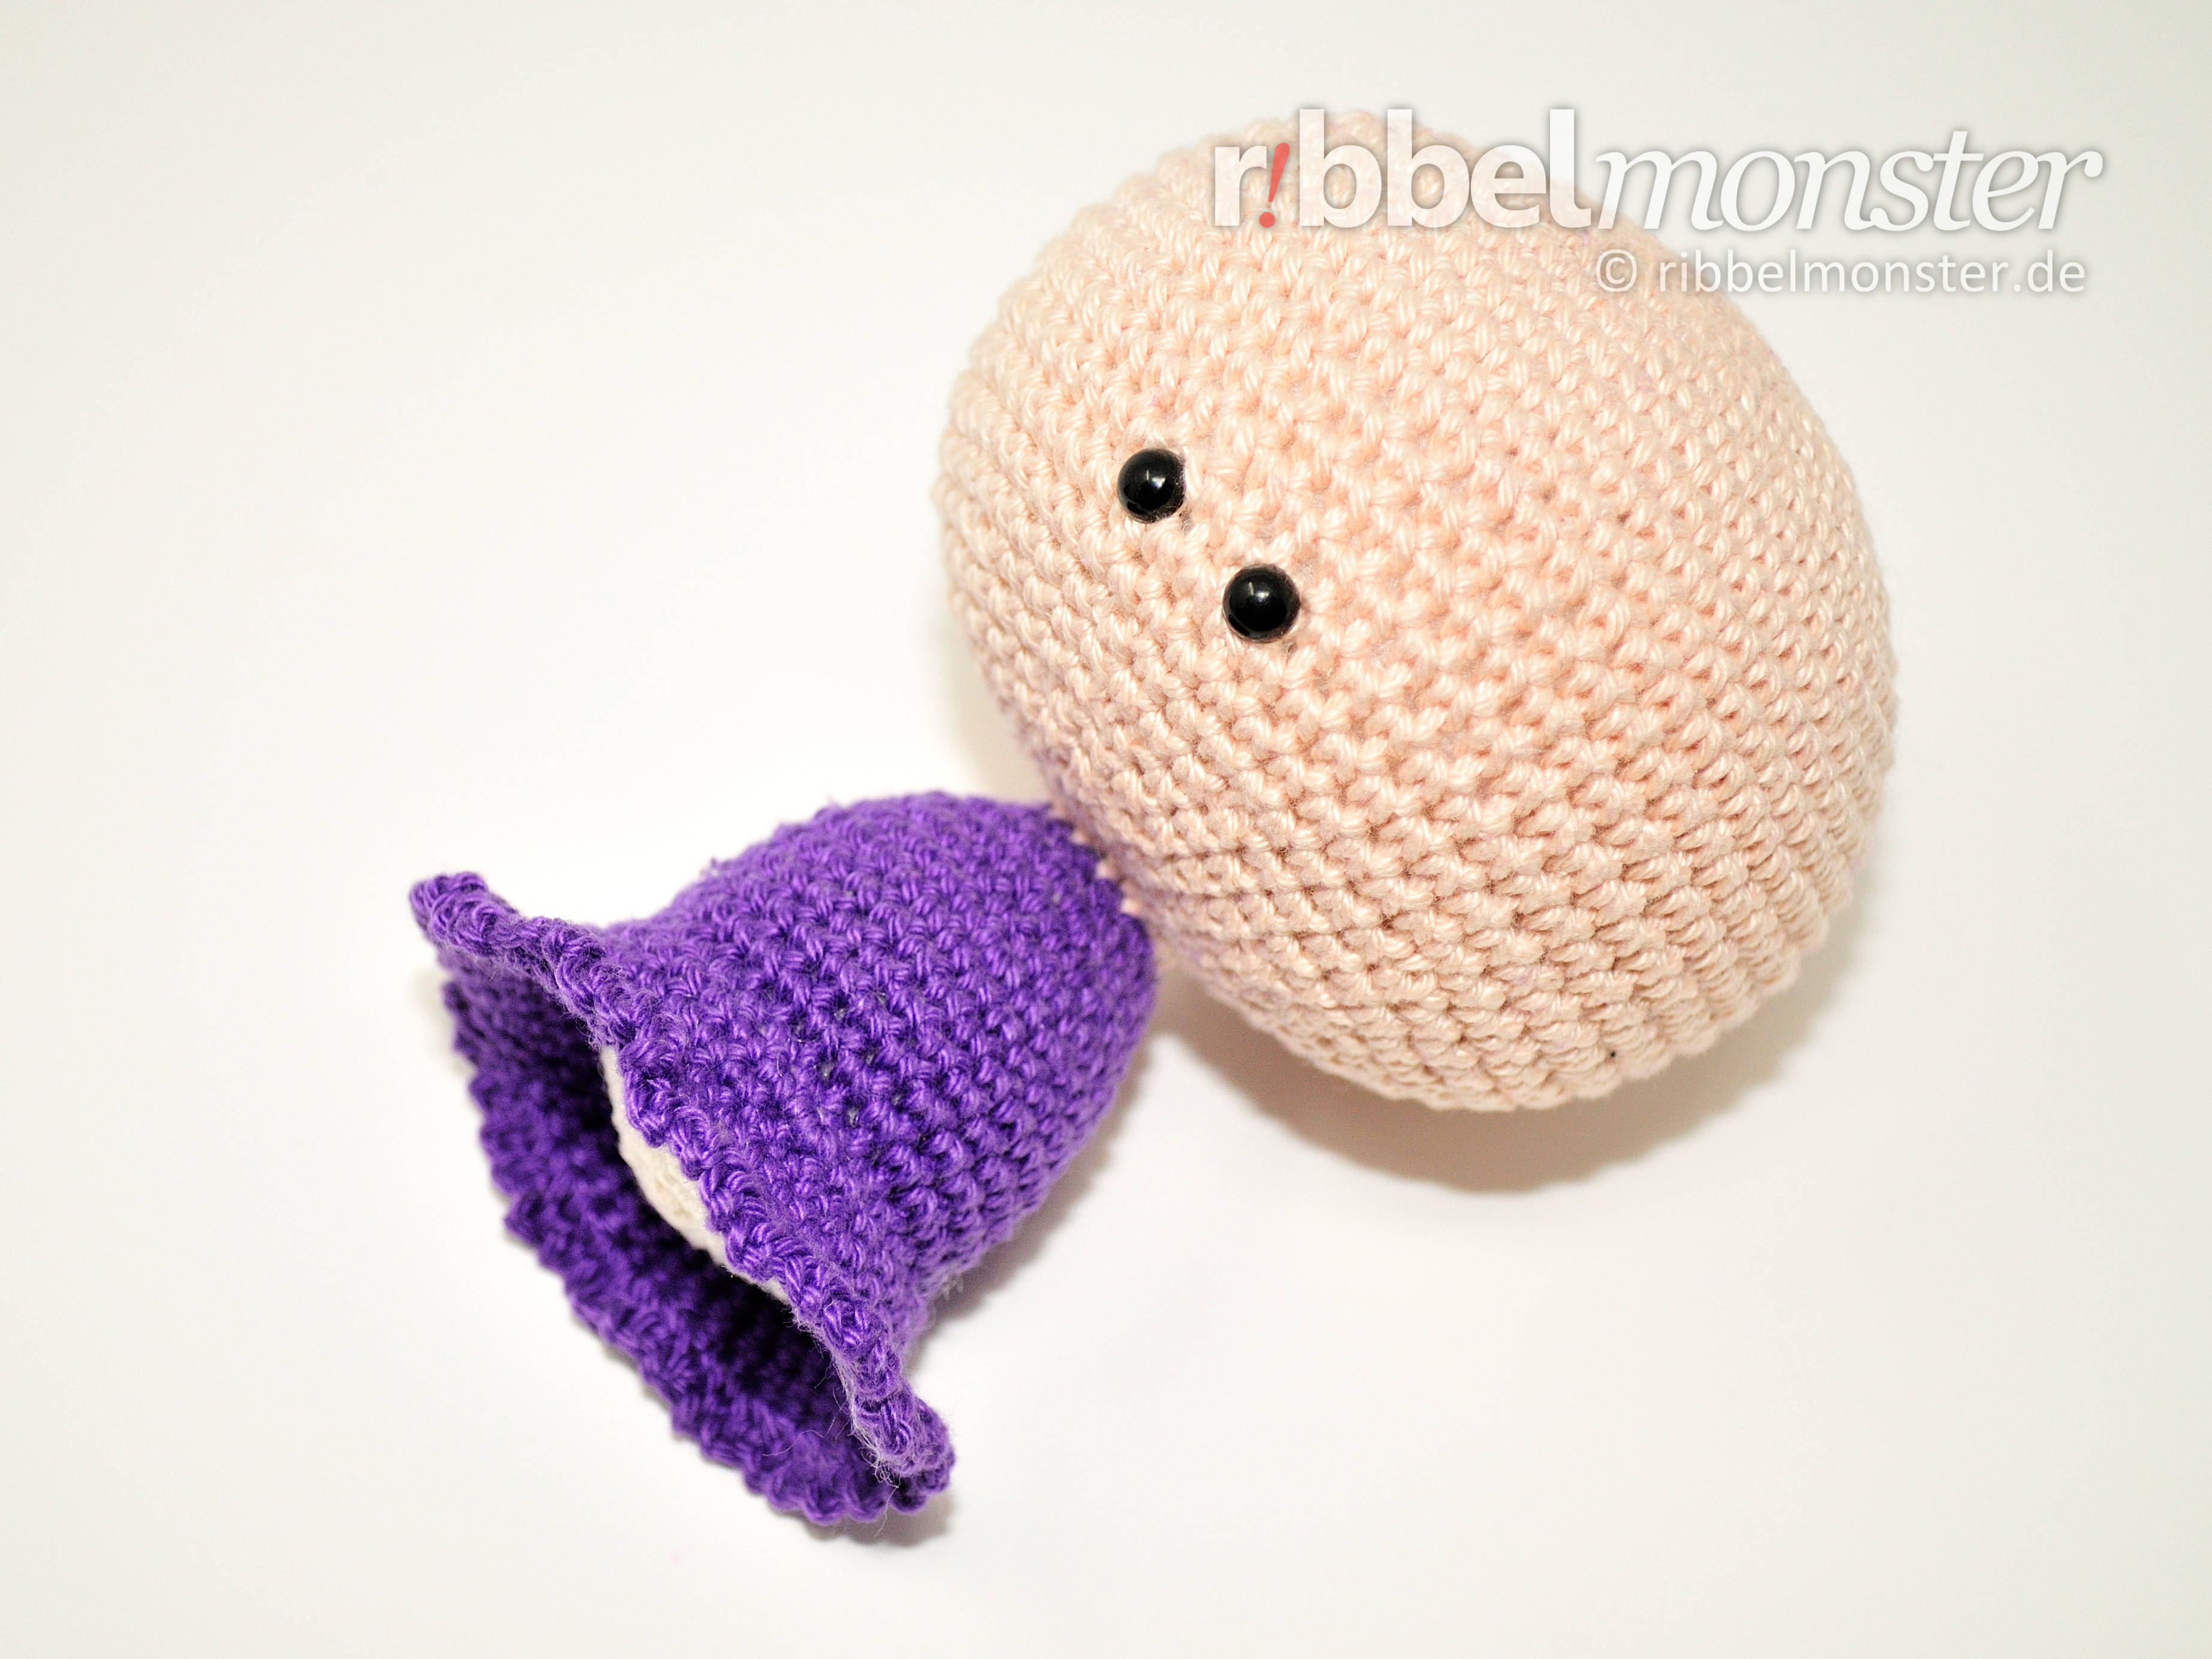
The head for the Crochet Witch is crocheted from top to bottom in spiral rounds with exclusively single crochet stitches (US!). The head is filled and stuffed properly. Then we do not cut the thread but continue with the upper part of the body.
Note! If you want to achieve a particularly beautiful result, you can hide regular increases and decreases by offsetting them a little. You can recognize regular increases by the phrase “double every … stitch,” and regular decreases by the phrase “crochet together every … and … stitch”. The stitch chart for spheres and circles might also be helpful for you. Additionally, you can apply a special crochet technique here for invisible decreases.
- skin-colored:
- 1st round:
- magic ring
- into the magic ring:
- 6 single crochet stitches (US!)
- = 6 stitches
- 2nd round:
- double every stitch
- = 12 stitches
- 3rd round:
- double every 2nd stitch
- = 18 stitches
- 4th round:
- double every 3rd stitch
- = 24 stitches
- 5th round:
- double every 4th stitch
- = 30 stitches
- 6th round:
- double every 5th stitch
- = 36 stitches
- 7th round:
- double every 6th stitch
- = 42 stitches
- 8th round:
- double every 7th stitch
- = 48 stitches
- 9th round:
- double every 8th stitch
- = 54 stitches
- 10th round:
- double every 9th stitch
- = 60 stitches
- 11th – 21st round:
- (= 11 rounds)
- every stitch one stitch
- = 60 stitches
- attach safety eyes, position:
- after the 19th round
- 2 stitches distance
- 22nd round:
- crochet together every 9th and 10th stitch
- = 54 stitches
- 23rd round:
- crochet together every 8th and 9th stitch
- = 48 stitches
- 24th round:
- crochet together every 7th and 8th stitch
- = 42 stitches
- 25th round:
- crochet together every 6th and 7th stitch
- = 36 stitches
- 26th round:
- crochet together every 5th and 6th stitch
- = 30 stitches
- 27th round:
- crochet together every 4th and 5th stitch
- = 24 stitches
- 28th round:
- crochet together every 3rd and 4th stitch
- = 18 stitches
- fill and stuff completely
- 29th round:
- crochet together every 2nd and 3rd stitch
- = 12 stitches
- do NOT cut yarn, continue with:
- Upper part of the body
Upper part of the body for Crochet Witch (1x)
The upper part of the body for the Crochet Witch is attached directly to the head. We work from top to bottom with exclusively single crochet stitches (US!) in spiral rounds. We also crochet the lower part of the body at the same time. Finally, we crochet a nice edge with single crochet stitches (US!) and chains.
Tip: Wenn du ein besonders schönes Ergebnis erhalten möchtest, kannst du die regelmäßigen Zunahmen durch Versetzen ein wenig verstecken. Dazu verwendest du einfach die Maschentabelle für Kugeln und Kreise.
(Redaktion: Block ersetzen)
- skin-colored:
- 30th round:
- every stitch one stitch
- = 12 stitches
- purple:
- 31st round:
- double every 4th stitch
- = 15 stitches
- 32nd round:
- double every 5th stitch
- = 18 stitches
- 33rd round:
- double every 6th stitch
- = 21 stitches
- 34th round:
- double every 7th stitch
- = 24 stitches
- 35th round:
- double every 8th stitch
- = 27 stitches
- 36th round:
- double every 9th stitch
- = 30 stitches
- 37th – 41st round:
- (= 5 rounds)
- every stitch one stitch
- = 30 stitches
In Round 42, the lower part and the upper part of the body are crocheted together. To do this, you place the lower part against the upper part, covering the opening of the upper part, with the beautiful side facing outward, and the next stitch to the left of the round transition. Now, for each stitch, you always insert the hook through both loops of the upper part and then the lower part. This way, both parts are firmly crocheted together. Just before you finish the round, the body is fully filled and stuffed. Then you simply continue with Round 43.
- 42nd round:
- every stitch one stitch
- = 30 stitches
- fill and stuff completely
- 43rd round:
- double every 10th stitch
- = 33 stitches
- 44th round:
- double every 11th stitch
- = 36 stitches
- 45th round:
- double every 12th stitch
- = 39 stitches
- 46th round:
- double every 13th stitch
- = 42 stitches
- 47th round:
- repeat 42x:
- 2 chain stitches
- 1x one single crochet stitch (US!) into one stitch
- = 42 stitches
- repeat 42x:
- cut yarn, pull through loop, secure and weave in the yarn end
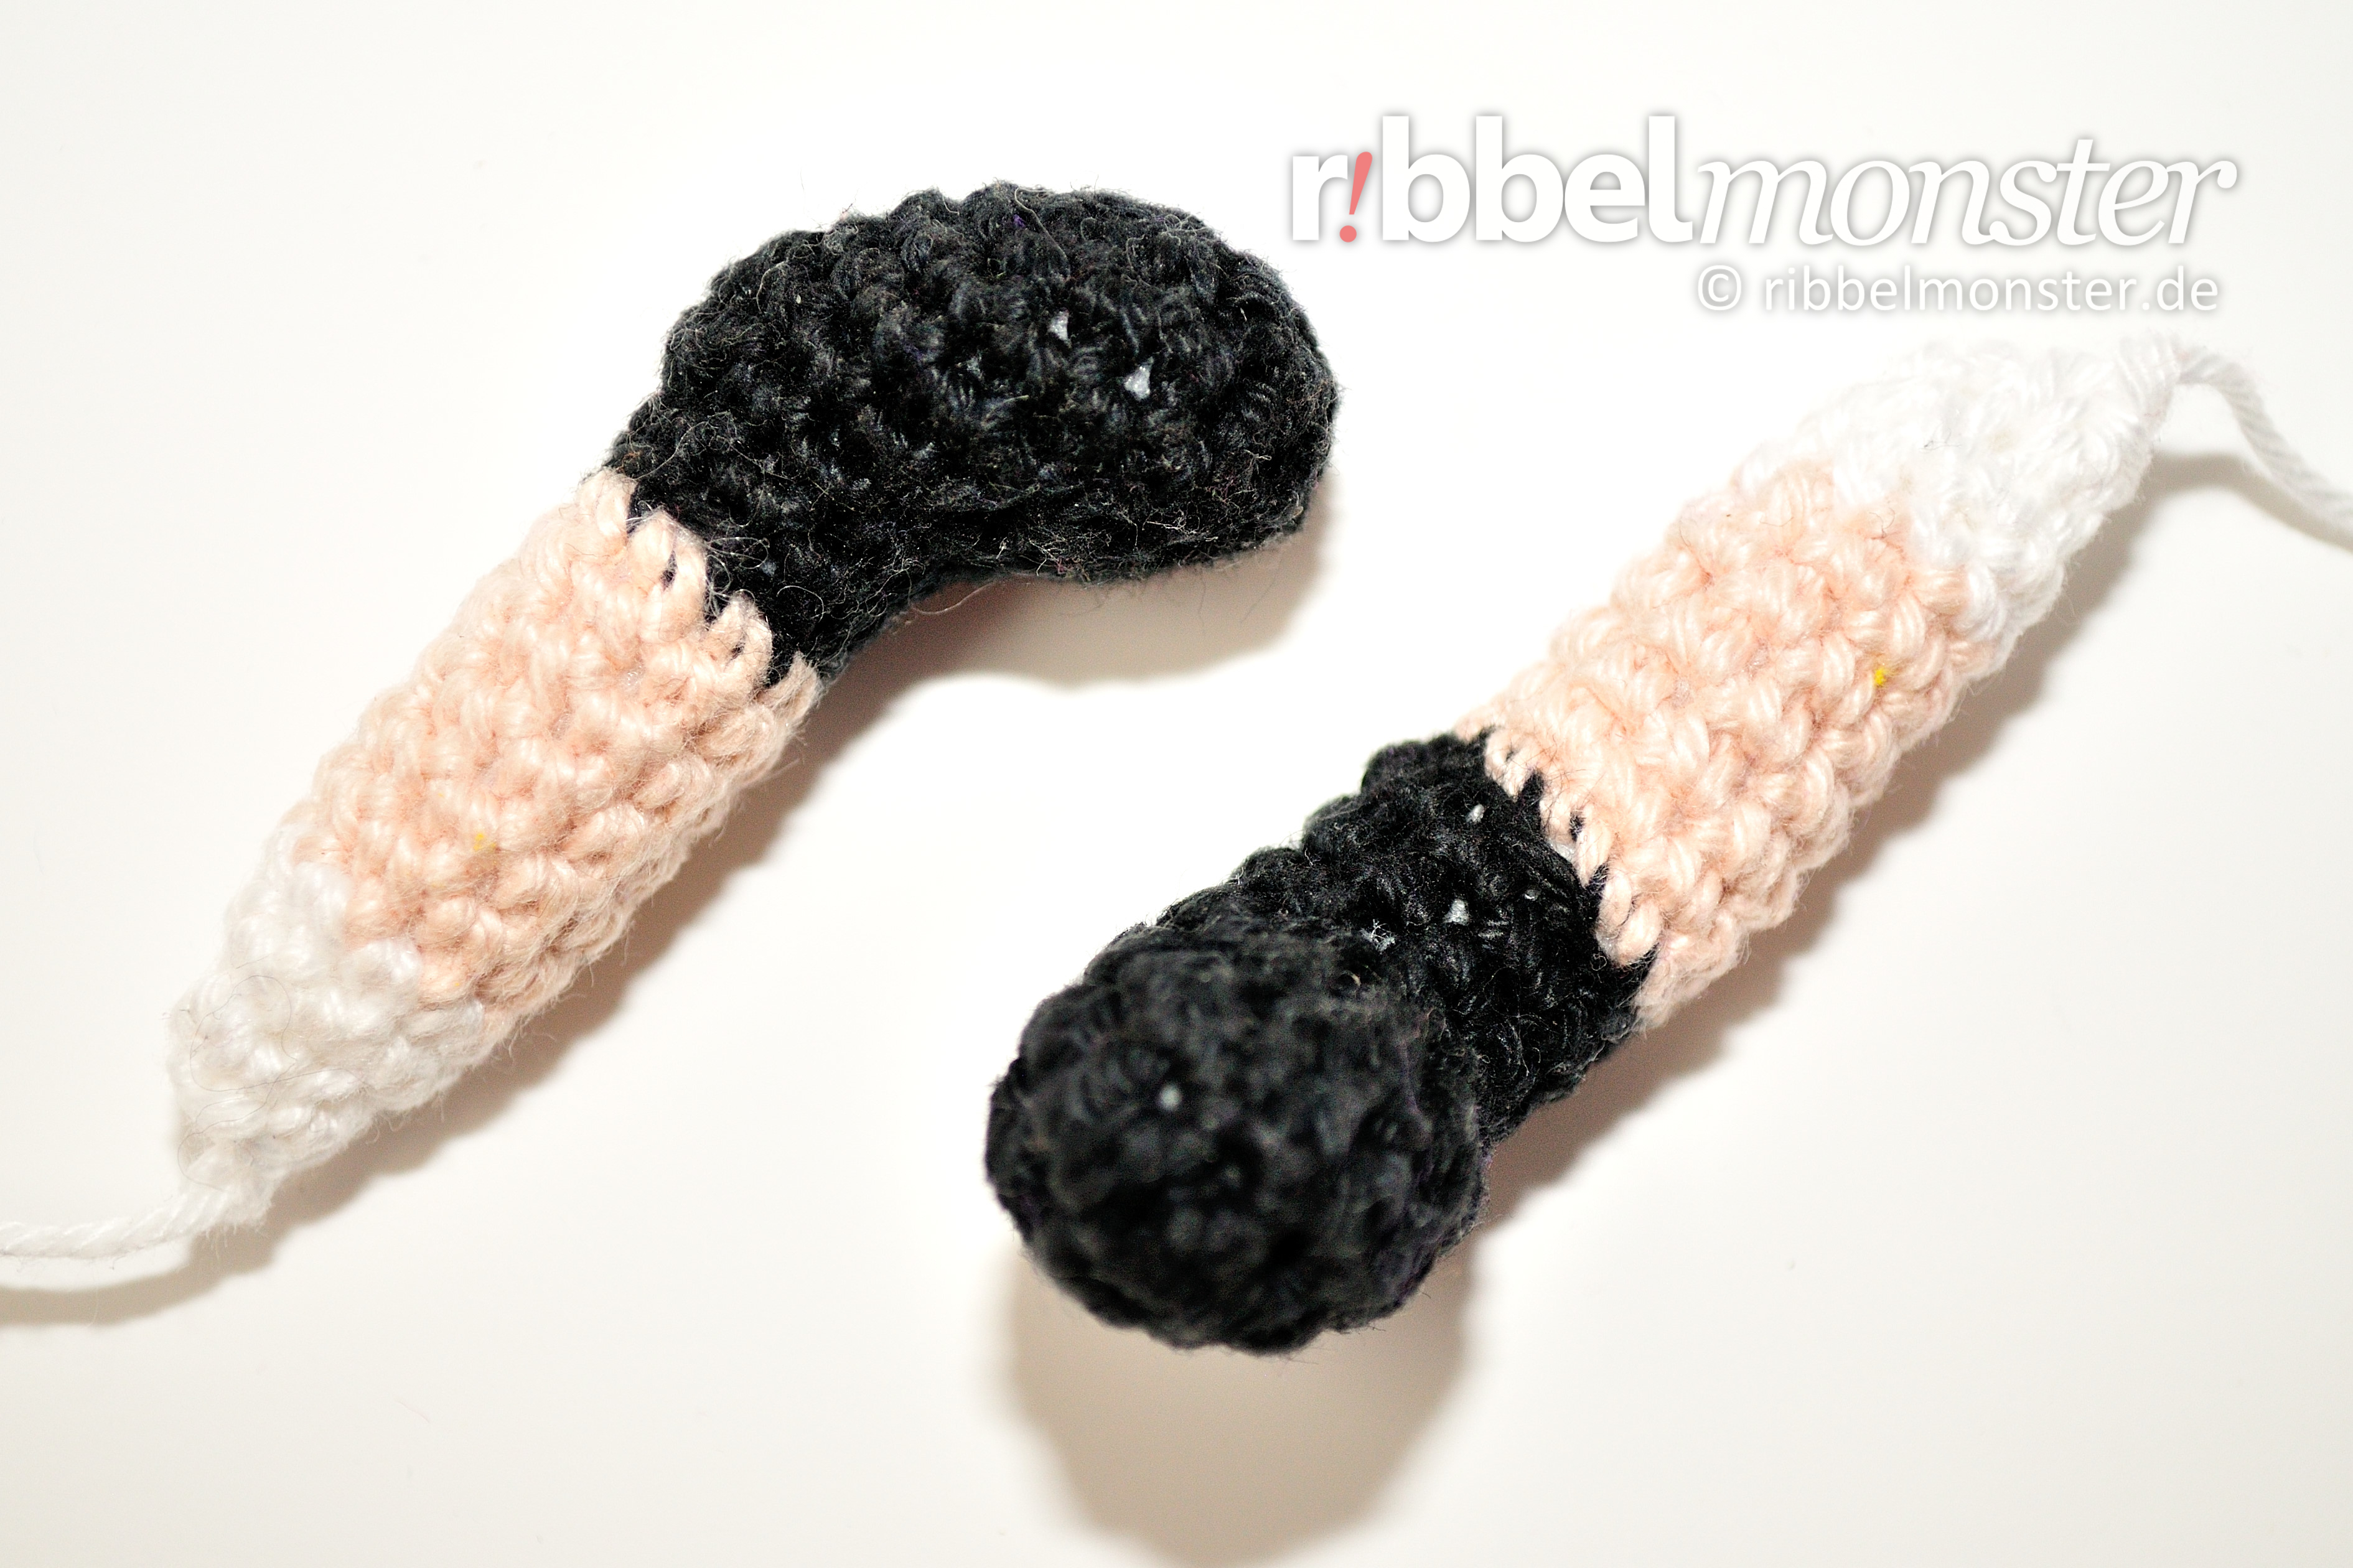
Arms for Crochet Witch (2x)
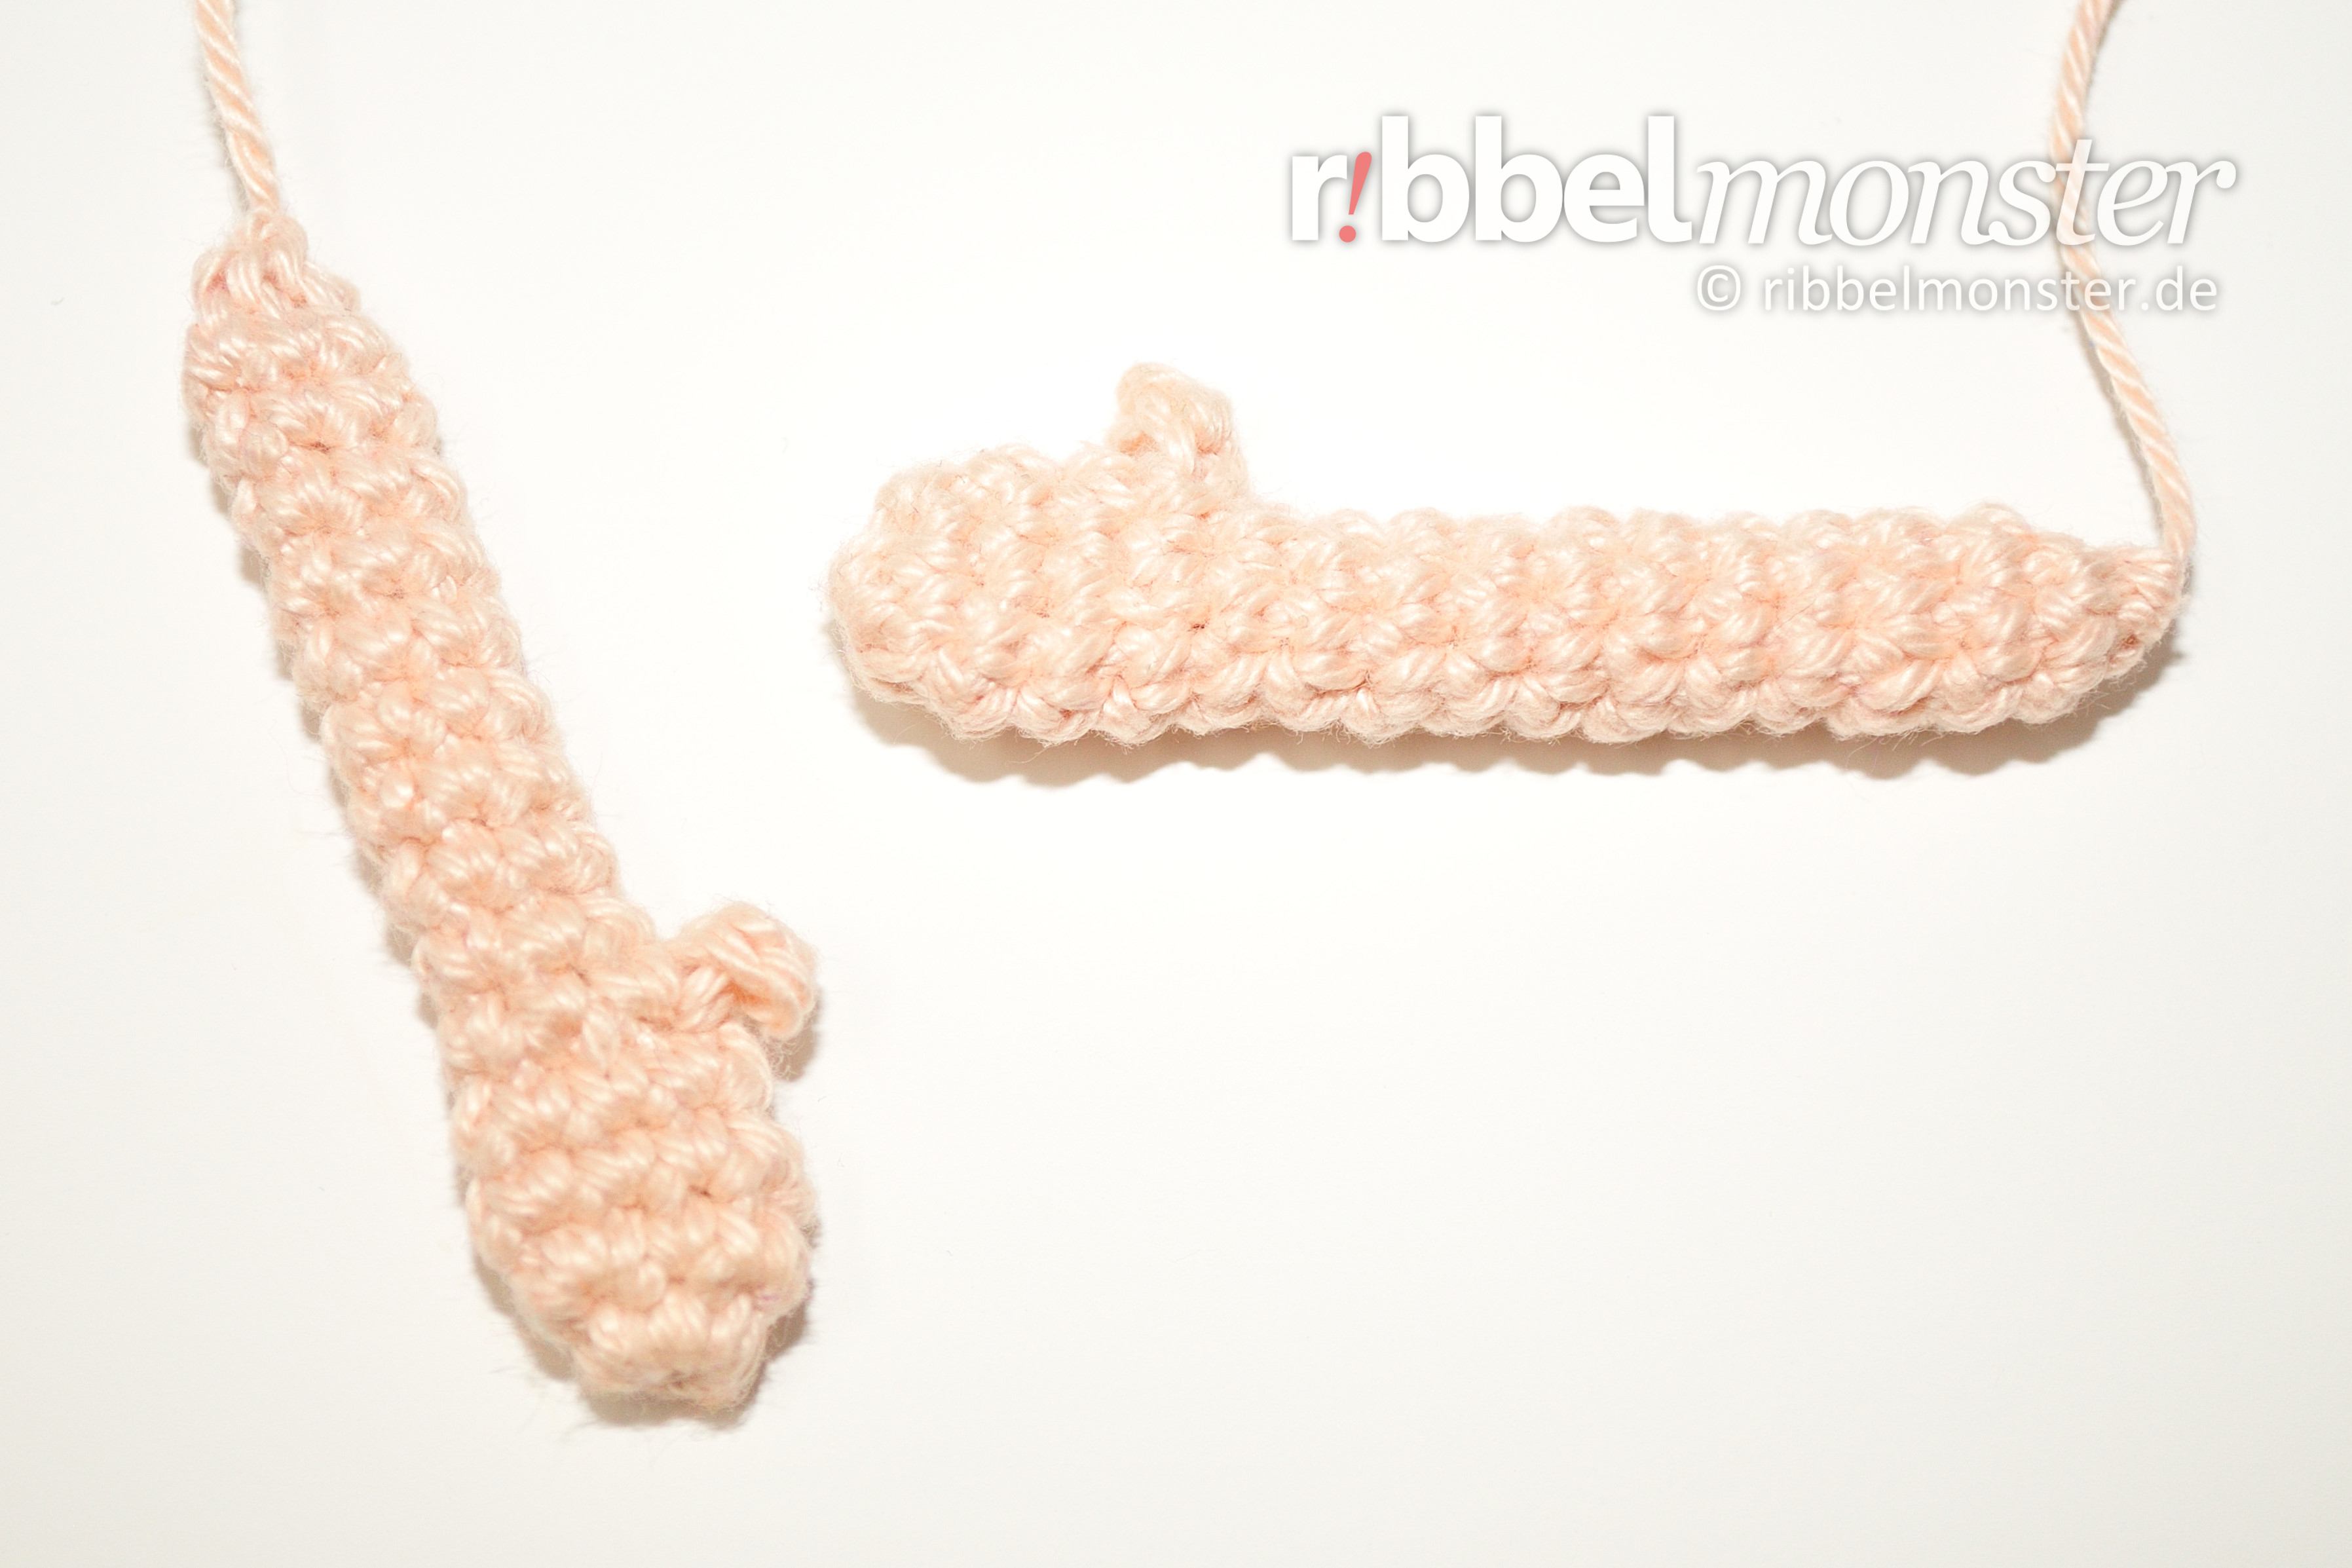
The arms for the Crochet Witch are crocheted from fingertips to shoulders in spiral rounds with exclusively single crochet stitches (US!). The arms are not filled but folded so that the thumbs lie on the inside of the palms.
Note! If you want to achieve a particularly beautiful result, you can hide regular increases and decreases by offsetting them a little. You can recognize regular increases by the phrase “double every … stitch,” and regular decreases by the phrase “crochet together every … and … stitch”. The stitch chart for spheres and circles might also be helpful for you. Additionally, you can apply a special crochet technique here for invisible decreases.
Note! If you want to create several nearly identical parts, it’s advisable to work on them consecutively on the same day. For larger parts, it’s even recommended to work on them simultaneously in stages. Our tension and tightness can vary from day to day, leading to visible differences.
- skin-colored:
- 1st round:
- magic ring
- into the magic ring:
- 6 single crochet stitches (US!)
- = 6 stitches
- 2nd round:
- double every 3rd stitch
- = 8 stitches
- 3rd round:
- every stitch one stitch
- = 8 stitches
- 4th round:
- 4x one single crochet stitch (US!) into one stitch
- Thumb:
- 2 chain stitches
- 1 turning chain stitch
- into the chain stitches:
- 1 slip stitch
- 1 single crochet stitch (US!)
- 4x one single crochet stitch (US!) into one stitch
- = 8 stitches
- 5th round:
- 1x one single crochet stitch (US!) into one stitch
- 1x crochet together two stitches with one single crochet stitch (US!)
- 1x one single crochet stitch (US!) into one stitch
- place the thumb outward and skip
- 1x one single crochet stitch (US!) into one stitch
- 1x crochet together two stitches with one single crochet stitch (US!)
- 1x one single crochet stitch (US!) into one stitch
- = 6 stitches
- 6th – 16th round:
- (= 11 rounds)
- every stitch one stitch
- = 6 stitches
- cut yarn generously, pull through loop, do NOT cut the yarn end, it will be used later for sewing
Sleeves for Crochet Witch (2x)
The sleeves for the Crochet Witch are crocheted from the shoulders downward with single crochet stitches (US!) in spiral rounds. Finally, we crochet a nice edge with single crochet stitches (US!) and chains. The sleeves are not filled but later pulled over the arms.
Tip: Wenn du ein besonders schönes Ergebnis erhalten möchtest, kannst du die regelmäßigen Zunahmen durch Versetzen ein wenig verstecken. Dazu verwendest du einfach die Maschentabelle für Kugeln und Kreise.
(Redaktion: Block ersetzen)
Note! If you want to create several nearly identical parts, it’s advisable to work on them consecutively on the same day. For larger parts, it’s even recommended to work on them simultaneously in stages. Our tension and tightness can vary from day to day, leading to visible differences.
- purple:
- 1st round:
- magic ring
- into the magic ring:
- 6 single crochet stitches (US!)
- = 6 stitches
- 2nd round:
- double every 6th stitch
- = 7 stitches
- 3rd round:
- double every 7th stitch
- = 8 stitches
- 4th round:
- double every 8th stitch
- = 9 stitches
- 5th round:
- double every 9th stitch
- = 10 stitches
- 6th round:
- double every 10th stitch
- = 11 stitches
- 7th round:
- double every 11th stitch
- = 12 stitches
- 8th round:
- double every 12th stitch
- = 13 stitches
- 9th round:
- double every 13th stitch
- = 14 stitches
- 10th round:
- double every 14th stitch
- = 15 stitches
- 11th round:
- repeat 15x:
- 2 chain stitches
- 1x one single crochet stitch (US!) into one stitch
- = 15 stitches
- repeat 15x:
- cut yarn, pull through loop, secure and weave in the yarn end
Legs for Crochet Witch (2x)
The legs for the Crochet Witch are crocheted from the toes to the hips in spiral rounds with exclusively single crochet stitches (US!). The feet are properly filled, while the legs remain a bit looser so that they can be moved easily later.
Note! If you want to achieve a particularly beautiful result, you can hide regular decreases by offsetting them a little. You can recognize regular decreases by the phrase “crochet together every … and … stitch”. The stitch chart for spheres and circles might also be helpful for you. Additionally, you can apply a special crochet technique here for invisible decreases.
Note! If you want to create several nearly identical parts, it’s advisable to work on them consecutively on the same day. For larger parts, it’s even recommended to work on them simultaneously in stages. Our tension and tightness can vary from day to day, leading to visible differences.
- black:
- 1st round:
- magic ring
- into the magic ring:
- 6 single crochet stitches (US!)
- = 6 stitches
- 2nd round:
- 1x two single crochet stitches (US!) into one stitch
- 1x one single crochet stitch (US!) into one stitch
- 2x two half double crochet stitches (US!) into one stitch
- 1x one single crochet stitch (US!) into one stitch
- 1x two single crochet stitches (US!) into one stitch
- = 10 stitches
- 3rd round:
- 1x two single crochet stitches (US!) into one stitch
- 3x one single crochet stitch (US!) into one stitch
- 3x two half double crochet stitches (US!) into one stitch
- 2x one single crochet stitch (US!) into one stitch
- 1x two single crochet stitches (US!) into one stitch
- = 15 stitches
- 4th round:
- 5x one single crochet stitch (US!) into one stitch
- 5x one half double crochet stitch (US!) into one stitch
- 5x one single crochet stitch (US!) into one stitch
- = 15 stitches
- 5th round:
- 5x one single crochet stitch (US!) into one stitch
- 3x crochet together two stitches with one half double crochet stitch (US!)
- 4x one single crochet stitch (US!) into one stitch
- = 12 stitches
- 6th round:
- 1x three half double crochet stitches (US!) into one stitch
- 3x one single crochet stitch (US!) into one stitch
- 3x crochet together two stitches with one single crochet stitch (US!)
- 2x one single crochet stitch (US!) into one stitch
- = 11 stitches
- 7th round:
- 2x crochet together two stitches with one half double crochet stitch (US!)
- 7x one single crochet stitch (US!) into one stitch
- = 9 stitches
- 8th round:
- every stitch one stitch
- = 9 stitches
- skin-colored:
- 9th – 14th round:
- (= 6 rounds)
- every stitch one stitch
- = 9 stitches
- white:
- 15th + 16th round:
- (= 2 rounds)
- every stitch one stitch
- = 9 stitches
- 17th round:
- crochet together every 2nd and 3rd stitch
- = 6 stitches
- cut yarn generously, pull through loop, do NOT cut the yarn end, it will be used later for sewing
Ears for Crochet Witch (2x)
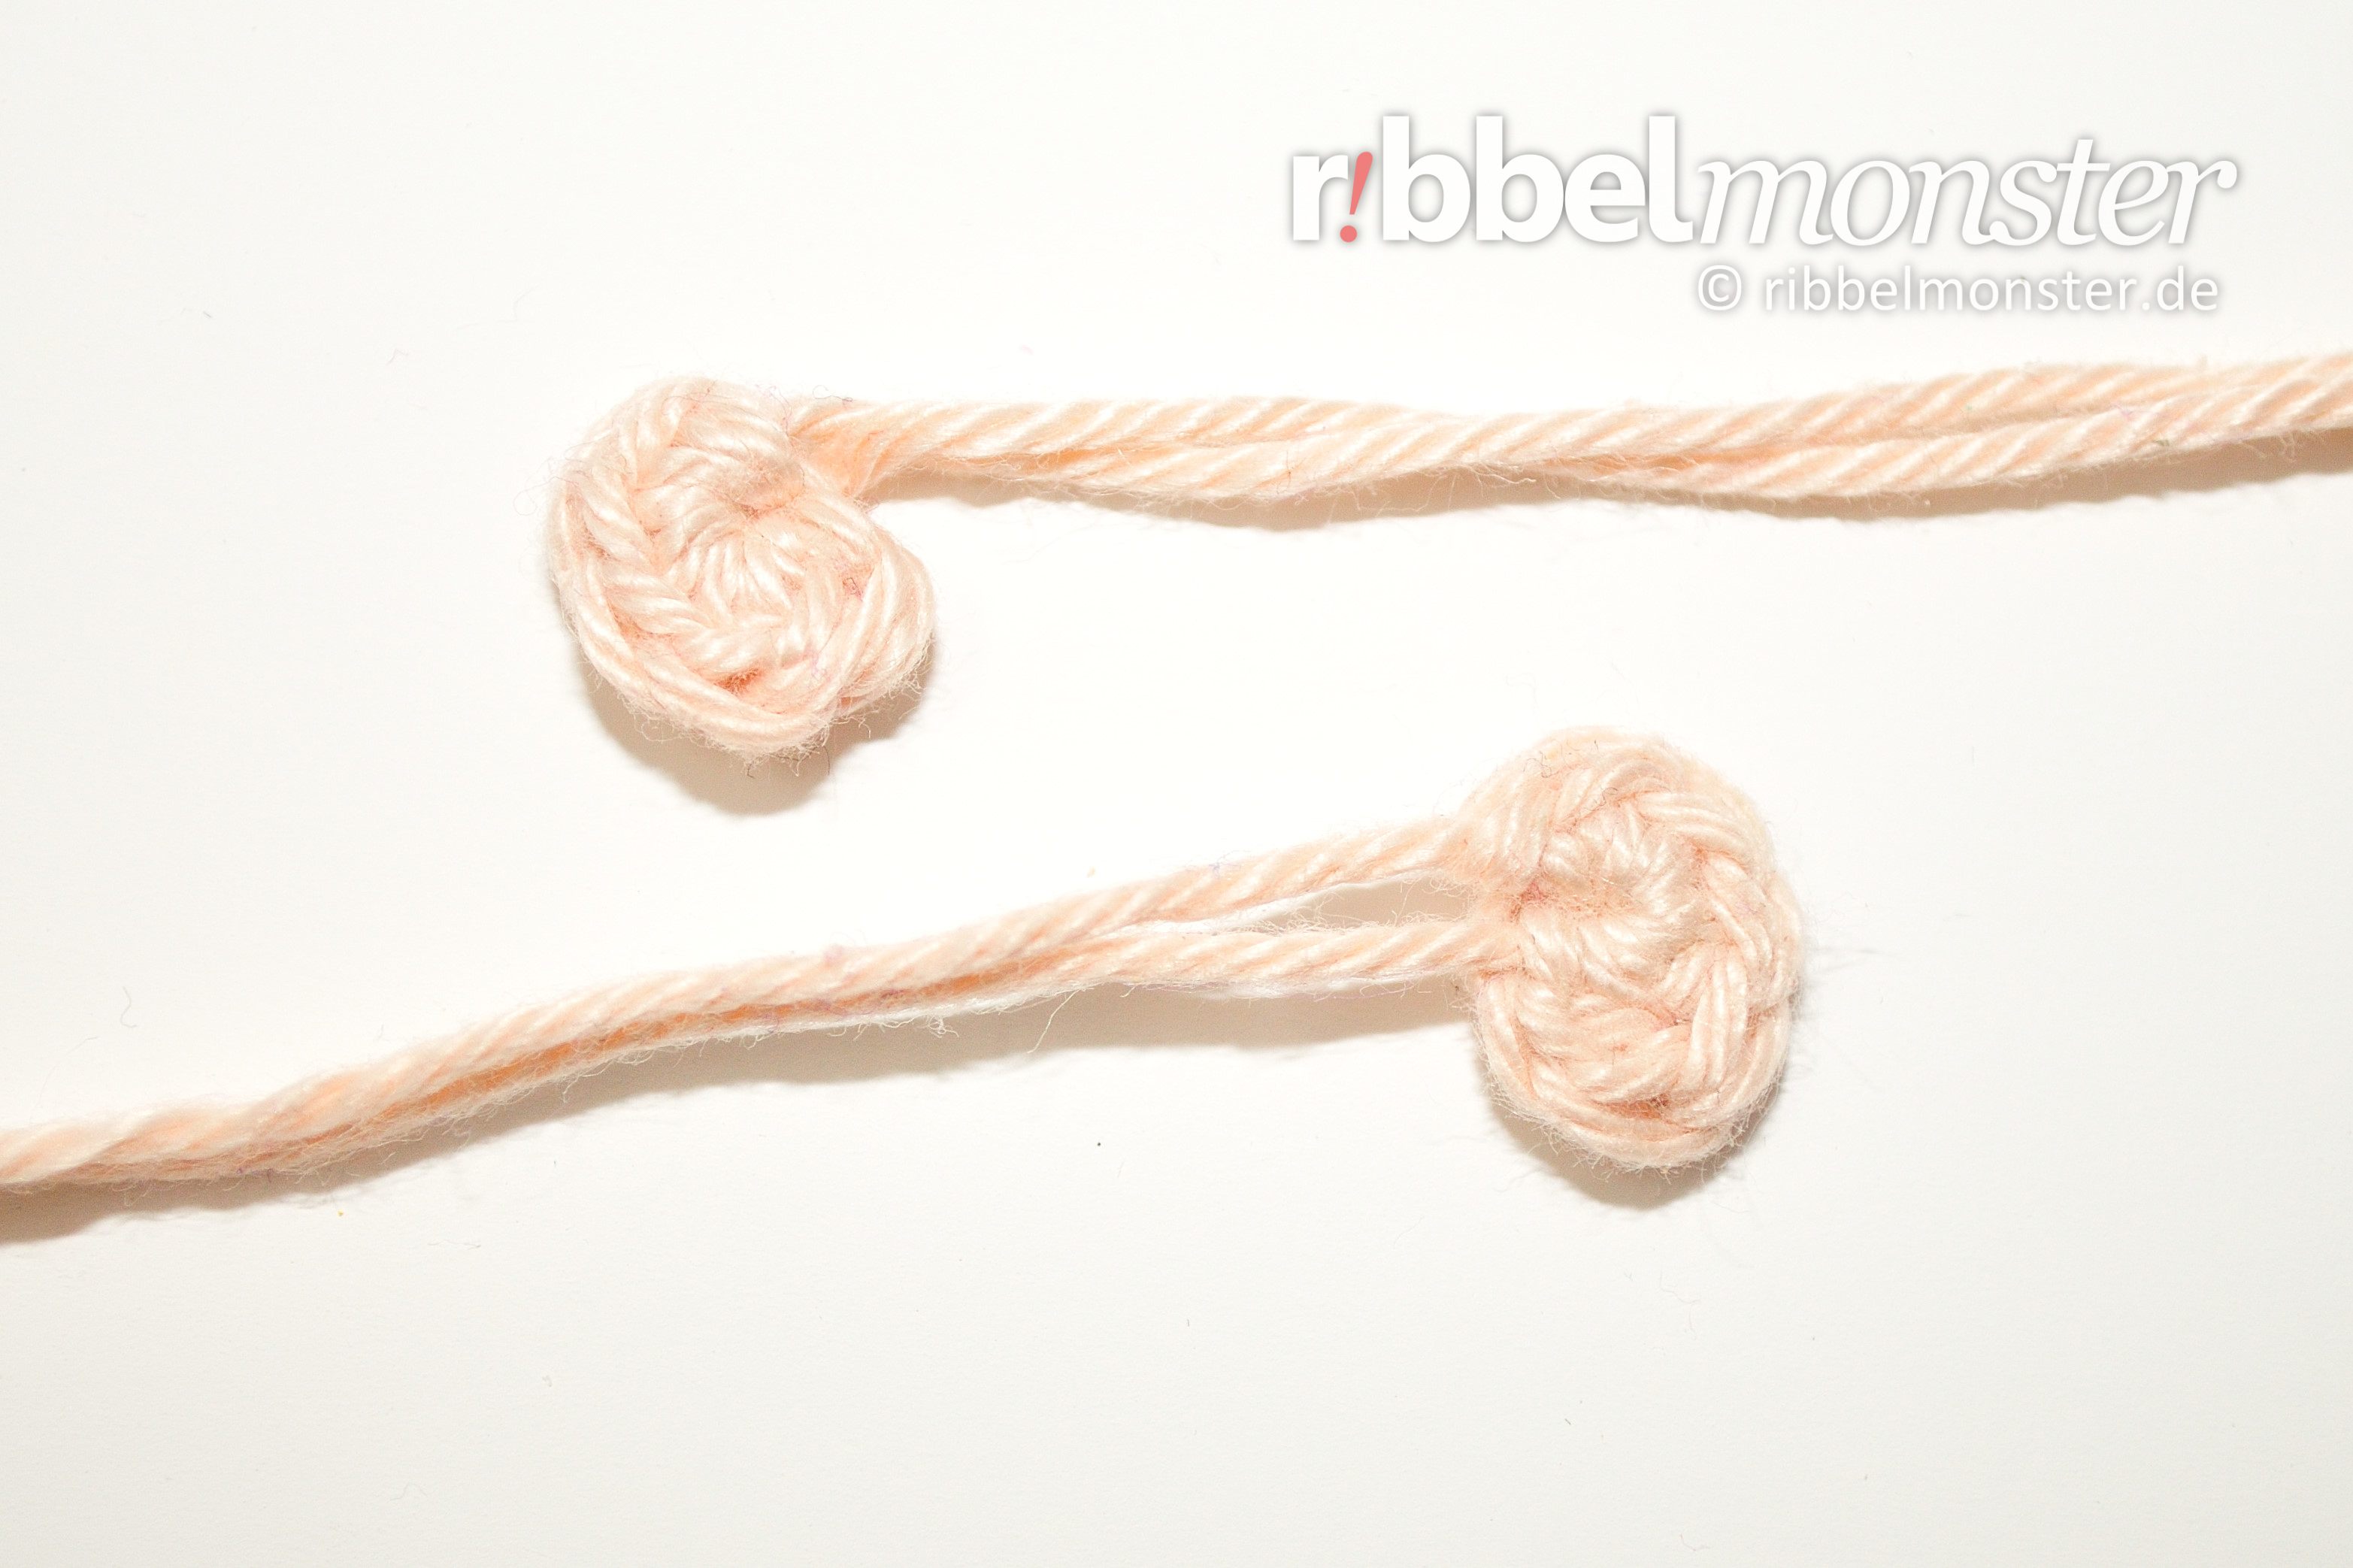
Next, let’s crochet the ears for the Crochet Witch. The ears are crocheted in just one round and later knotted to the head with the thread ends.
Note! If you want to create several nearly identical parts, it’s advisable to work on them consecutively on the same day. For larger parts, it’s even recommended to work on them simultaneously in stages. Our tension and tightness can vary from day to day, leading to visible differences.
- skin-colored:
- Left Ear:
- magic ring
- into the magic ring:
- 1 double crochet stitch (US!)
- 1 half double crochet stitch (US!)
- 3 single crochet stitches (US!)
- 1 slip stitch
- = 6 stitches
- Right Ear:
- magic ring
- into the magic ring:
- 3 single crochet stitches (US!)
- 1 half double crochet stitch (US!)
- 1 double crochet stitch (US!)
- 1 slip stitch
- = 6 stitches
- cut yarn generously, pull through loop, do NOT cut the yarn end, it will be used later for attaching
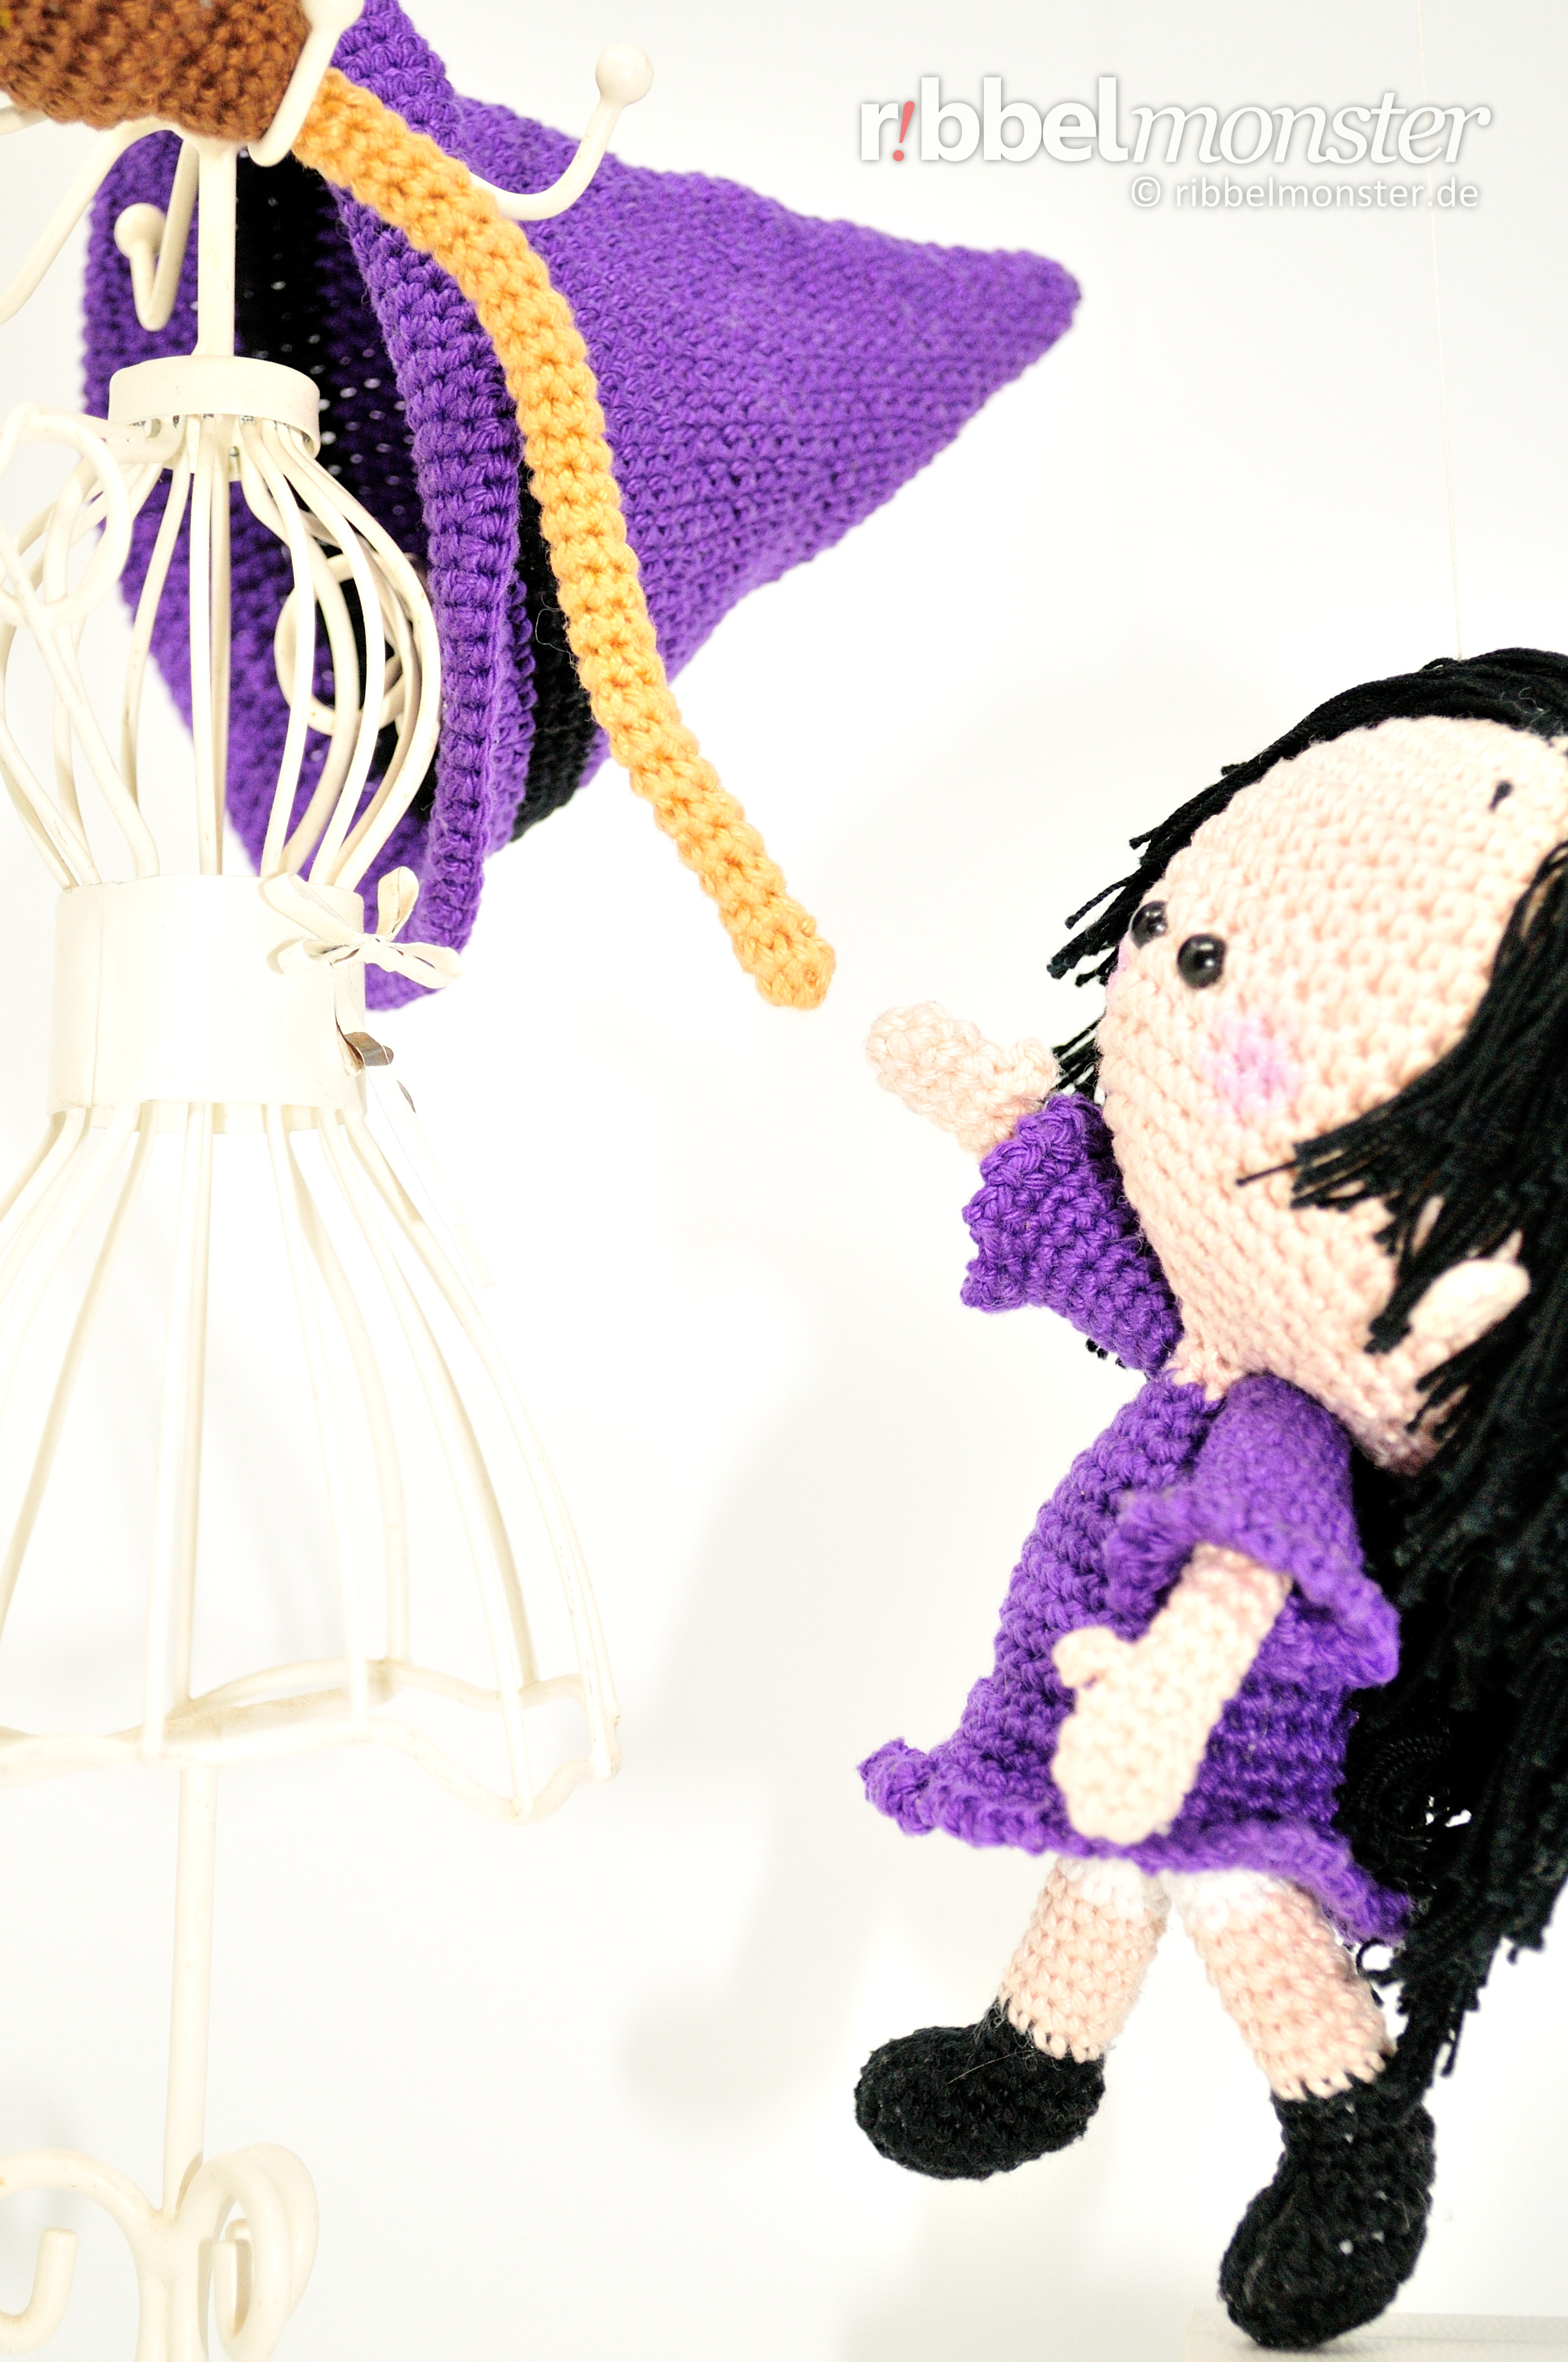
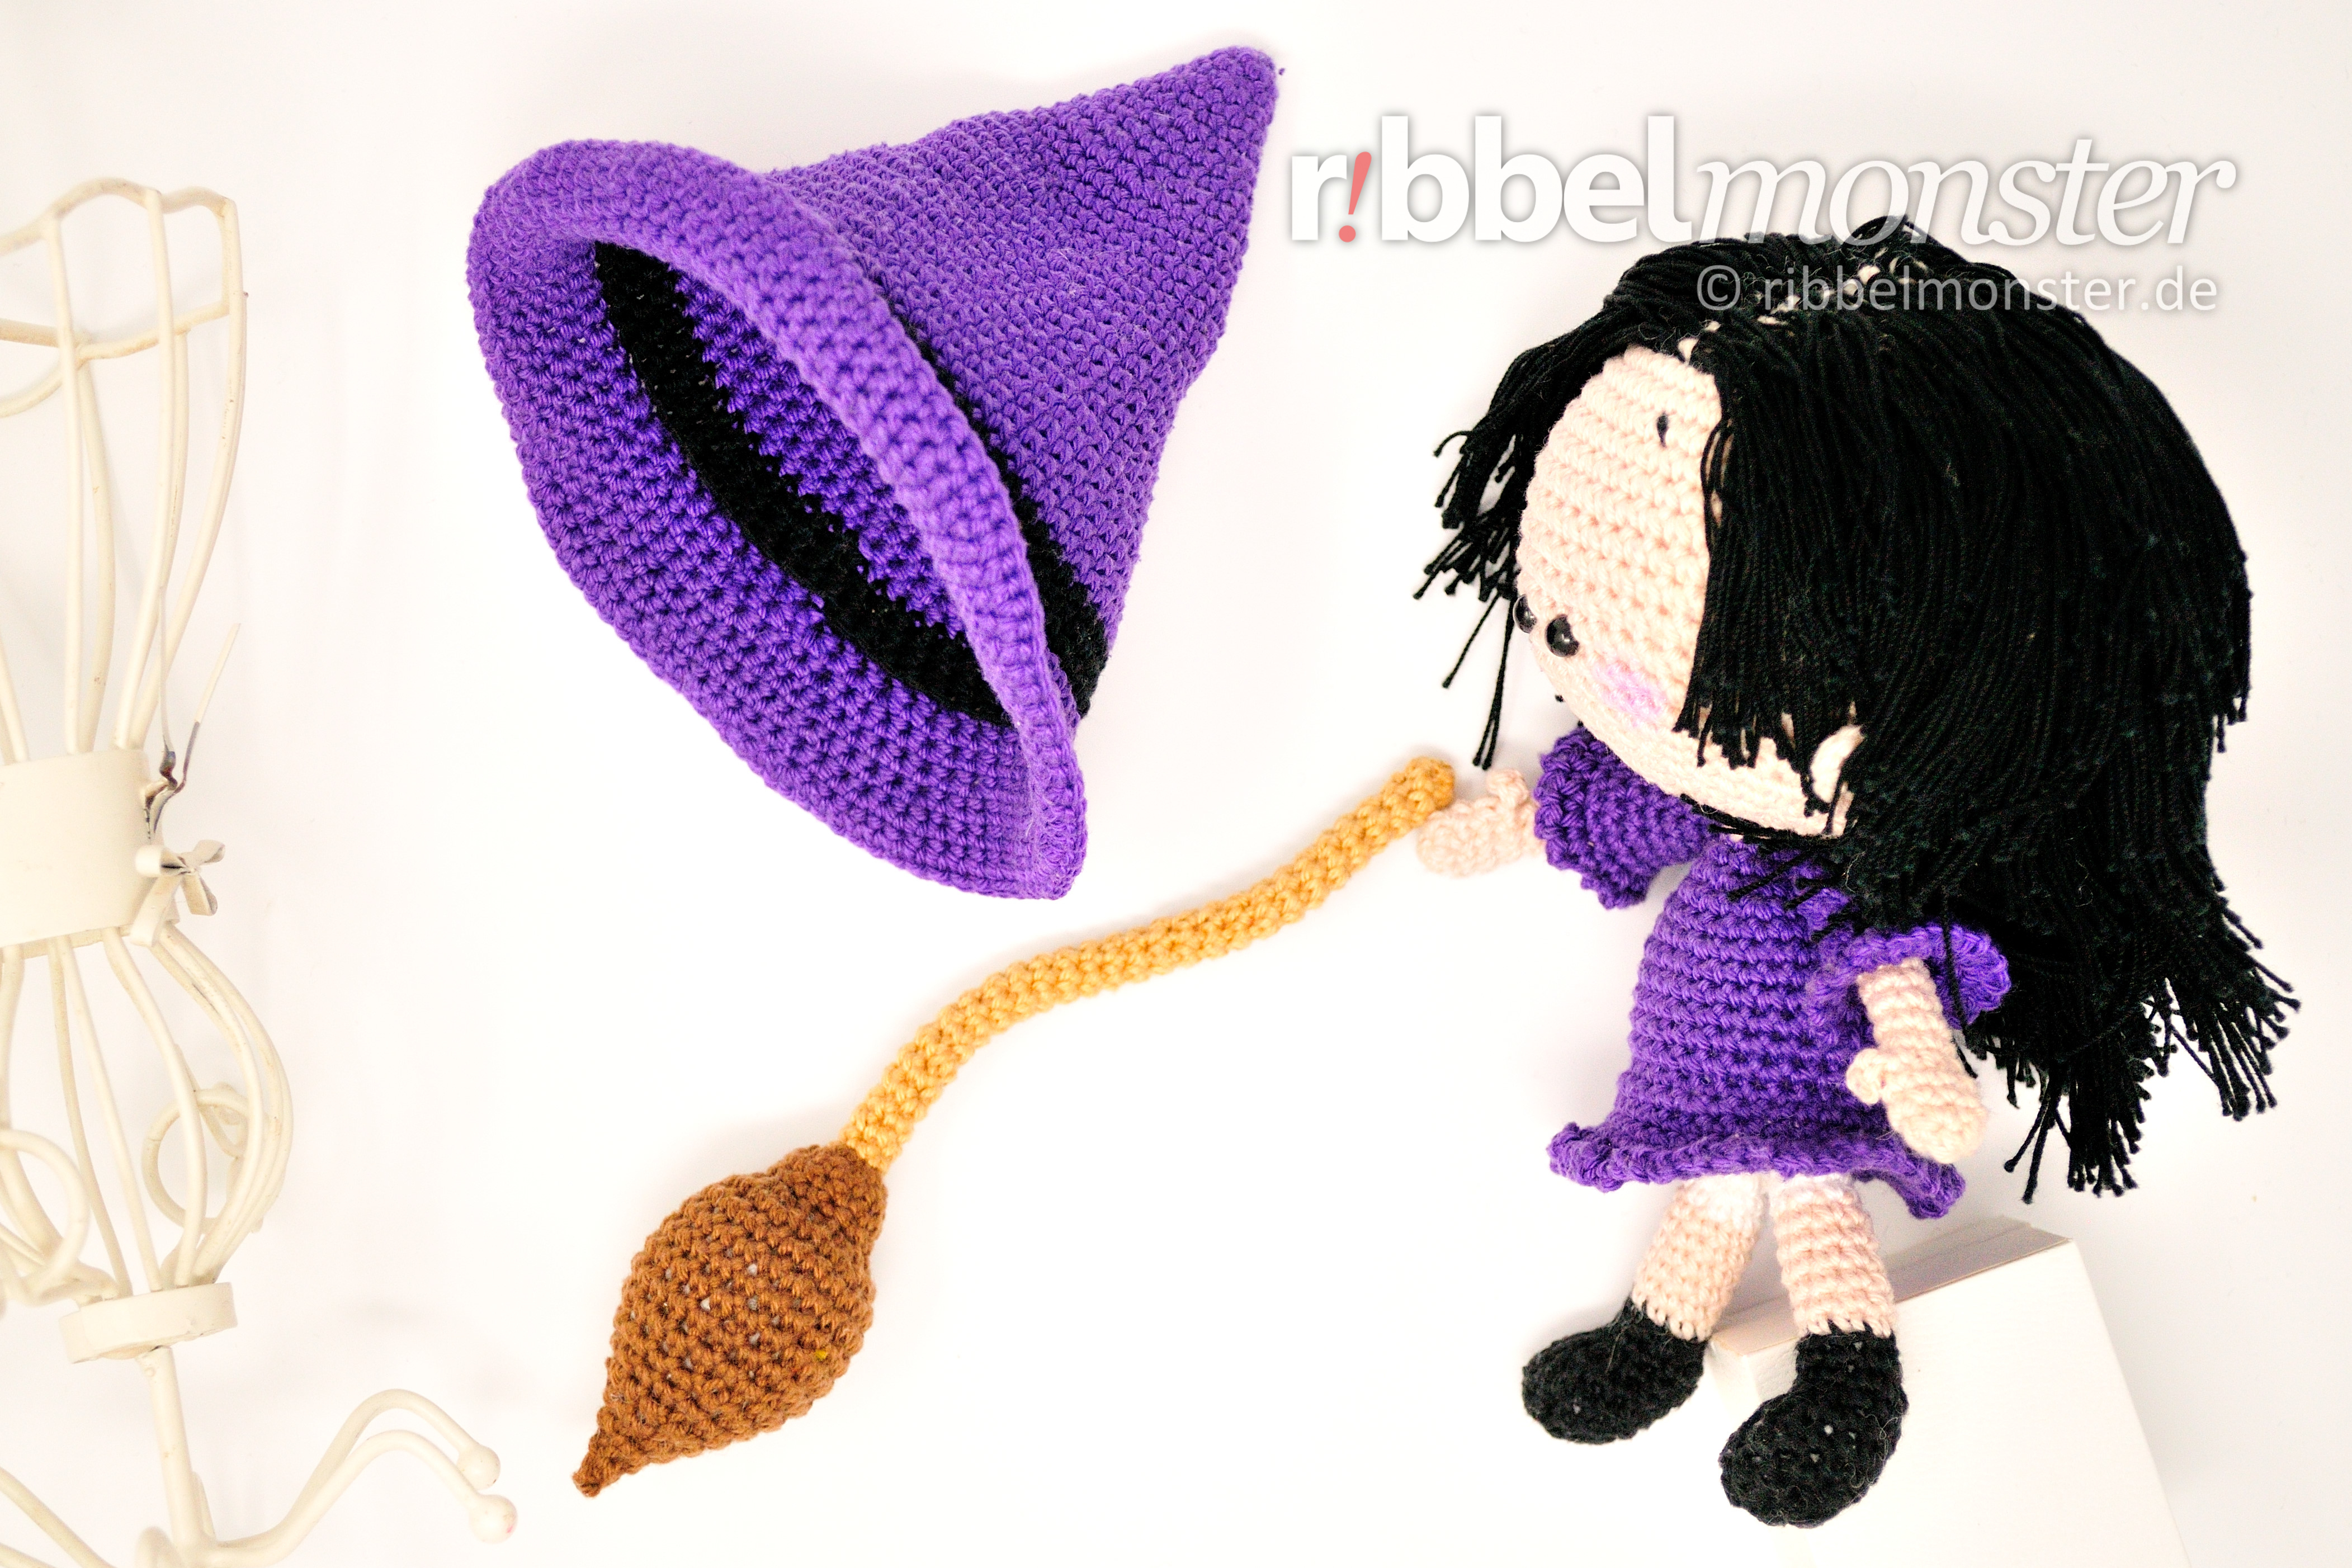
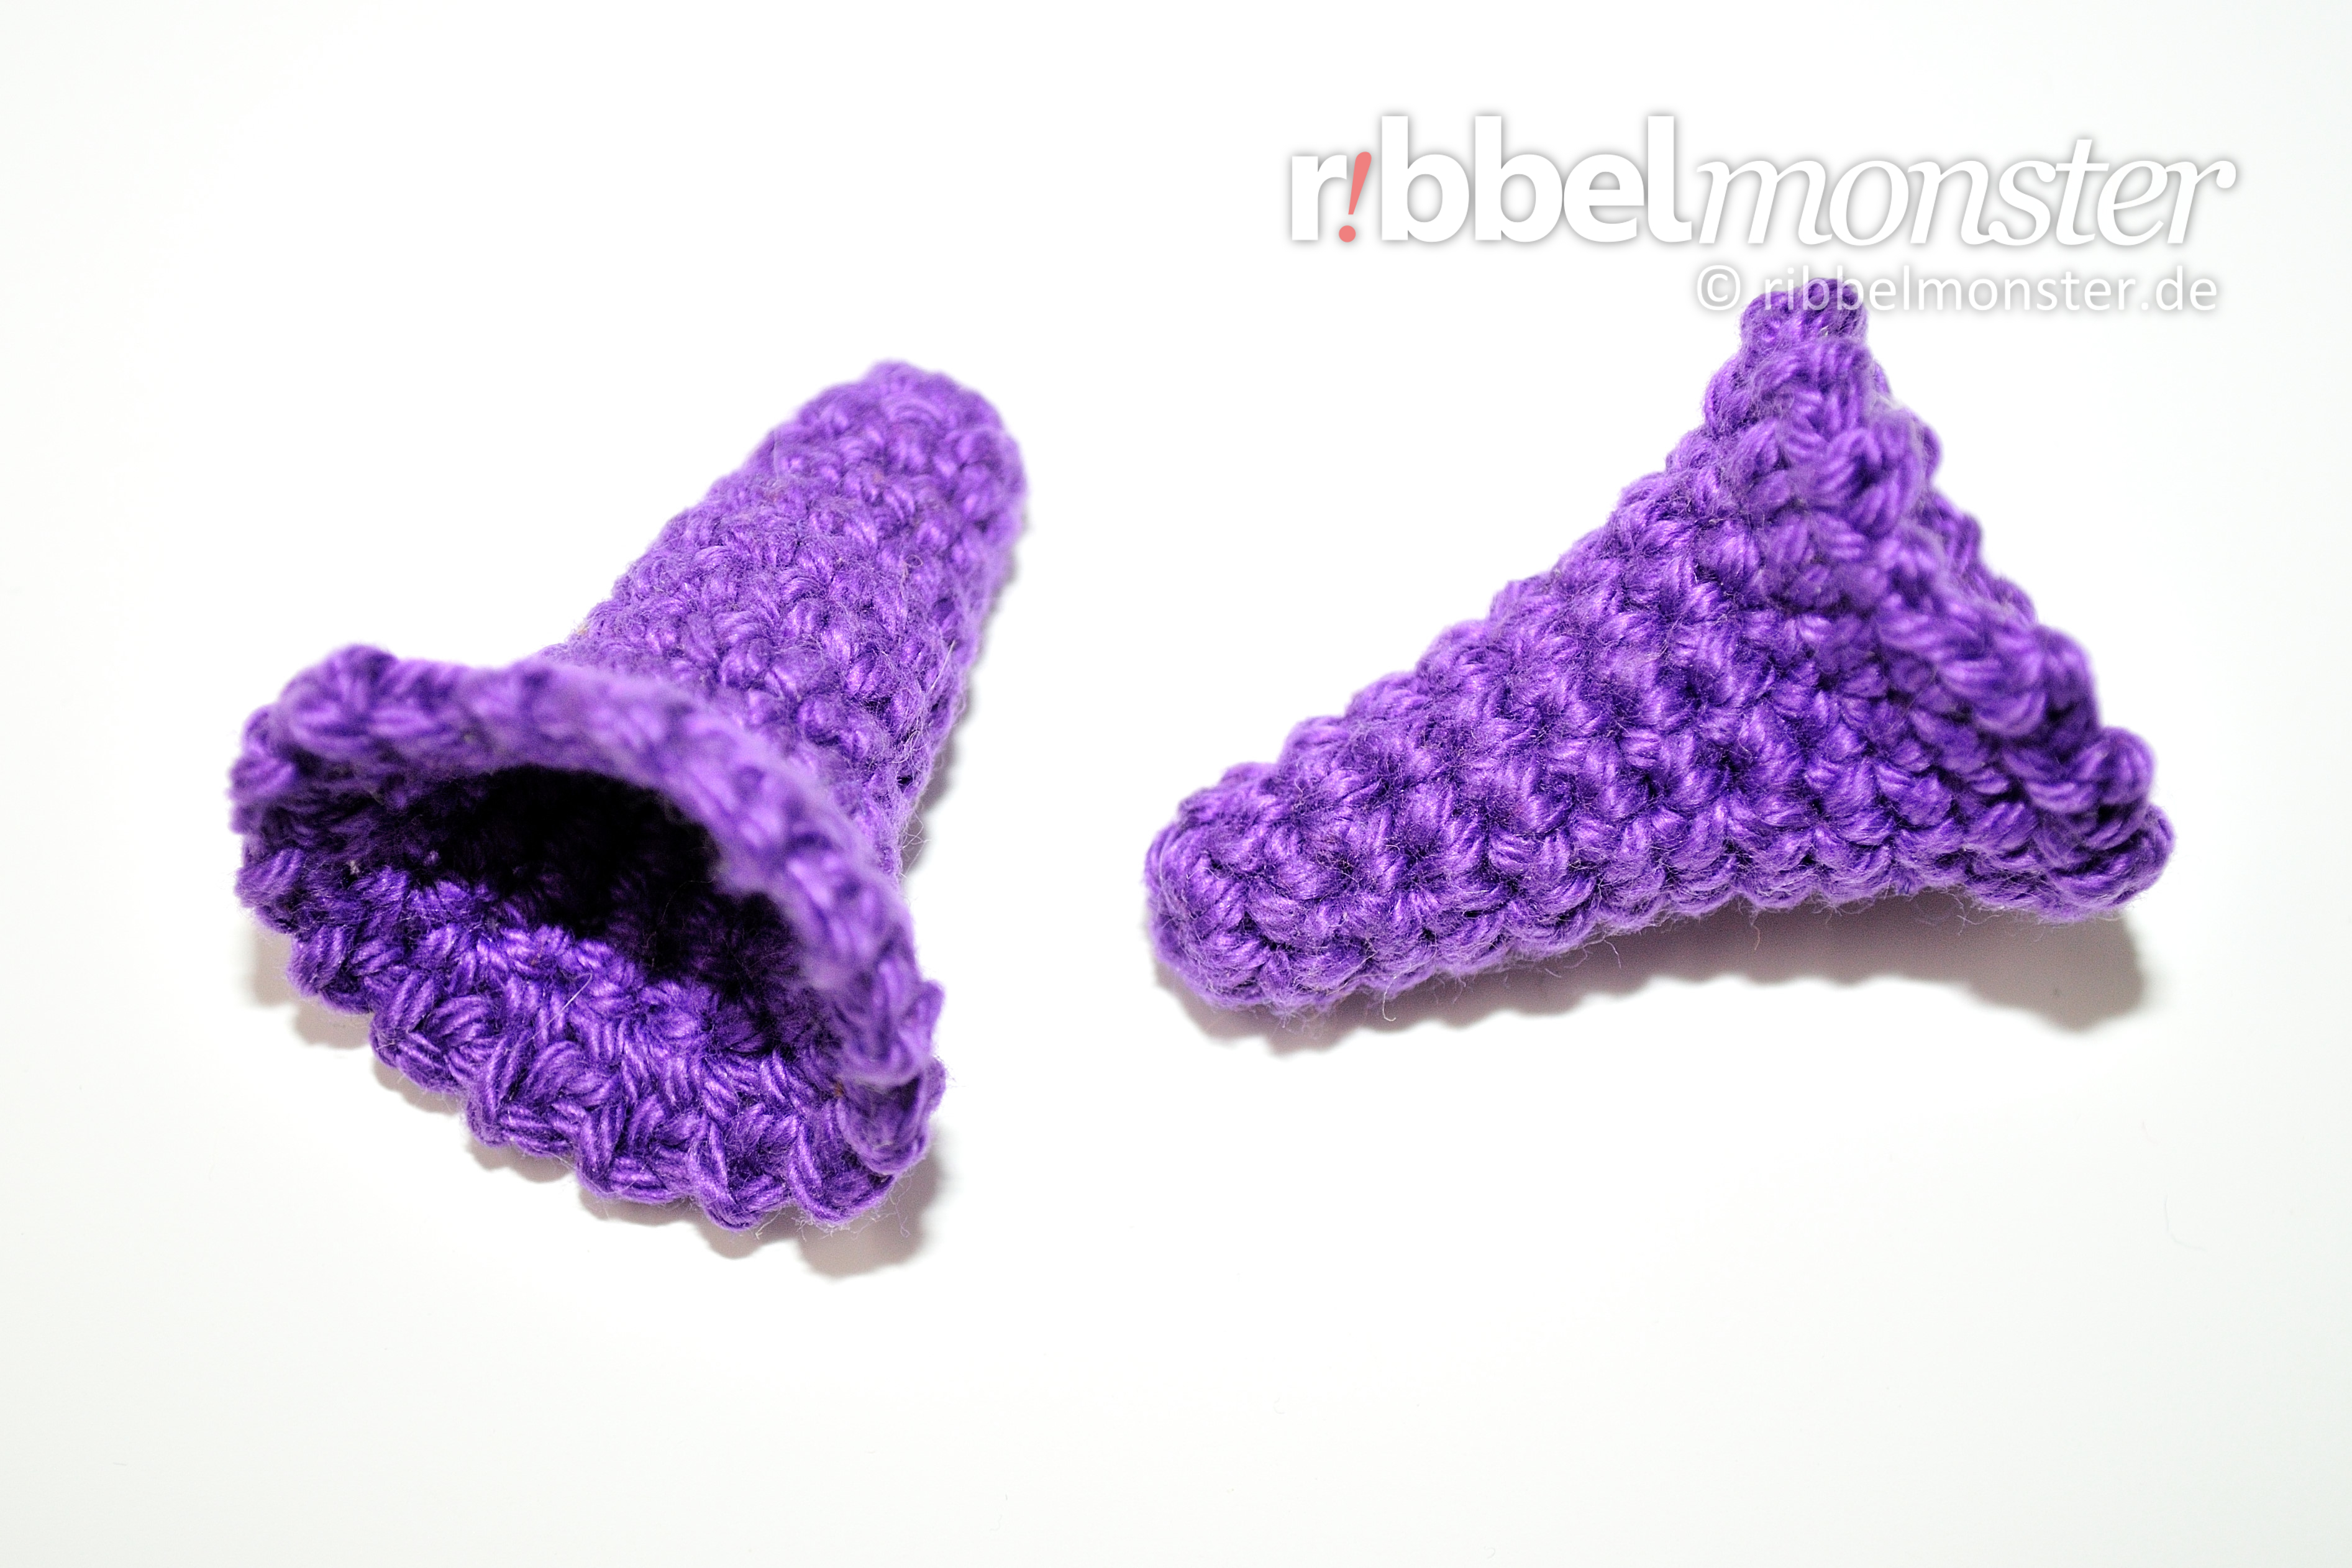
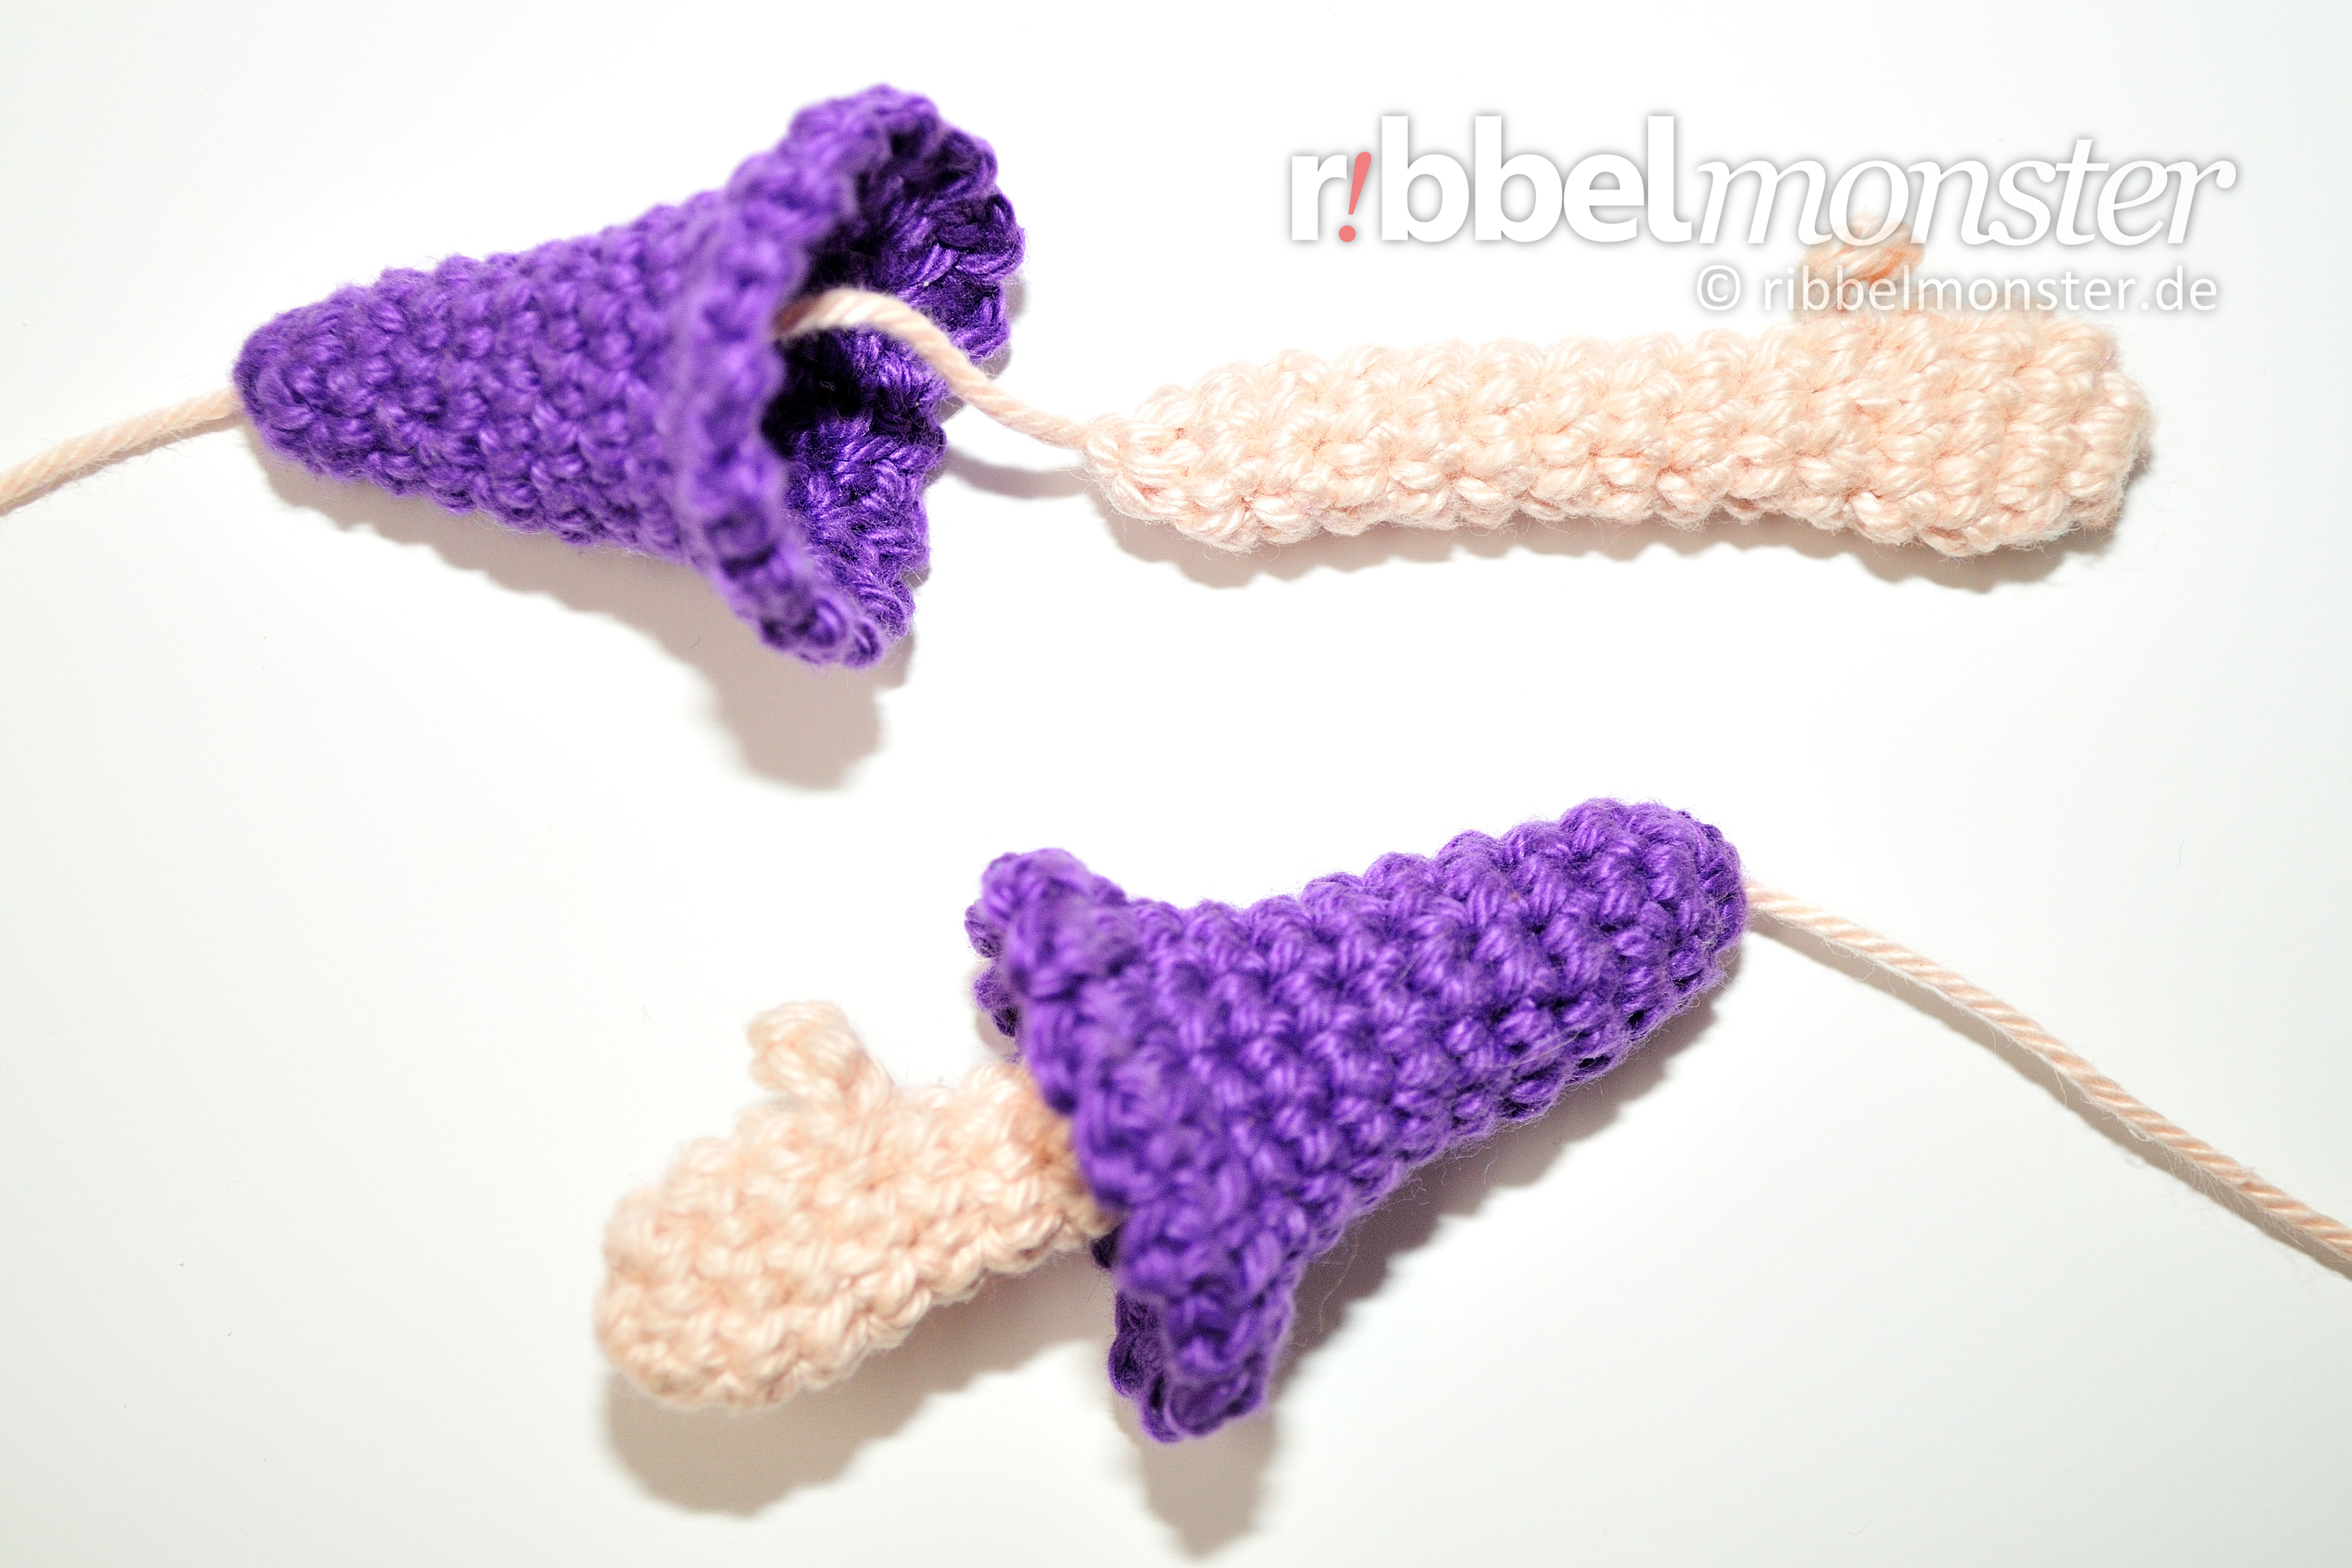
Crochet Witch Hat (1x)
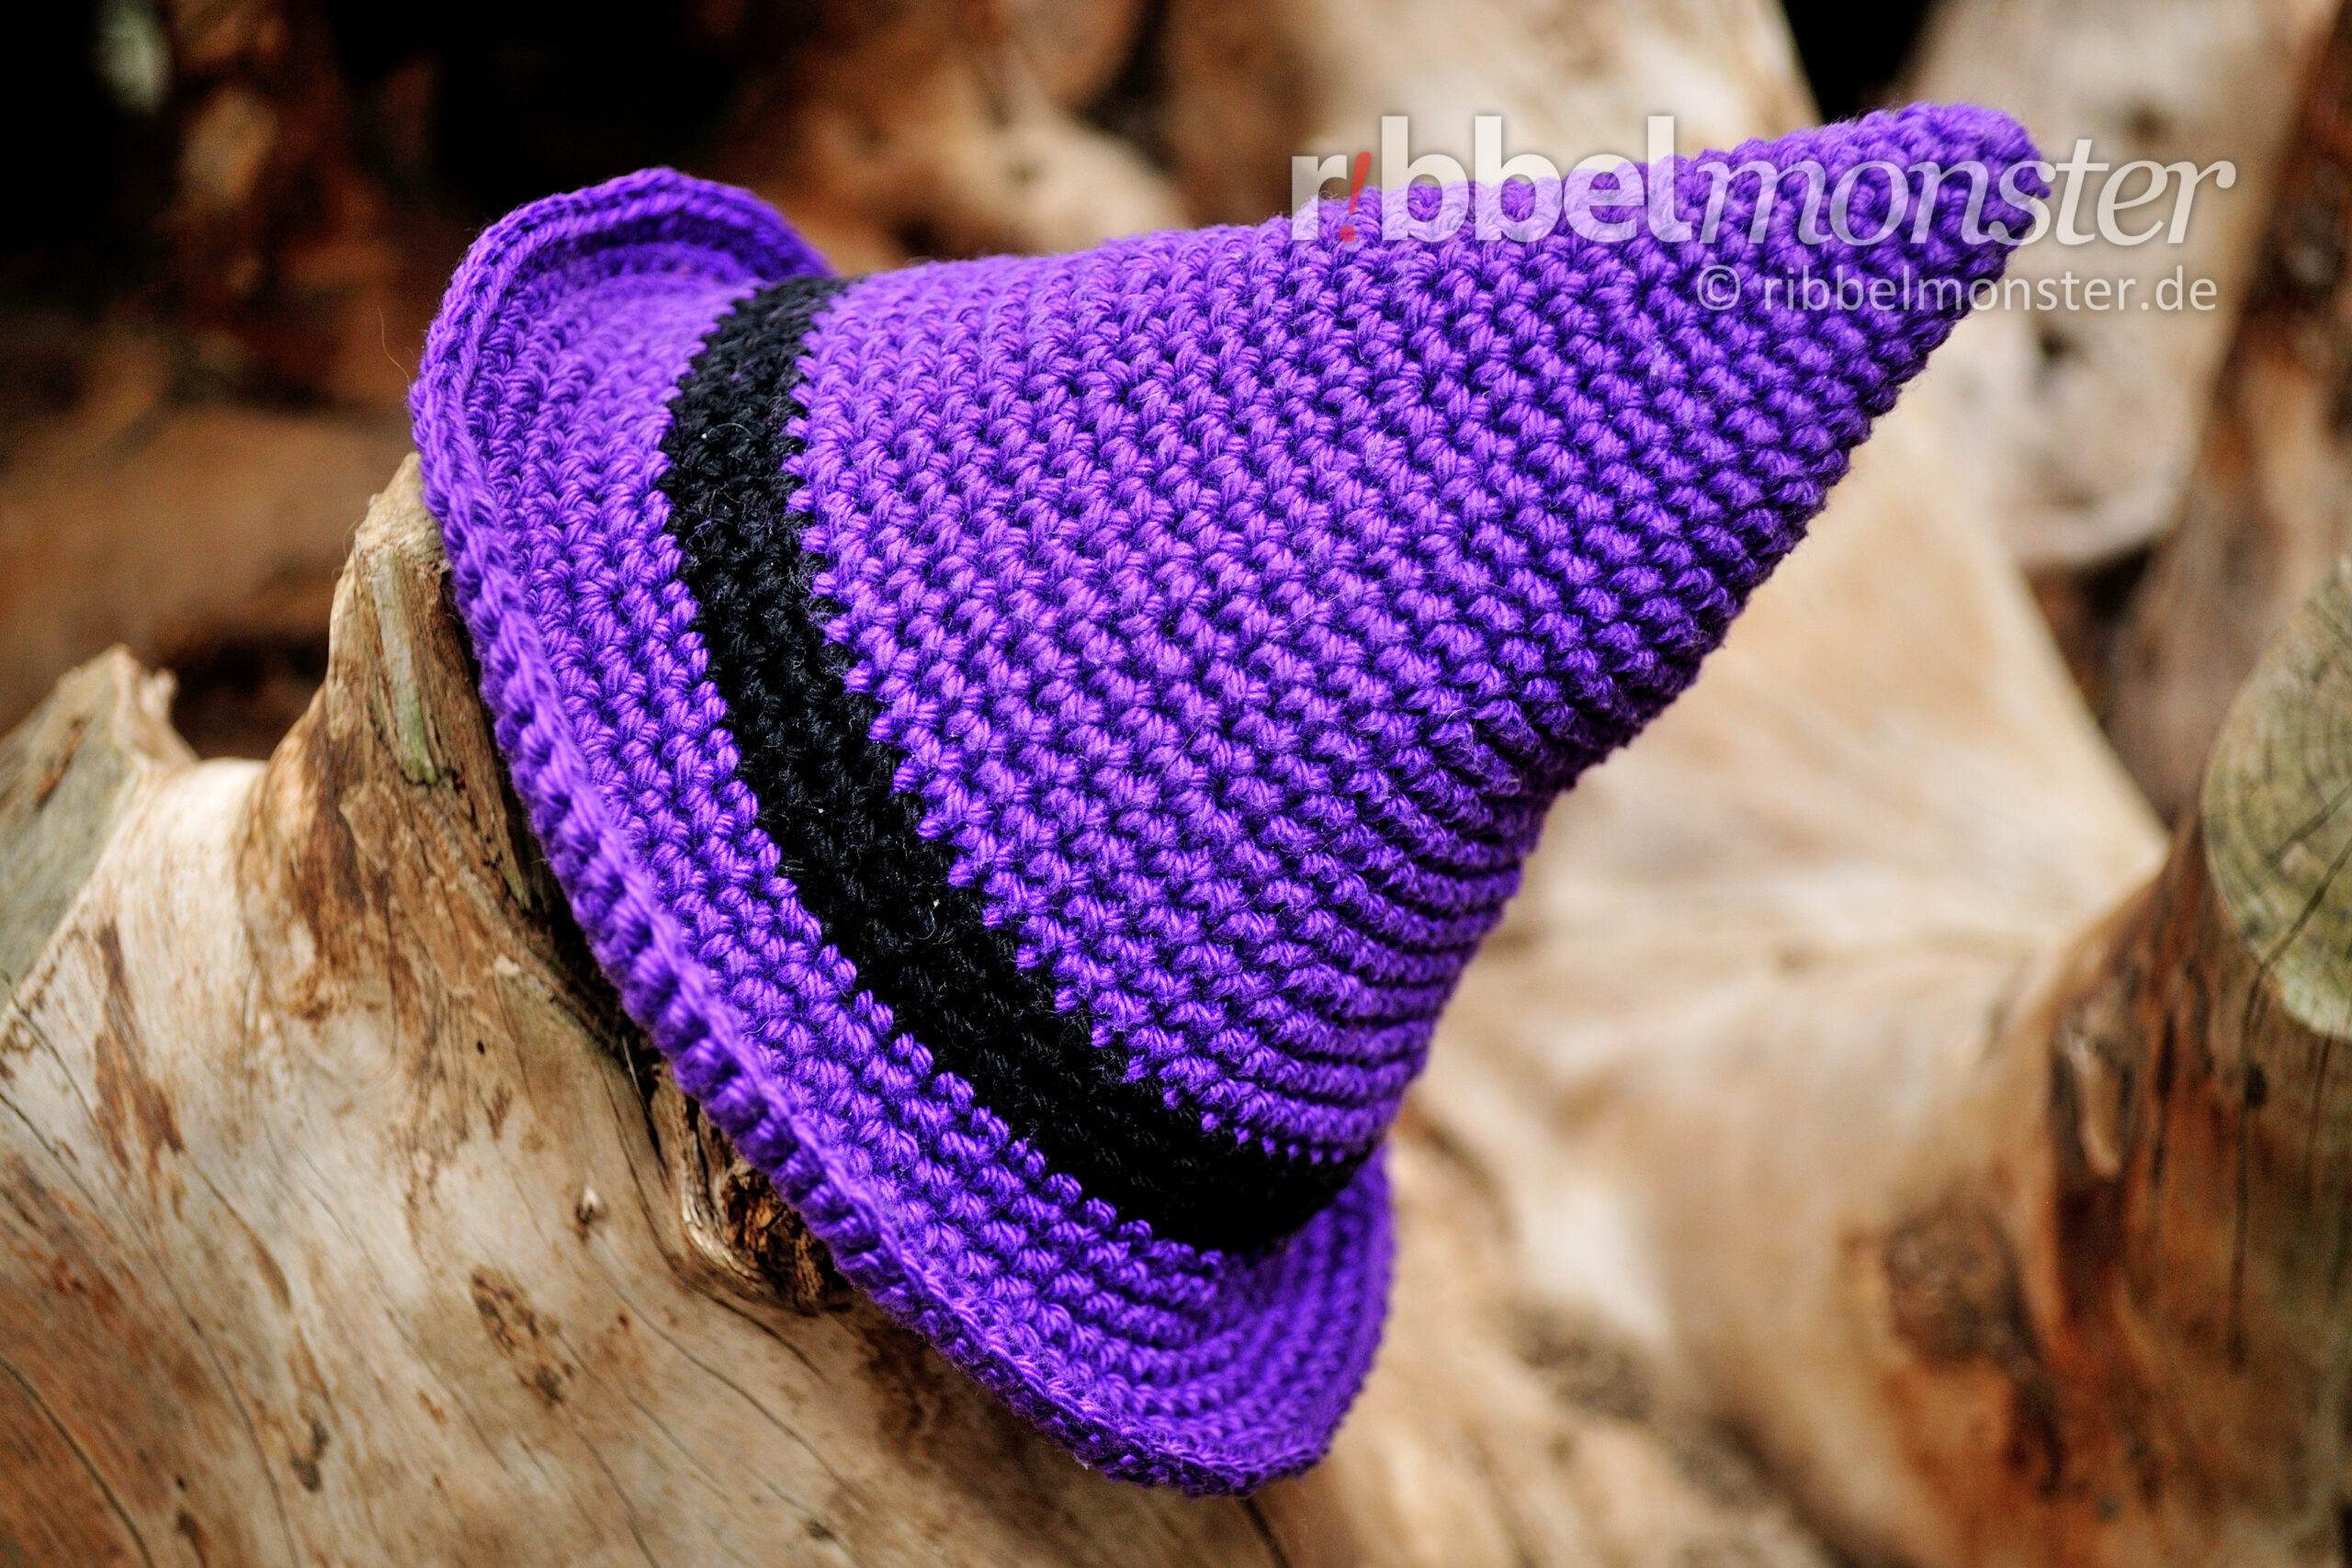
Next, we want to crochet a witch hat for our Amigurumi Crochet Witch. Simply follow this pattern for crocheting a witch hat.
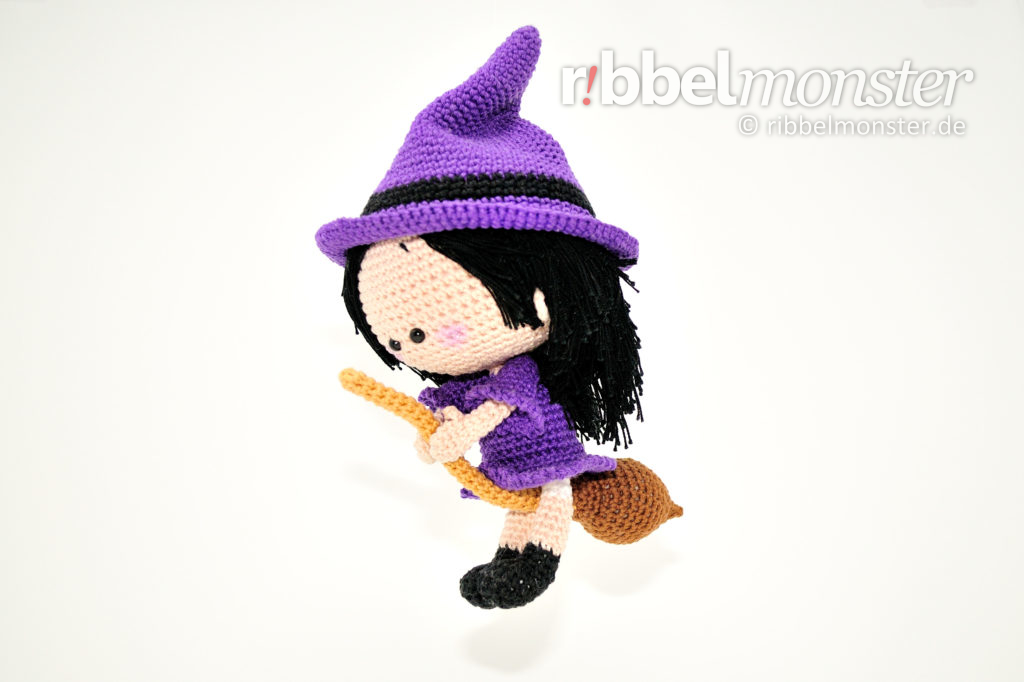
Crochet Witch Broom (1x)
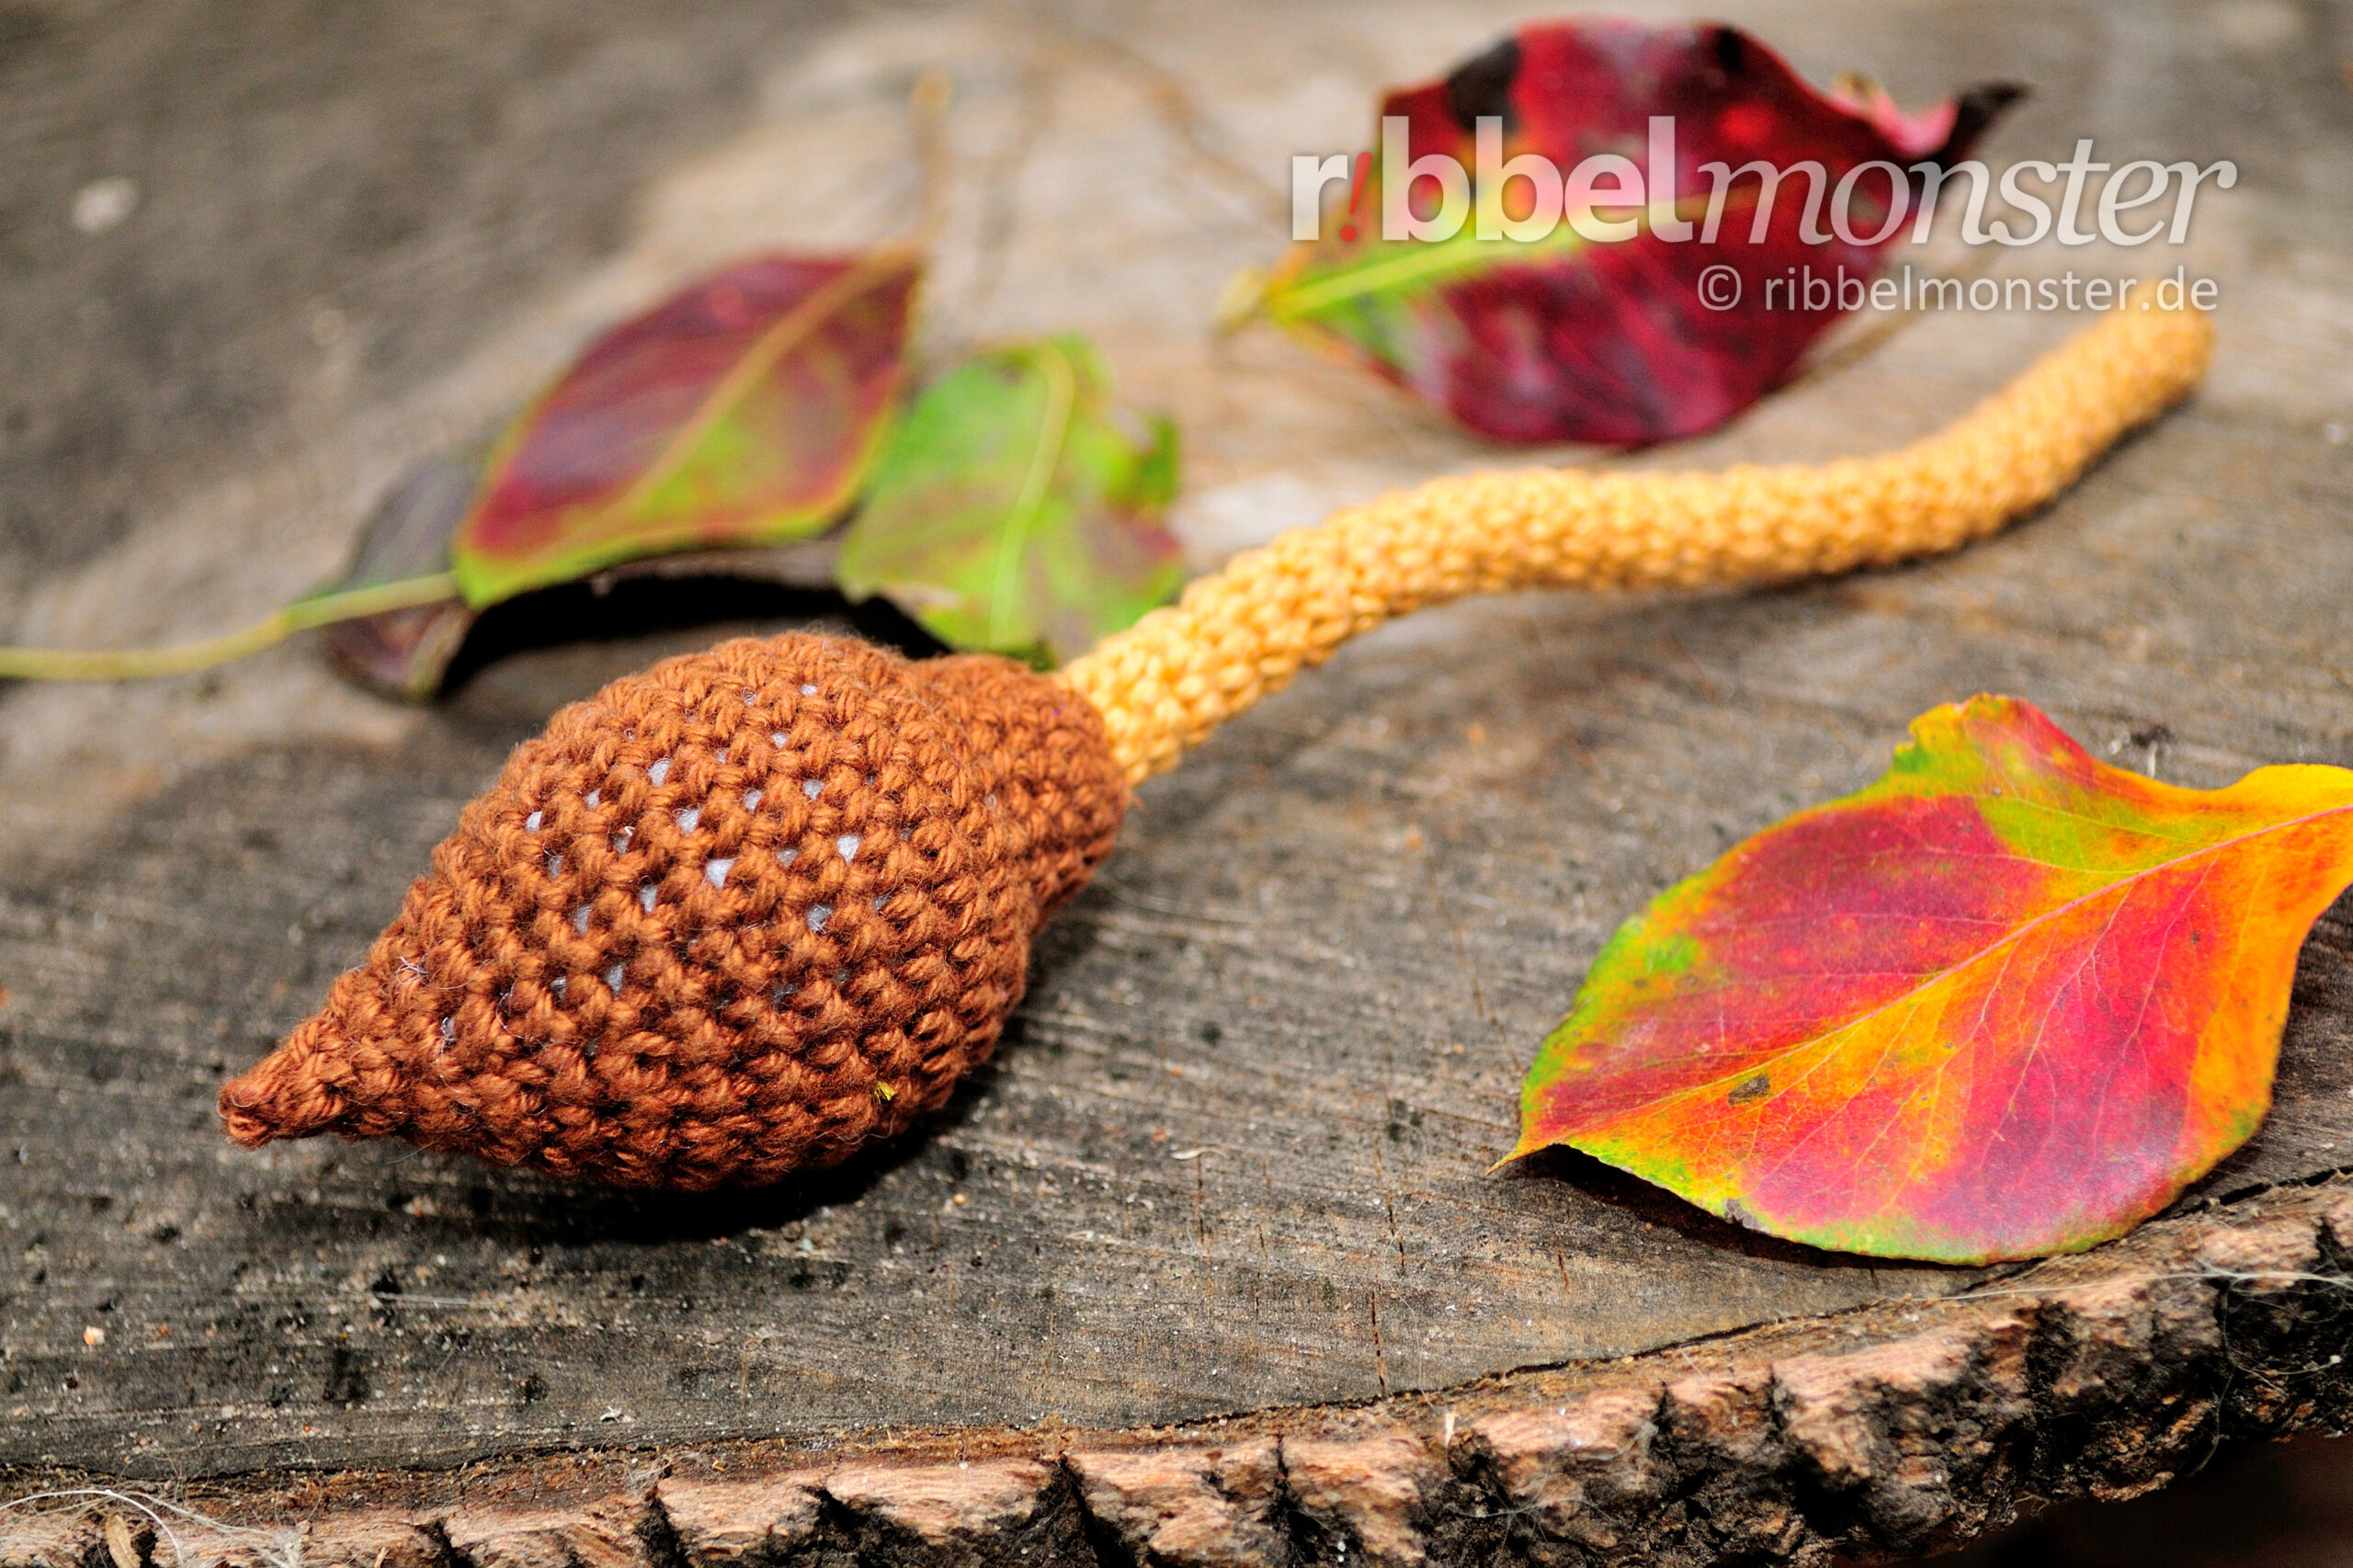
If you’d like, you can also crochet a witch broom for your witch. Just follow the pattern.
Finish Amigurumi Witch

After crocheting all parts for the Amigurumi Witch, we can first pin them together with pins. This way, we can see if everything is in the right positions and make any adjustments easily.
Attach Ears
We start by knotting the ears onto the head. You may find the pattern for attaching small parts helpful. Place them between the 19th and 20th rounds with a distance of 10 stitches from the eyes. Make sure to attach the ears in the correct orientation, with the front side facing forward and the slightly longer earlobe pointing downward.
Assemble Arms and Sleeves
Now you can pull the arms into the sleeves. To do this, thread the end of the arm from the inside through the yarn ring of the sleeve. Then pull the arm, along with the yarn end, into the sleeve.
Attach Arms
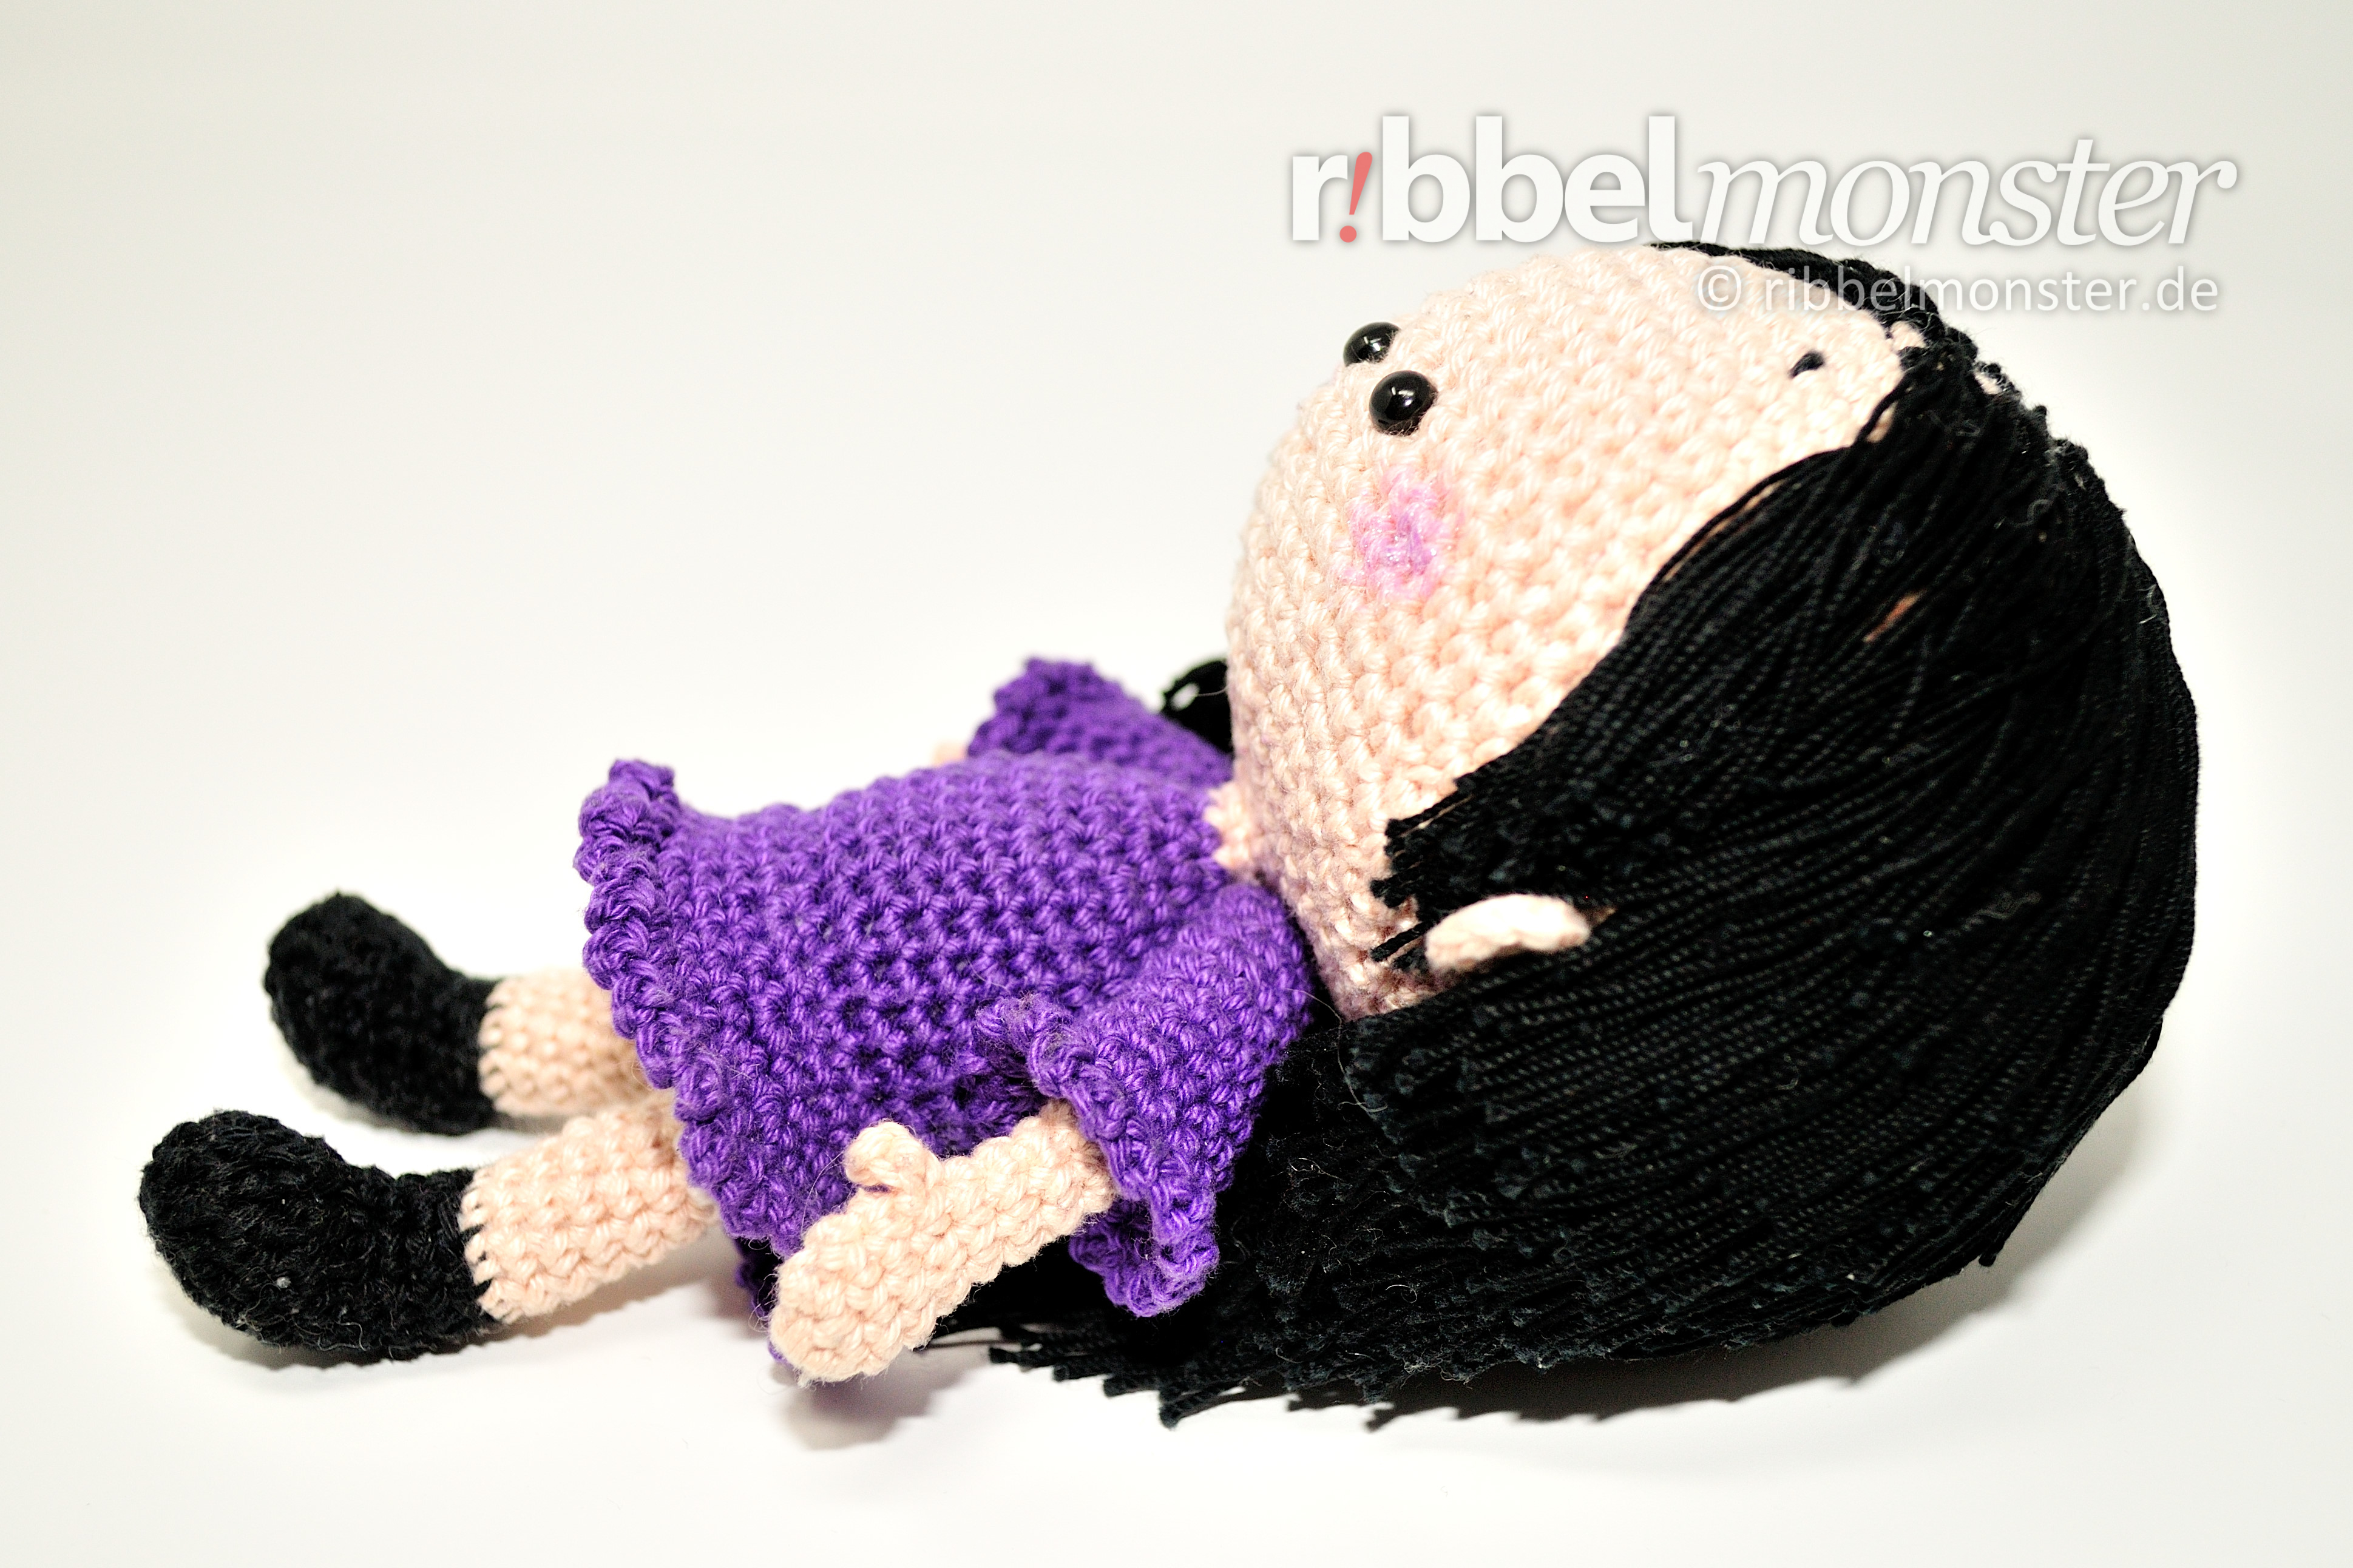
Next, you can attach the arms just below the head. Either horizontally flat or flexible with thread joints, as described in the pattern for thread joints.
Attach Legs
The legs are attached horizontally, folded at the center of the underside in a line. Make sure that the toe tips point forward.
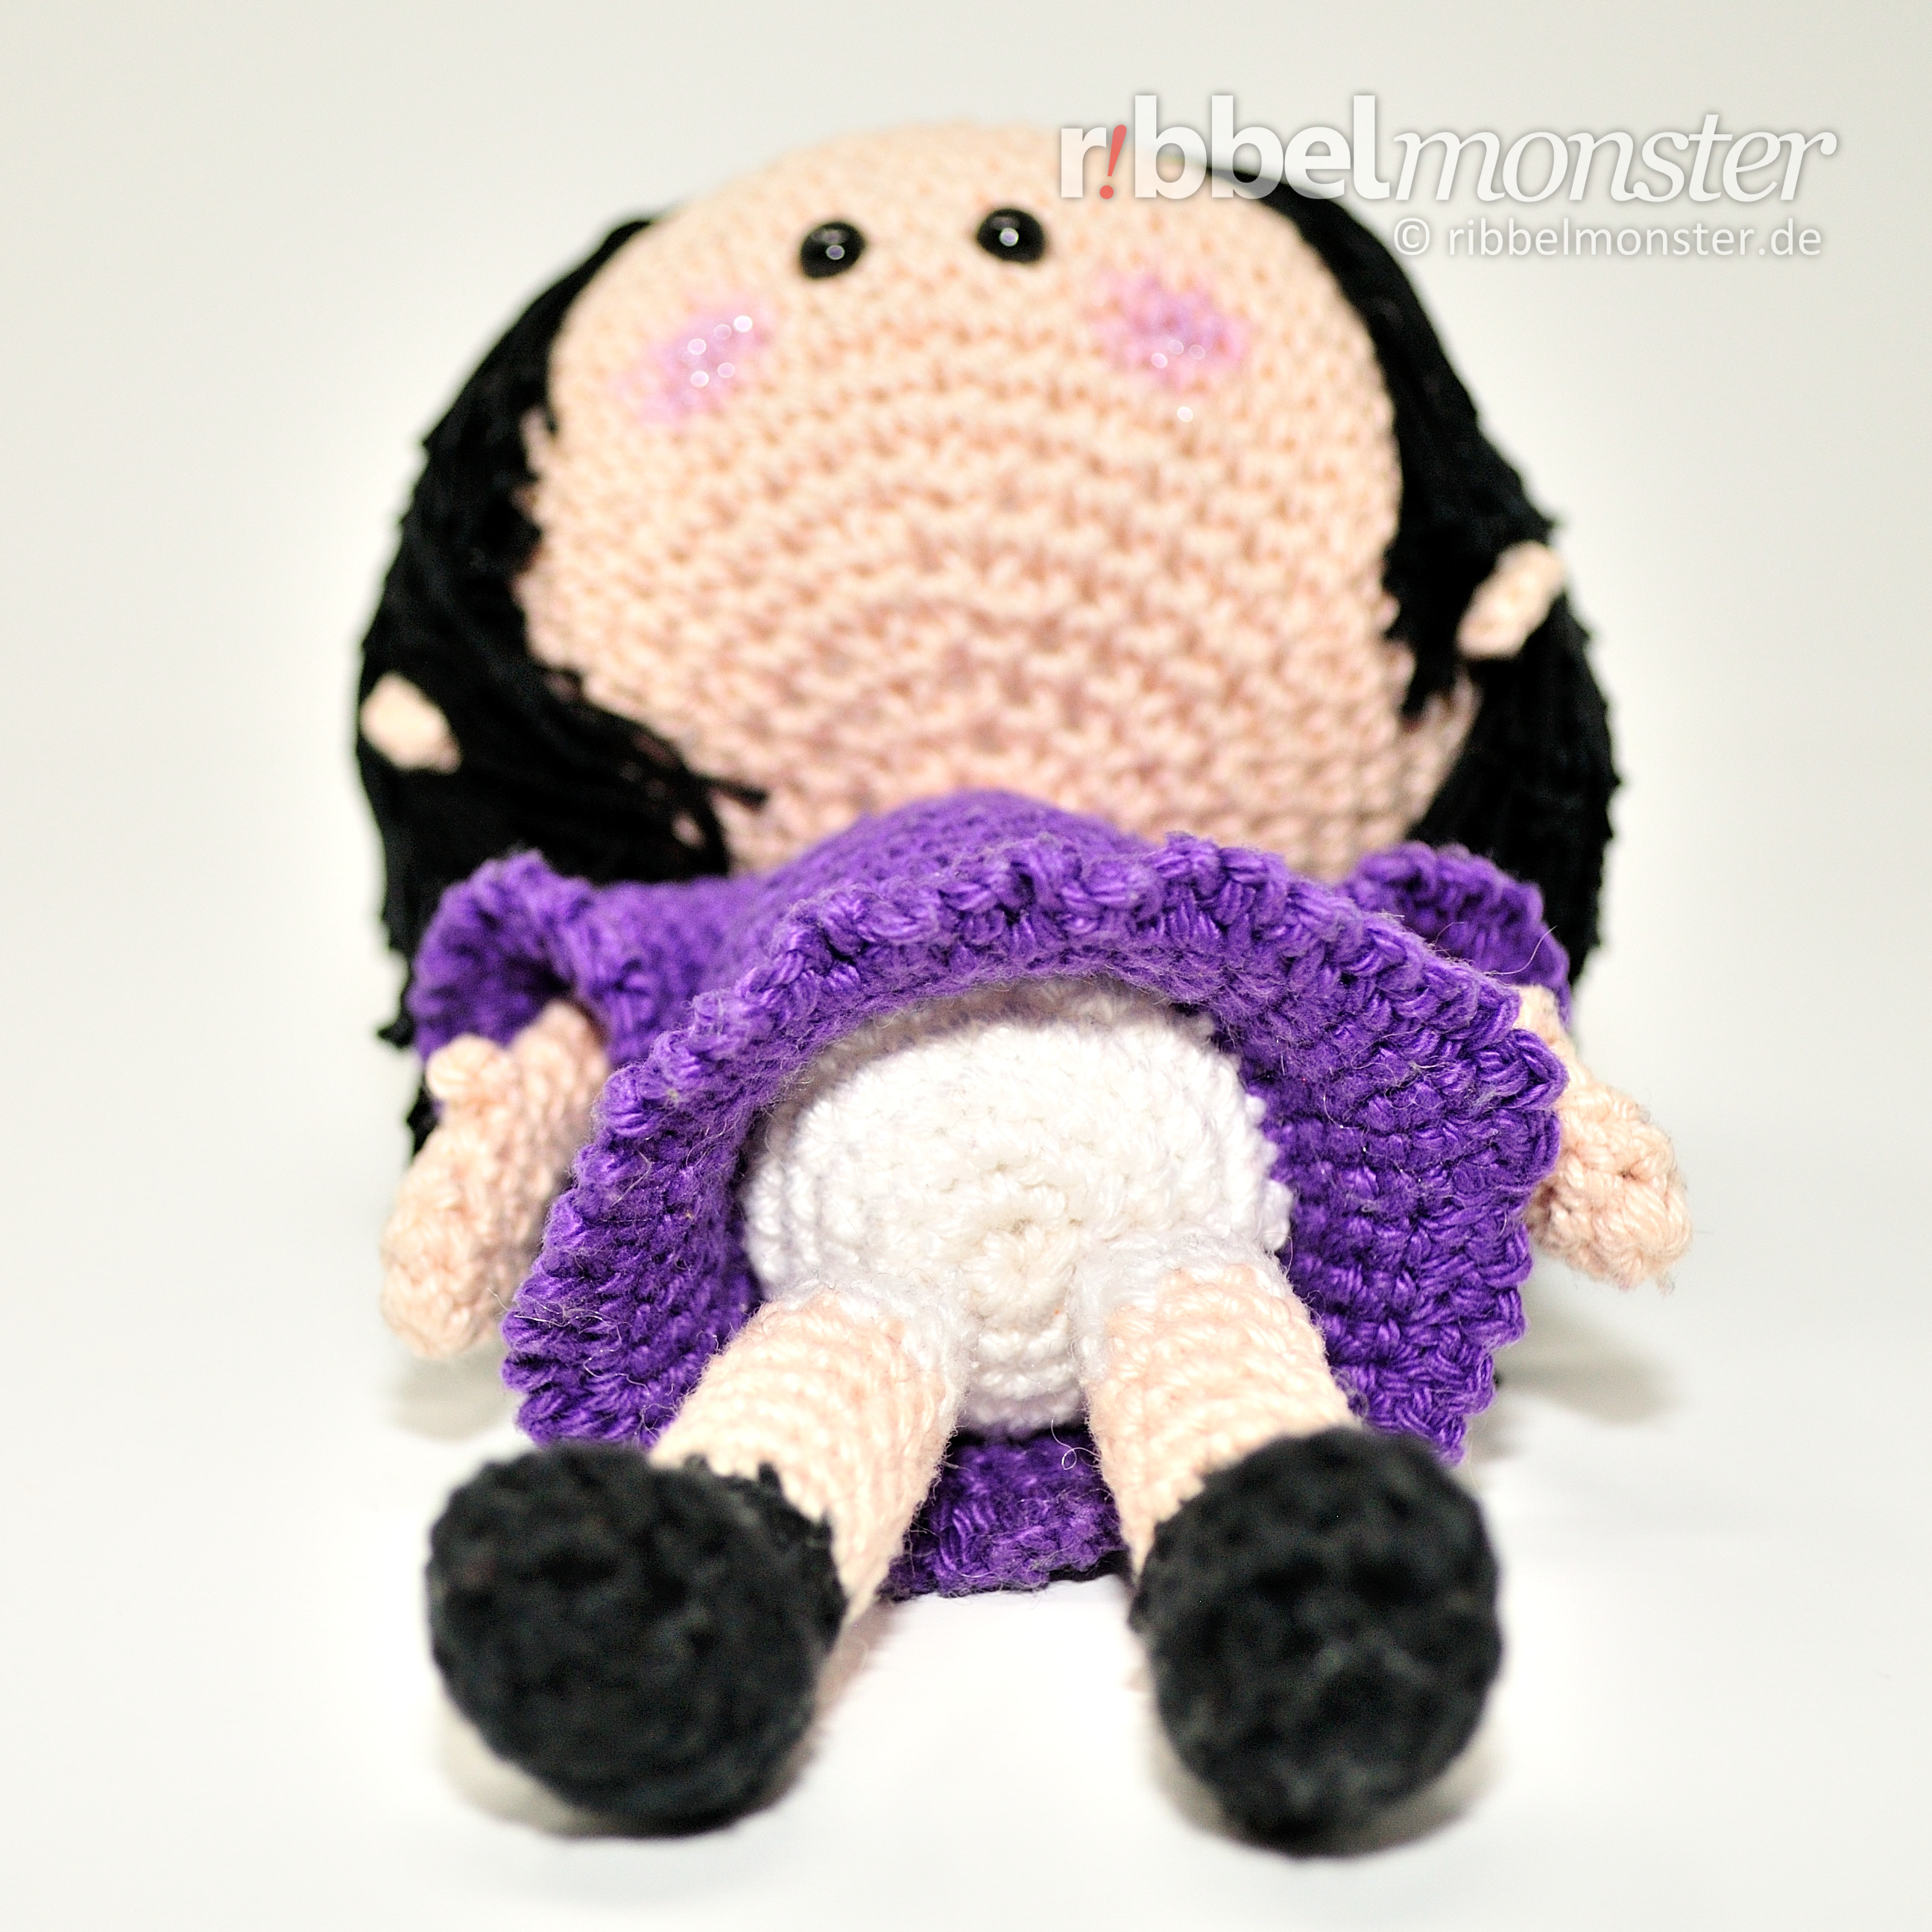
Embroider Eyebrows
Finally, embroider the eyebrows with black embroidery thread or stuffing yarn. They sit 7 or 8 rounds above the eyes and slant inward.
Attach Hair
Lastly, knot the hair onto the head with thin black crochet yarn. The pattern for attaching hair may help you. I used 6cm-long hair, which means 12cm-long strands. You can, of course, customize the hairstyle accordingly.
Paint Cheeks
Finally, I painted cheeks on the little witch with purple acrylic paint.

Done!
Now your crocheted witch is ready. I wish you lots of spooky fun! You can also find more crochet patterns for Halloween here.
Vielleicht hast du aber auch Lust die anderen Amigurumis der Naminja Serie nachzuarbeiten.
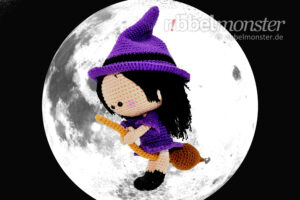
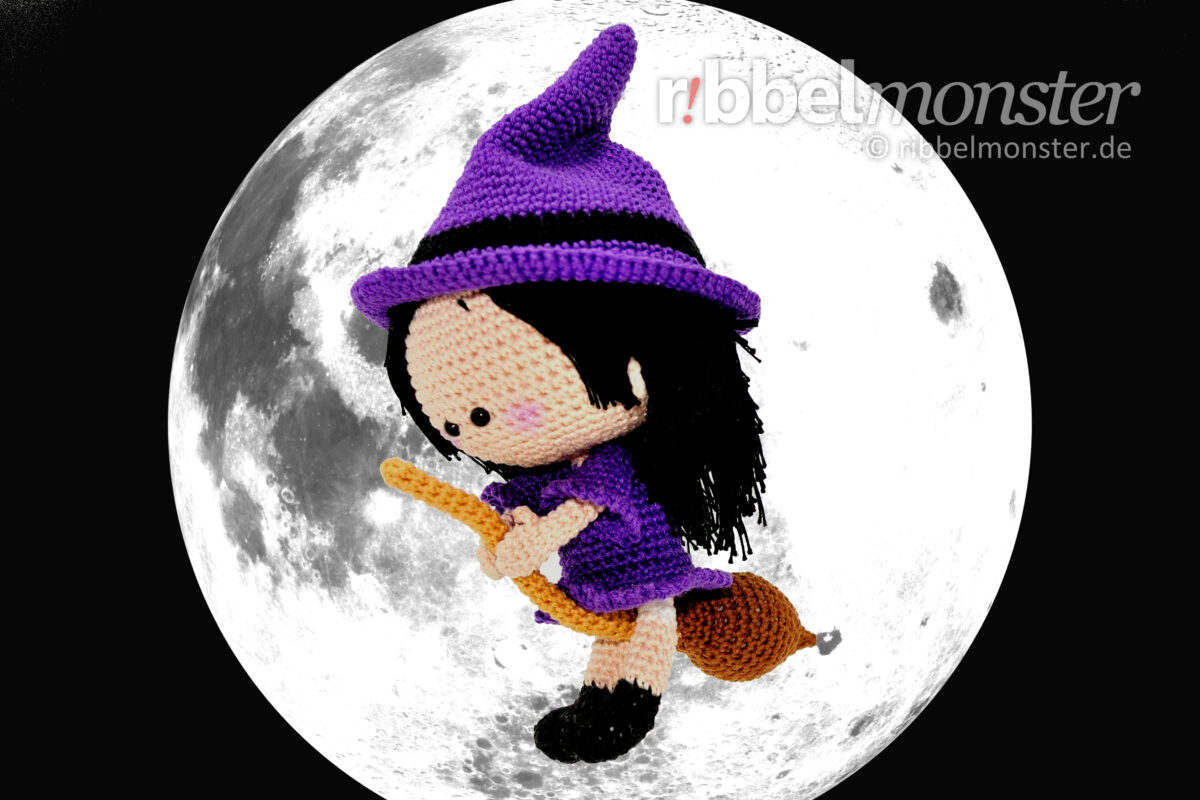
Schau mal wer gerda am Mond vorbei geflogen ist. Das ist die kleine Hexe Mechthild auf ihrem neuen Hexenbesen.

Wenn du Lust hast, können wir zusammen den zuckersüßen Lebkuchenmann Pepe häkeln.
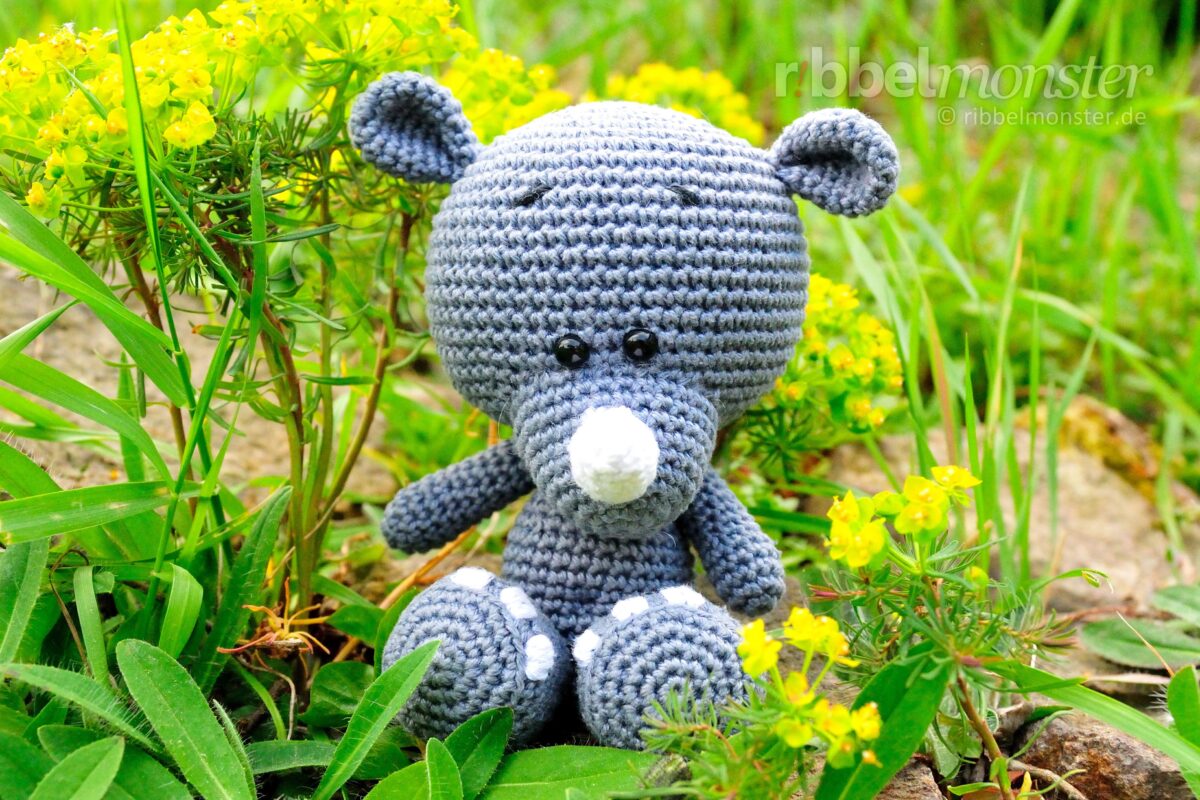
Am liebsten Mag das Nashorn Piko sonniges Wetter und saftige Wiesen.
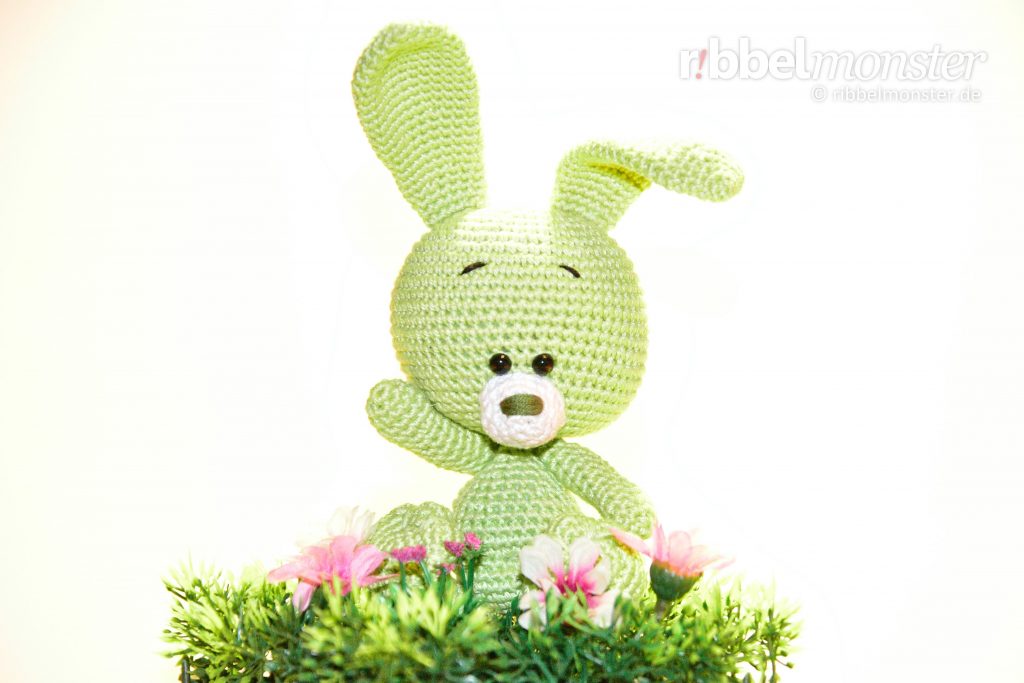
Schau mal wer da so eifrig winkt. Da sitzt doch Hase Ono mitten in der Blumenwiese.

Der kleine Schneemann Sven sitzt schon den ganzen Tag mit seinem Schlitten am Fenster und wartet auf den ersten Schnee.
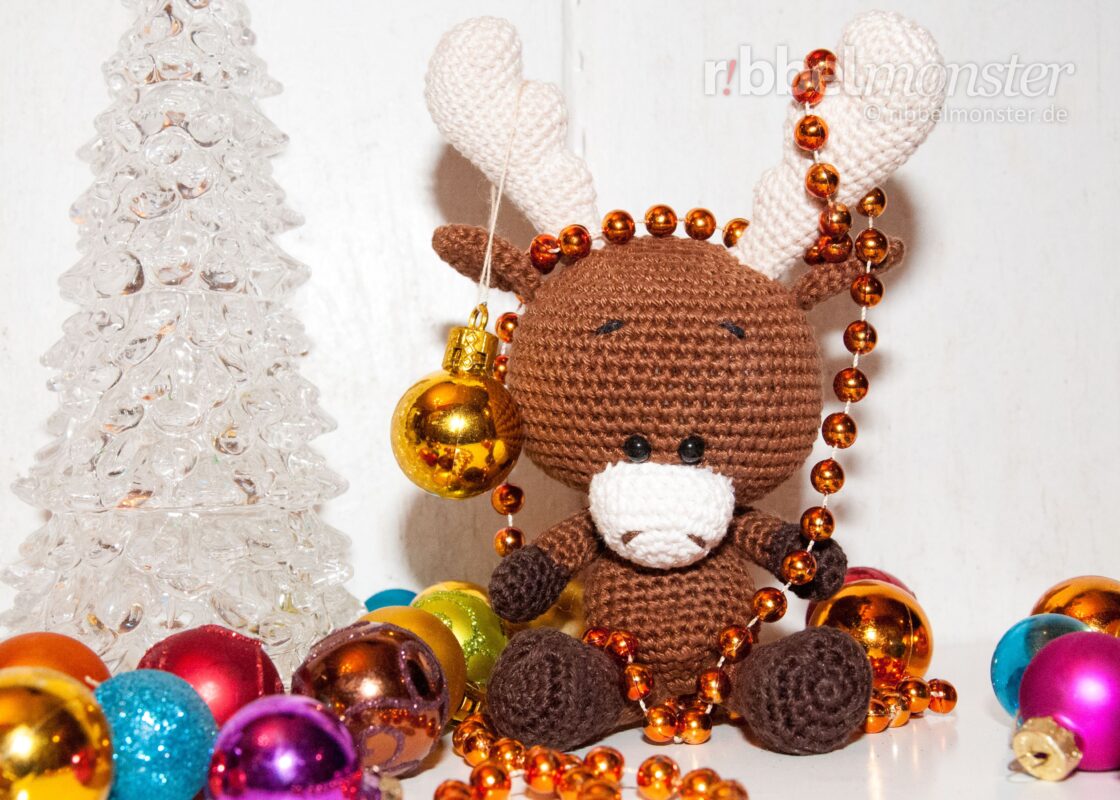
Ich fürchte unser Elch Sören hat sich schon wieder im Christbaumschmuck verheddert. Kannst du ihn retten?
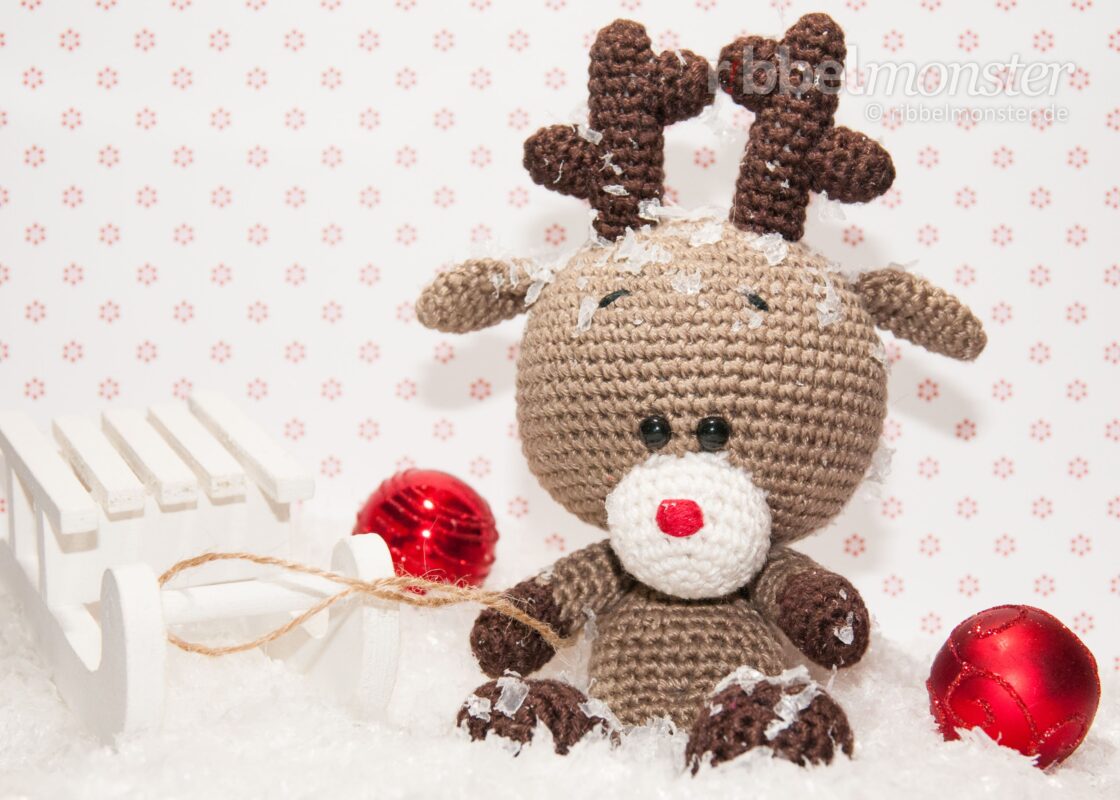
Es sieht ganz so aus, als hätte das Rentier Rudi schon den Schlitten bereit gemacht.

Ich glaube Teddy Pina hat sich gerade fürchterlich erschreckt. Weißt du was das ist?