
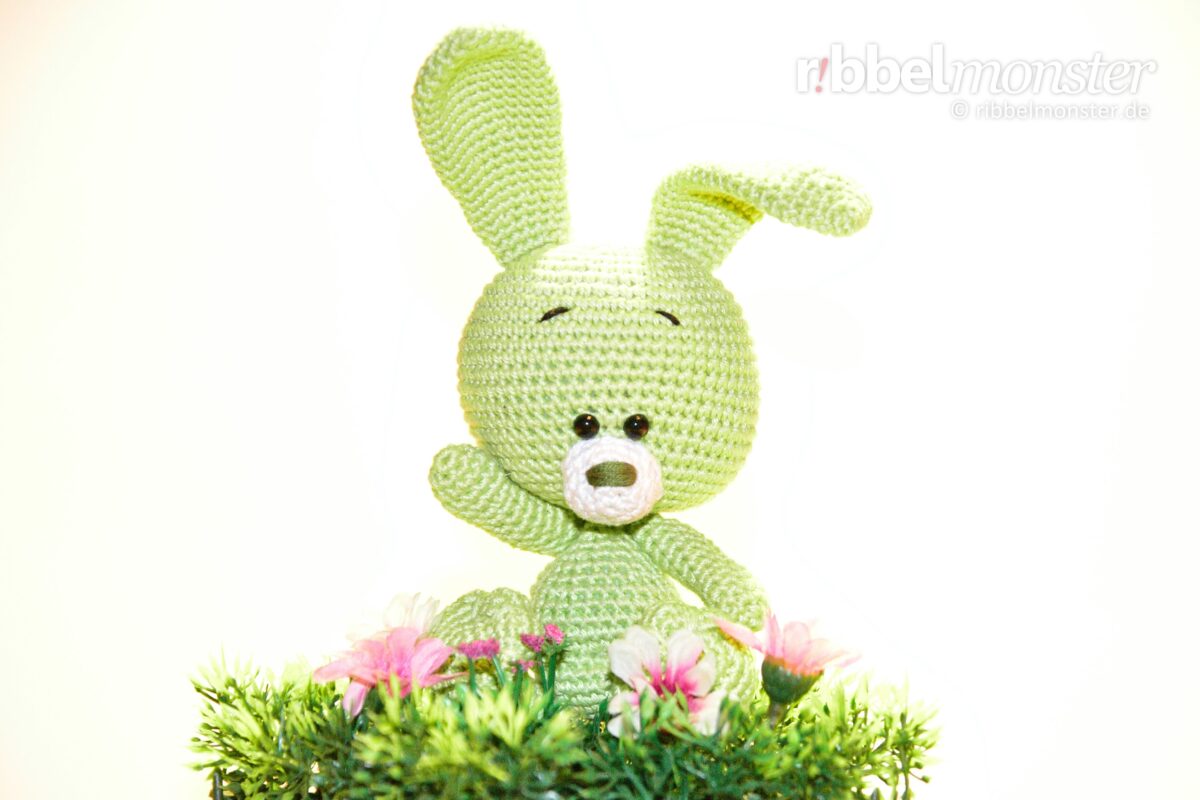
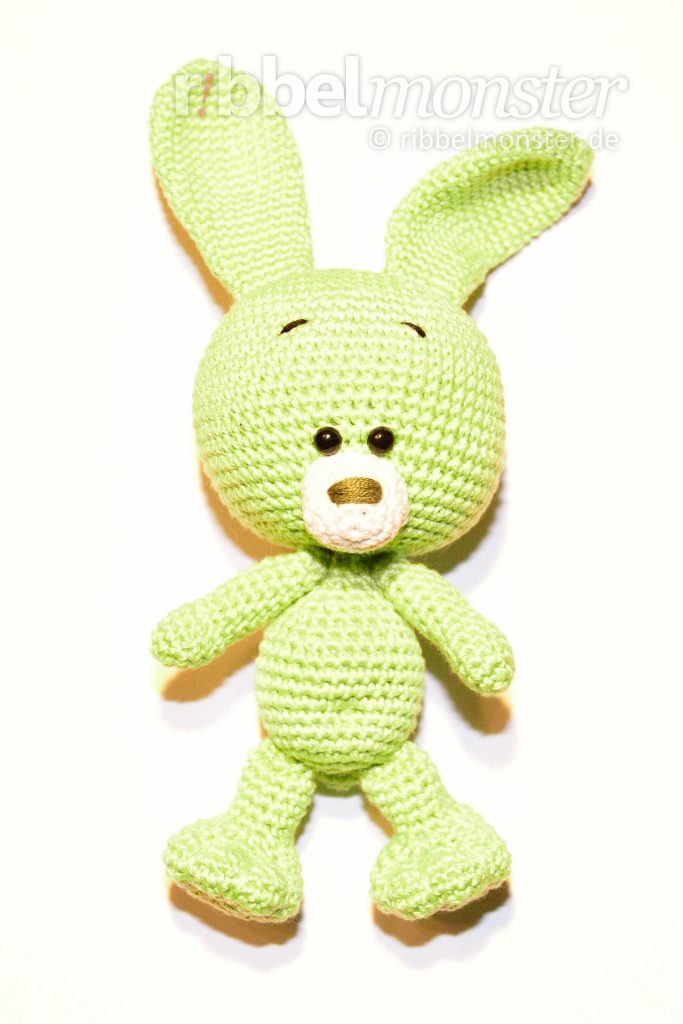
The sweet Amigurumi Crochet Bunny is made easy with this pattern. Ono is a lively crocheted bunny that loves to nap in colorful flower meadows all day.
Content
Introduction: Amigurumi – Crochet Bunny “Ono”
To successfully crochet the Amigurumi Bunny, it is essential to prepare in advance. Therefore, you will find detailed information about prerequisites, materials, and size here. If you need help, you can easily follow the respective additional links.
Attention! Amigurumis are very cute and, therefore, not only popular among adults. Children often see them as toys, so you should be especially careful. Amigurumis that are not intended for play should be kept out of the reach of children. If an Amigurumi is meant to be played with by children, you should strictly adhere to the guidelines for toys. If you plan to give away or sell Amigurumis (license for sellers), you must strictly adhere to the legal requirements for toys and display the required CE marking.
Prerequisites
To effortlessly implement this crochet pattern for the Amigurumi Bunny, you should already be familiar with the following crochet techniques. If this is not yet the case, you will find detailed tutorials here to learn them quickly.
- Crochet Magic Ring
- Decreases
- Increases
- Single Crochet Stitches (US!)
Note! By offsetting regular increases and decreases, they become almost invisible. You can recognize regular increases by the phrase “double every … stitch,” and regular decreases by the phrase “crochet together every … and … stitch”. The stitch chart for spheres and circles might also be helpful for you.
Note! Using a special technique for invisible decreases makes them nearly invisible. Although this technique requires a bit of practice, it’s worth giving it a try.
Supplies
The material described here was used for the shown Amigurumi Bunny. In general, you can crochet the Amigurumi Bunny with any yarn and a corresponding needle size. You will get a comparable result if you use exactly these materials. In addition to the materials, you will find the necessary tools and supplies listed in the following.
Crochet Hook
You will need a crochet hook with a size of B or C (alphabetic) or 1 1/2 (numeric). For converting to other sizes, the crochet hook size converter will help you. I have selected some great crochet hooks for you here.
Darning Yarn
I have used darning yarn in the shade of black here. If you cannot find a suitable darning yarn in your supplies, I have already selected some for you.
Darning Yarn
Colour: green Help? View example
Filling
For filling, I used synthetic filling made of 100% polyester. However, there are numerous alternatives for filling material. If you’ve run out of filling, I’ve prepared a refill for you here.
Safety Eyes
I used 2 safety eyes with a diameter of 1/4 inches. The eyes are completely black. However, there are countless alternatives for amigurumi eyes. You might prefer other safety eyes as well.
Scissors
You’ll need any scissors. It’s best to use your most beautiful scissors because it brings you joy. If you don’t have really nice scissors, I’ve picked out some lovely ones for you.
Wool Needle
You’ll need a wool needle with a blunt tip. The thickness of the wool needle should match the thickness of your yarn. You might like the set of wool needles I’ve picked out for you.
Yarn – Schachenmayr – Catania – light green – 392
I used yarn in the shade Yellow Green. The material is 100% cotton. The yardage is 137 yds / 1.75 oz. If you want to replenish your supply, I’ve already picked out the matching yarn for you here.
Yarn – Schachenmayr – Catania – white – 106
I used yarn in the shade White. The material is 100% cotton. The yardage is 137 yds / 1.75 oz. If you want to replenish your supply, I’ve already picked out the matching yarn for you here.
Note! The specified yarn was used for the example shown here. In principle, you can use any yarn and an appropriate needle size. However, the quality of the material also affects the quality of the result, so you should avoid cutting corners in the wrong place. Also, the thickness of the yarn and the needle will influence the size of the outcome, which you can, of course, intentionally take advantage of.
Note! I have used safety eyes here. If you have never attached safety eyes before, you can also find detailed instructions on how to attach safety eyes here. In addition to a wide selection of other safety eyes, there are also numerous alternatives for amigurumi eyes. Simply use the eyes that you like best.
Size
Here are the size specifications for the crocheted Amigurumi Bunny. The height was measured while standing without ears. Please note that the actual size depends on the yarn used, the size of the crochet hook, and individual crochet tension.
| Needle Size | Yardage | Size |
|---|---|---|
| Crochet Hook B, C or 1 1/2 | 137 yds / 1.75 oz | 6 1/5 inch |
| Crochet Hook C, D or 2 1/2 | 120 yds / 1.75 oz | ? |
| Crochet Hook E or 4 | 93 yds / 1.75 oz | ? |
Note! If you want to change the size, you can simply use a thicker or thinner yarn with a suitable needle size. Simply doubling the rounds, rows, and stitches, on the other hand, will only result in an uneven outcome.
Crochet Pattern: Amigurumi – Crochet Bunny “Ono”
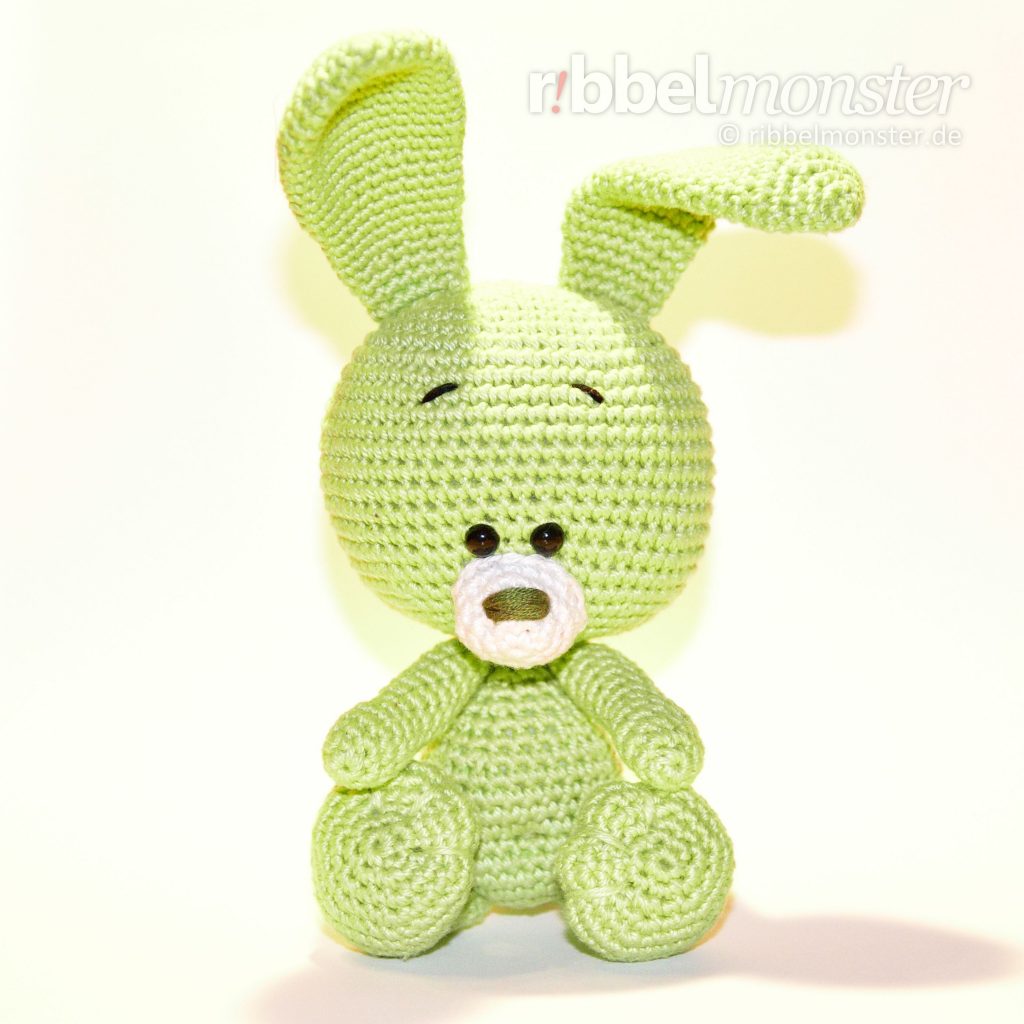
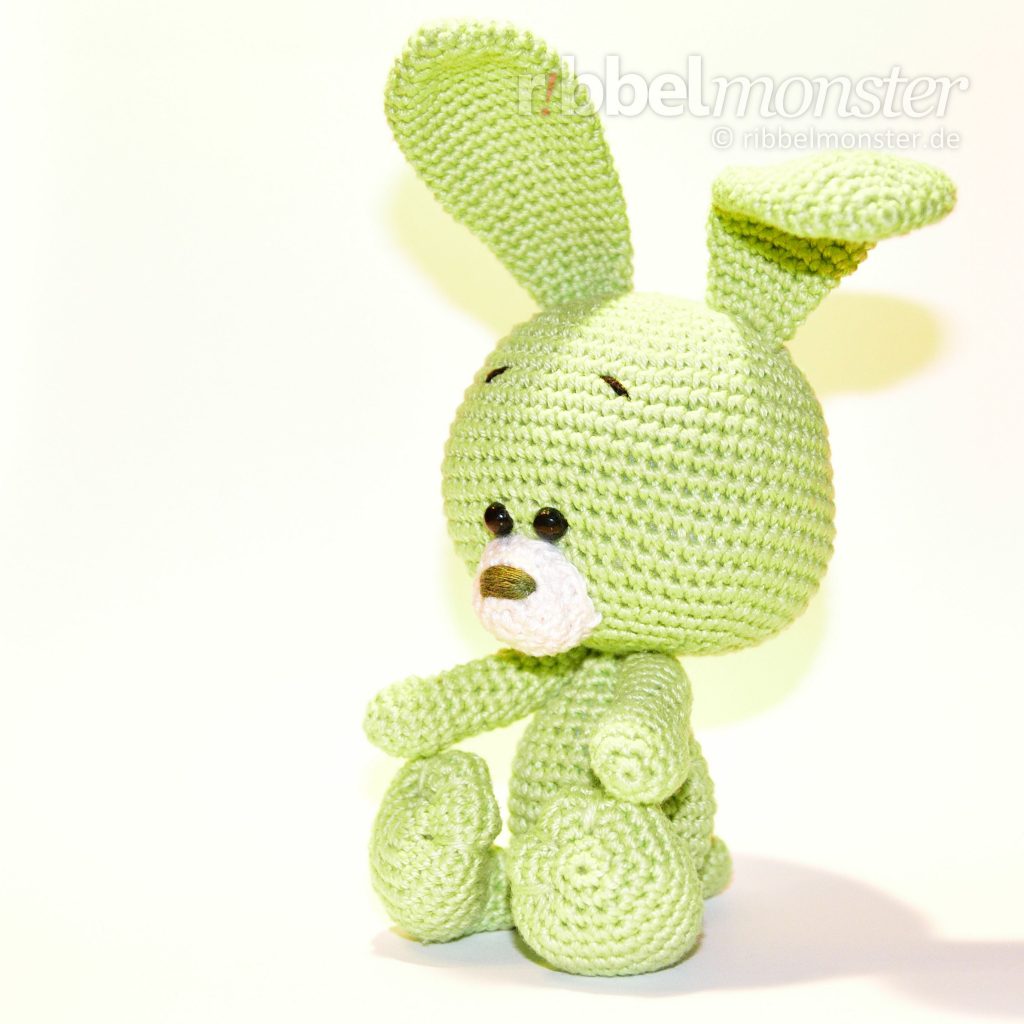
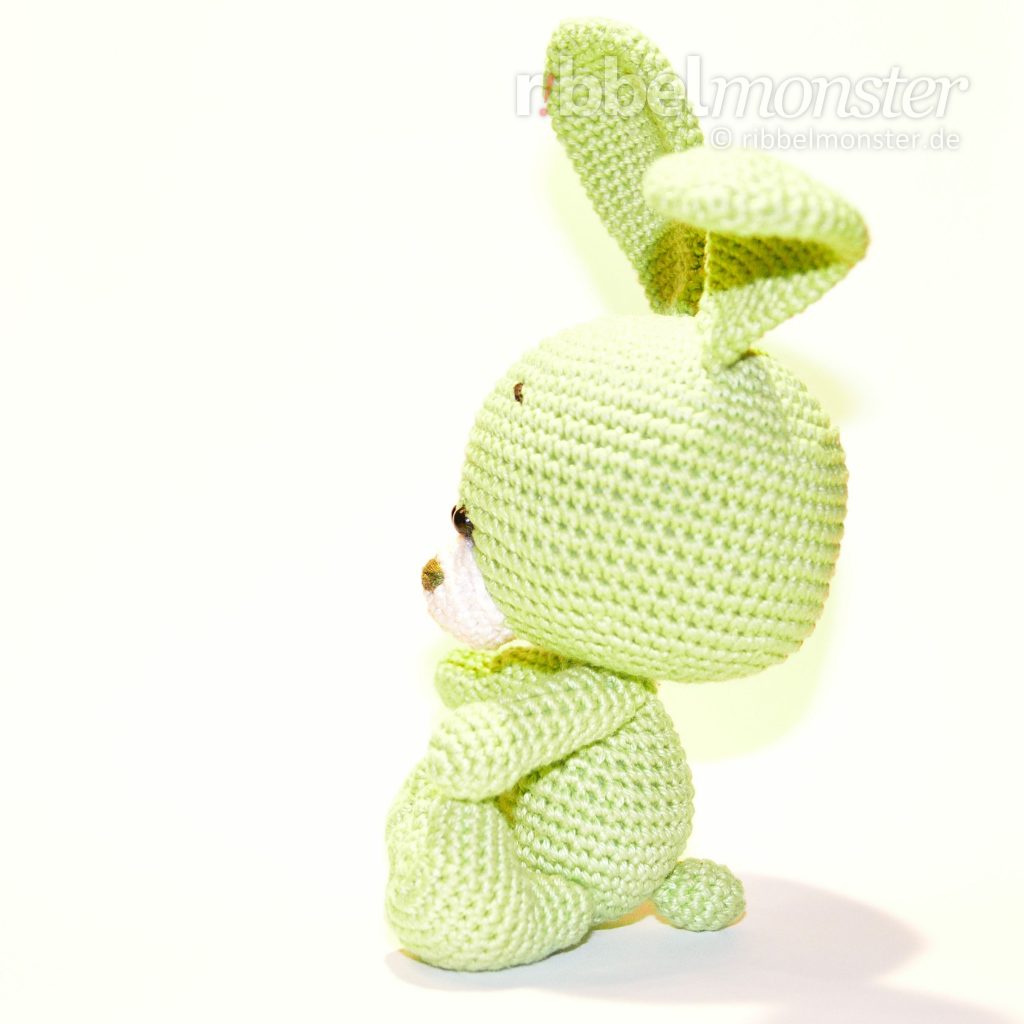
For the sweet Amigurumi Crochet Bunny, we first crochet the head and body, and then the arms, legs, snout, tail, and ears. After that, all parts are sewn together, and some cute details are added.
Head for Crochet Bunny (1x)
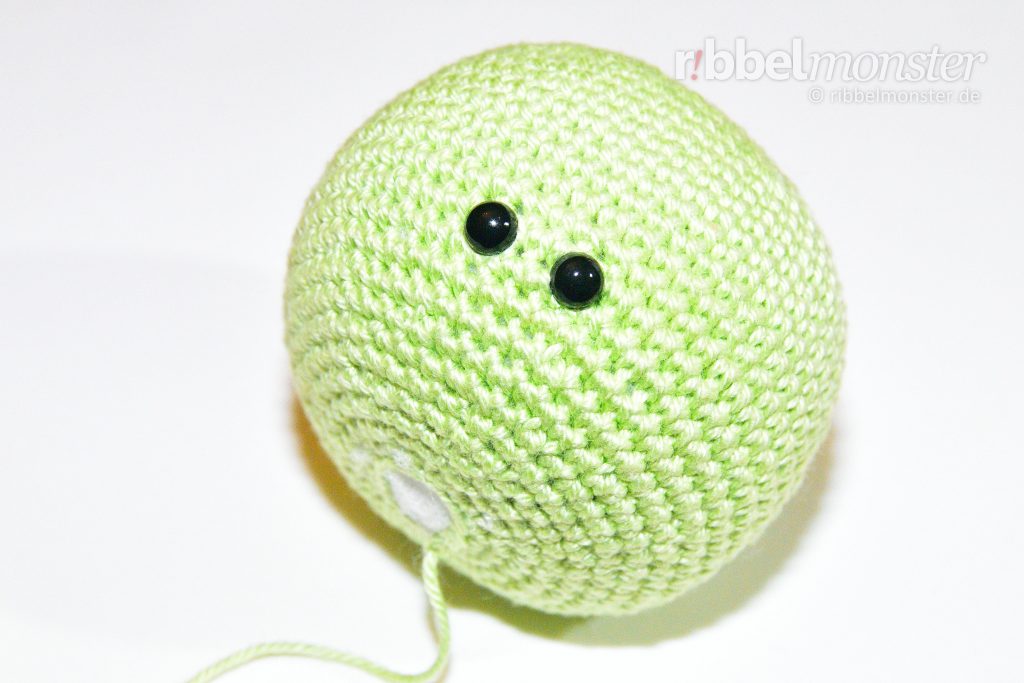
Den Kopf häkeln wir von oben nach unten in Spiralrunden mit Festen Maschen. Der Kopf wird vollständig gefüllt und gestopft, jedoch nicht ganz geschlossen.
Note! If you want to achieve a particularly beautiful result, you can hide regular increases and decreases by offsetting them a little. You can recognize regular increases by the phrase “double every … stitch,” and regular decreases by the phrase “crochet together every … and … stitch”. The stitch chart for spheres and circles might also be helpful for you. Additionally, you can apply a special crochet technique here for invisible decreases.
- light green:
- 1st round:
- magic ring
- into the magic ring:
- 6 single crochet stitches (US!)
- = 6 stitches
- 2nd round:
- double every stitch
- = 12 stitches
- 3rd round:
- double every 2nd stitch
- = 18 stitches
- 4th round:
- double every 3rd stitch
- = 24 stitches
- 5th round:
- double every 4th stitch
- = 30 stitches
- 6th round:
- double every 5th stitch
- = 36 stitches
- 7th round:
- double every 6th stitch
- = 42 stitches
- 8th round:
- double every 7th stitch
- = 48 stitches
- 9th round:
- double every 8th stitch
- = 54 stitches
- 10th round:
- double every 9th stitch
- = 60 stitches
- 11th – 21st round:
- (= 11 rounds)
- every stitch one stitch
- = 60 stitches
- attach safety eyes, position:
- after the 19th round
- 2 stitches distance
- 22nd round:
- crochet together every 9th and 10th stitch
- = 54 stitches
- 23rd round:
- crochet together every 8th and 9th stitch
- = 48 stitches
- 24th round:
- crochet together every 7th and 8th stitch
- = 42 stitches
- 25th round:
- crochet together every 6th and 7th stitch
- = 36 stitches
- 26th round:
- crochet together every 5th and 6th stitch
- = 30 stitches
- 27th round:
- crochet together every 4th and 5th stitch
- = 24 stitches
- 28th round:
- crochet together every 3rd and 4th stitch
- = 18 stitches
- fill and stuff completely
- 29th round:
- crochet together every 2nd and 3rd stitch
- = 12 stitches
- cut yarn generously, pull through loop, do NOT cut the yarn end, it will be used later for sewing
Body for Crochet Bunny (1x)
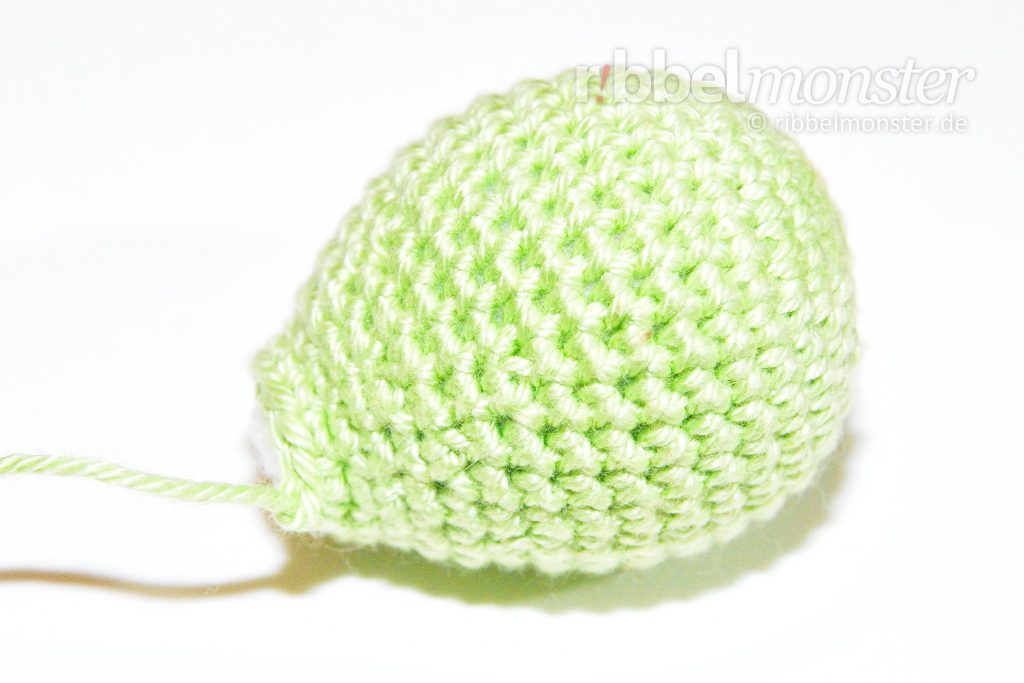
Den Körper häkeln wir von unten nach oben in Spiralrunden mit Festen Maschen. Der Körper wird vollständig gefüllt und gestopft, jedoch nicht ganz geschlossen.
Note! Your Amigurumi may have difficulty sitting independently if it is filled entirely with a uniformly light stuffing. To improve this, you can incorporate an appropriate center of gravity. Simply fill the bottom of the body with some plastic granules to add a little weight to the body. This way, your Amigurumi can sit much more easily on its own.
Note! If you want to achieve a particularly beautiful result, you can hide regular increases and decreases by offsetting them a little. You can recognize regular increases by the phrase “double every … stitch,” and regular decreases by the phrase “crochet together every … and … stitch”. The stitch chart for spheres and circles might also be helpful for you. Additionally, you can apply a special crochet technique here for invisible decreases.
- light green:
- 1st round:
- magic ring
- into the magic ring:
- 6 single crochet stitches (US!)
- = 6 stitches
- 2nd round:
- double every stitch
- = 12 stitches
- 3rd round:
- double every 2nd stitch
- = 18 stitches
- 4th round:
- double every 3rd stitch
- = 24 stitches
- 5th round:
- double every 4th stitch
- = 30 stitches
- 6th – 11th round:
- (= 6 rounds)
- every stitch one stitch
- = 30 stitches
- 12th round:
- crochet together every 9th and 10th stitch
- = 27 stitches
- 13th round:
- crochet together every 8th and 9th stitch
- = 24 stitches
- 14th round:
- crochet together every 7th and 8th stitch
- = 21 stitches
- 15th round:
- crochet together every 6th and 7th stitch
- = 18 stitches
- 16th round:
- crochet together every 5th and 6th stitch
- = 15 stitches
- 17th round:
- crochet together every 4th and 5th stitch
- = 12 stitches
- fill and stuff completely
- cut the thread, pull off the loop
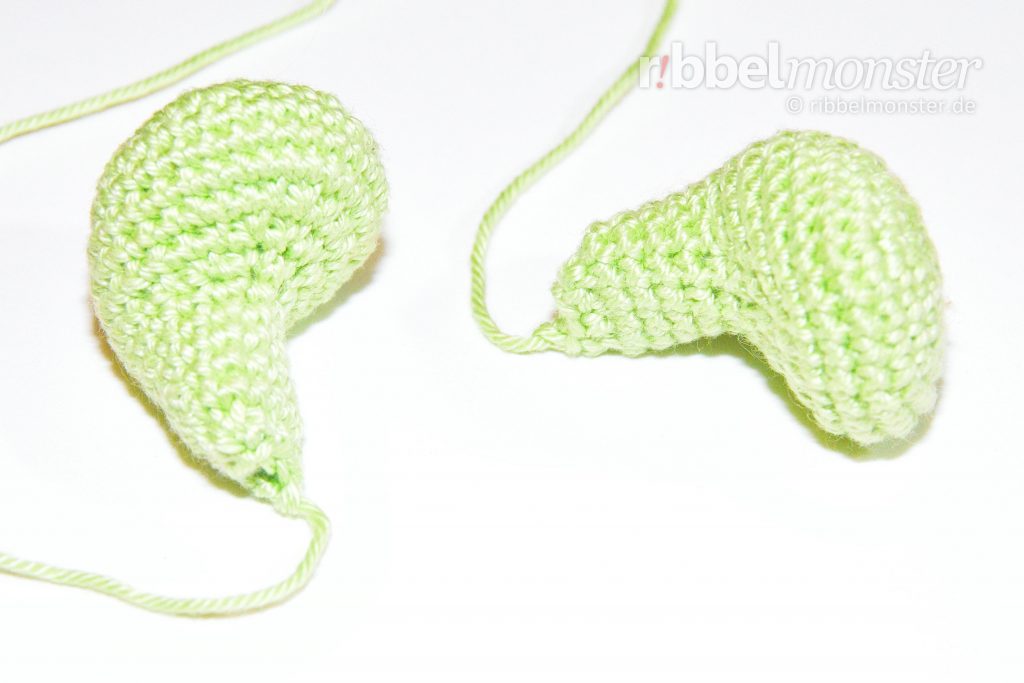
Ears for Crochet Bunny (2x)
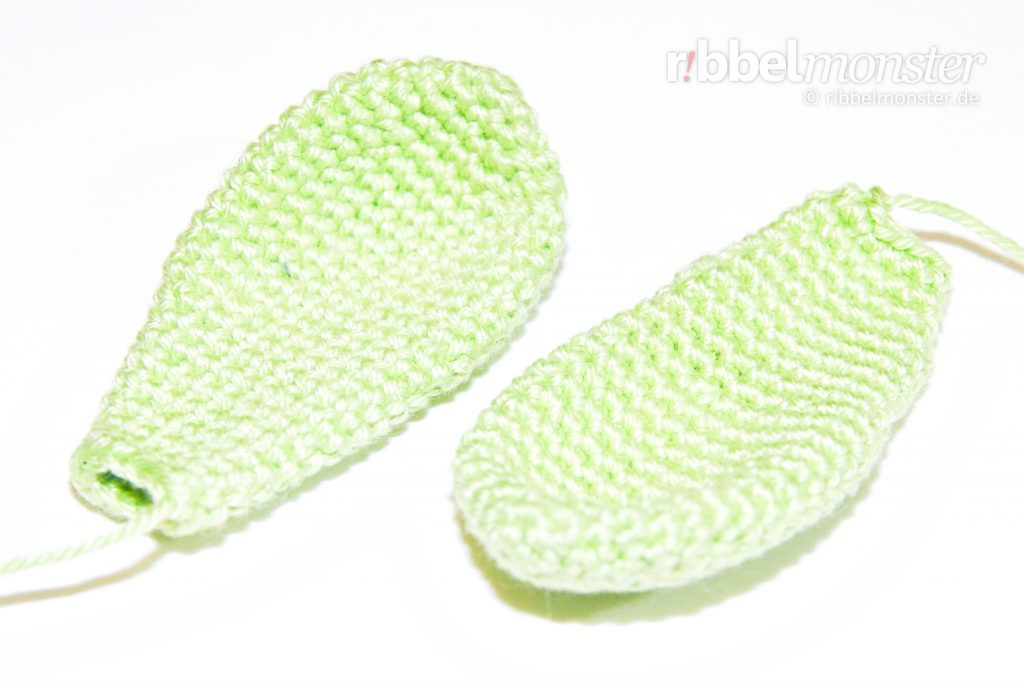
Die Ohren häkeln wir von der Spitze zum Ansatz in Spiralrunden mit Festen Maschen. Die Ohren werden nicht gefüllt, sondern nur flach gefaltet. Später wird das Fadenende verwendet, um die Ohren anzunähen.
Note! If you want to create several nearly identical parts, it’s advisable to work on them consecutively on the same day. For larger parts, it’s even recommended to work on them simultaneously in stages. Our tension and tightness can vary from day to day, leading to visible differences.
Note! If you want to achieve a particularly beautiful result, you can hide regular increases and decreases by offsetting them a little. You can recognize regular increases by the phrase “double every … stitch,” and regular decreases by the phrase “crochet together every … and … stitch”. The stitch chart for spheres and circles might also be helpful for you. Additionally, you can apply a special crochet technique here for invisible decreases.
- light green:
- 1st round:
- magic ring
- into the magic ring:
- 4 single crochet stitches (US!)
- = 4 stitches
- 2nd round:
- double every stitch
- = 8 stitches
- 3rd round:
- double every 2nd stitch
- = 12 stitches
- 4th round:
- double every 3rd stitch
- = 16 stitches
- 5th round:
- double every 4th stitch
- = 20 stitches
- 6th round:
- double every 5th stitch
- = 24 stitches
- 7th – 13th round:
- (= 7 rounds)
- every stitch one stitch
- = 24 stitches
- 14th round:
- crochet together every 23rd and 24th stitch
- = 23 stitches
- 15th round:
- crochet together every 22nd and 23rd stitch
- = 22 stitches
- 16th round:
- crochet together every 21st and 22nd stitch
- = 21 stitches
- 17th round:
- crochet together every 20th and 21st stitch
- = 20 stitches
- 18th round:
- crochet together every 19th and 20th stitch
- = 19 stitches
- 19th round:
- crochet together every 18th and 19th stitch
- = 18 stitches
- 20th round:
- crochet together every 17th and 18th stitch
- = 17 stitches
- 21st round:
- crochet together every 16th and 17th stitch
- = 16 stitches
- 22nd round:
- crochet together every 15th and 16th stitch
- = 15 stitches
- 23rd round:
- crochet together every 14th and 15th stitch
- = 14 stitches
- 24th round:
- crochet together every 13th and 14th stitch
- = 13 stitches
- 25th round:
- crochet together every 12th and 13th stitch
- = 12 stitches
- cut yarn generously, pull through loop, do NOT cut the yarn end, it will be used later for sewing
Snout for Crochet Bunny (1x)
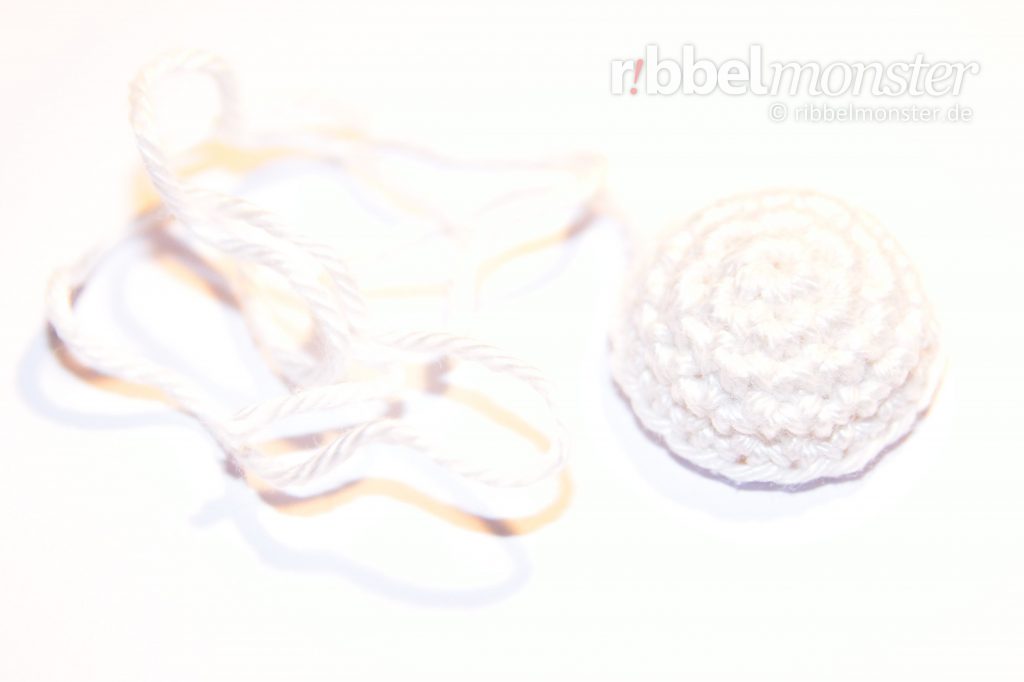
Die Schnauze häkeln wir von der innen nach außen mit Festen Maschen in Spiralrunden. Die Schnauze wird später mit dem Fadenende ringsherum angenäht und erst dabei gefüllt.
Tip: Wenn du ein besonders schönes Ergebnis erhalten möchtest, kannst du die regelmäßigen Zunahmen durch Versetzen ein wenig verstecken. Dazu verwendest du einfach die Maschentabelle für Kugeln und Kreise.
(Redaktion: Block ersetzen)
- white:
- 1st round:
- magic ring
- into the magic ring:
- 6 single crochet stitches (US!)
- = 6 stitches
- 2nd round:
- double every stitch
- = 12 stitches
- 3rd round:
- double every 2nd stitch
- = 18 stitches
- 4th + 5th round:
- (= 2 rounds)
- every stitch one stitch
- = 18 stitches
- cut yarn generously, pull through loop, do NOT cut the yarn end, it will be used later for sewing
Tail for Crochet Bunny (1x)

Den Schwanz häkeln wir von der Spitze zum Ansatz in Spiralrunden mit Festen Maschen. Der Schwanz wird nur leicht gefüllt und nicht ganz geschlossen.
Note! If you want to achieve a particularly beautiful result, you can hide regular increases and decreases by offsetting them a little. You can recognize regular increases by the phrase “double every … stitch,” and regular decreases by the phrase “crochet together every … and … stitch”. The stitch chart for spheres and circles might also be helpful for you. Additionally, you can apply a special crochet technique here for invisible decreases.
- light green:
- 1st round:
- magic ring
- into the magic ring:
- 6 single crochet stitches (US!)
- = 6 stitches
- 2nd round:
- double every stitch
- = 12 stitches
- 3rd – 5th round:
- (= 3 rounds)
- every stitch one stitch
- = 12 stitches
- fill and stuff completely
- 6th round:
- crochet together every 1st and 2nd stitch
- = 6 stitches
- cut yarn generously, pull through loop, do NOT cut the yarn end, it will be used later for sewing
Arms for Crochet Bunny (2x)
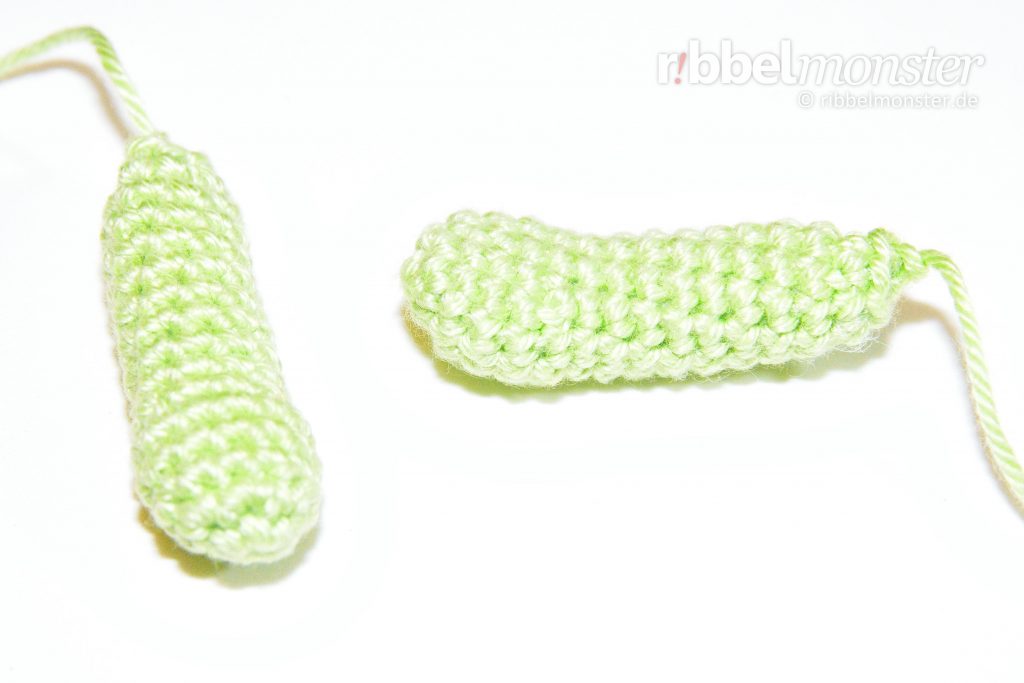
Die Arme häkeln wir von den Fingerspitzen zur Schulter mit Festen Maschen in Spiralrunden.
Note! If you want to create several nearly identical parts, it’s advisable to work on them consecutively on the same day. For larger parts, it’s even recommended to work on them simultaneously in stages. Our tension and tightness can vary from day to day, leading to visible differences.
Note! If you want to achieve a particularly beautiful result, you can hide regular increases and decreases by offsetting them a little. You can recognize regular increases by the phrase “double every … stitch,” and regular decreases by the phrase “crochet together every … and … stitch”. The stitch chart for spheres and circles might also be helpful for you. Additionally, you can apply a special crochet technique here for invisible decreases.
- light green:
- 1st round:
- magic ring
- into the magic ring:
- 6 single crochet stitches (US!)
- = 6 stitches
- 2nd round:
- double every stitch
- = 12 stitches
- 3rd – 5th round:
- (= 3 rounds)
- every stitch one stitch
- = 12 stitches
- 6th round:
- crochet together every 3rd and 4th stitch
- = 9 stitches
- 7th – 14th round:
- (= 8 rounds)
- every stitch one stitch
- = 9 stitches
- fill and stuff completely
- 15th round:
- crochet together every 2nd and 3rd stitch
- = 6 stitches
- cut yarn generously, pull through loop, do NOT cut the yarn end, it will be used later for sewing
Legs for Crochet Bunny (2x)
Die Beine häkeln wir von den Zehenspitzen zur Hüfte mit Festen Maschen in Spiralrunden.
Note! If you want to create several nearly identical parts, it’s advisable to work on them consecutively on the same day. For larger parts, it’s even recommended to work on them simultaneously in stages. Our tension and tightness can vary from day to day, leading to visible differences.
Note! If you want to achieve a particularly beautiful result, you can hide regular increases and decreases by offsetting them a little. You can recognize regular increases by the phrase “double every … stitch,” and regular decreases by the phrase “crochet together every … and … stitch”. The stitch chart for spheres and circles might also be helpful for you. Additionally, you can apply a special crochet technique here for invisible decreases.
- light green:
- 1st round:
- magic ring
- into the magic ring:
- 6 single crochet stitches (US!)
- = 6 stitches
- 2nd round:
- double every stitch
- = 12 stitches
- 3rd round:
- double every 2nd stitch
- = 18 stitches
- 4th round:
- double every 3rd stitch
- = 24 stitches
- 5th round:
- double every 4th stitch
- = 30 stitches
- 6th – 8th round:
- (= 3 rounds)
- every stitch one stitch
- = 30 stitches
- 9th round:
- 9x one single crochet stitch (US!) into one stitch
- 6x crochet together two stitches with one single crochet stitch (US!)
- 9x one single crochet stitch (US!) into one stitch
- = 24 stitches
- 10th round:
- 6x one single crochet stitch (US!) into one stitch
- 6x crochet together two stitches with one single crochet stitch (US!)
- 6x one single crochet stitch (US!) into one stitch
- = 18 stitches
- 11th round:
- 3x one single crochet stitch (US!) into one stitch
- 6x crochet together two stitches with one single crochet stitch (US!)
- 3x one single crochet stitch (US!) into one stitch
- = 12 stitches
- 12th – 16th round:
- (= 5 rounds)
- every stitch one stitch
- = 12 stitches
- fill and stuff completely
- 17th round:
- crochet together every 1st and 2nd stitch
- = 6 stitches
- cut yarn generously, pull through loop, do NOT cut the yarn end, it will be used later for sewing
Bunny Finish
Nachdem du alle Teile fertig gehäkelt hast, kannst du mit dem Zusammennähen beginnen. Vorher solltest du jedoch alle Teile mit Stecknadeln zusammen stecken. So siehst du ob die Positionen stimmen und kannst noch leicht Veränderungen vornehmen.
Sew head to body
Als erstes nähen wir den Kopf ringsherum an den Körper. Dabei zeigen beide Öffnungen zu einander. Wenn du das noch nie gemacht hast, hilft dir vielleicht die Anleitung zum zusammen nähen offener Teile.
Sew snout
Nun kannst du die Schnauze mit dem Fadenende ringsherum annähen. Dazu steckst du sie zuerst ringsherum mit Stecknadeln fest. Nun kannst du die Schnauze Stück für Stück annähen und dabei die Stecknadeln nach und nach entfernen. Kurz vor dem Ende wird die Schnauze gefüllt und gestopft. Anschließend sicherst du das Fadenende im Inneren.
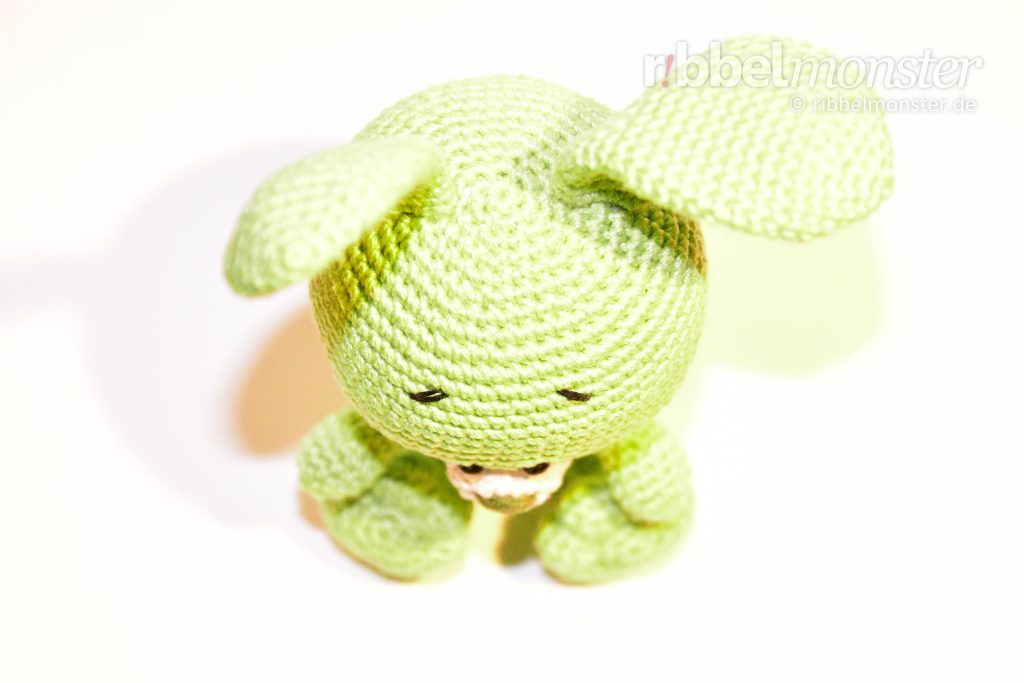
Sew ears
Next, the ears can be sewn onto the head with the yarn ends. They are not filled but only folded flat. The open side sits on each side of the head, parallel to the eyes when viewed from above.
Sew arms
Next, you can sew the arms just below the head. Either horizontally flat or flexible with thread joints, as described in the pattern for thread joints.
Sew legs
The legs are sewn horizontally folded to the center of the underside in a line.
Sew tail
Now, sew the tail in the middle on the back. To do this, fold the open end flat and sew it horizontally around the 6th round. The tail serves as a counterweight for sitting, so the placement should be well-considered.
Create Details
Finally, embroider the eyebrows with black embroidery thread or stuffing yarn. They sit 7 and 8 rounds above the eyes, slanting upward in the middle.
Embroider the nose with dark green embroidery thread or stuffing yarn in the middle above the snout. Simply make horizontal stitches over several stitches until the nose has the desired volume.
Next, use yarn to draw the belly button inward. To do this, make horizontal stitches around two stitches at the front at the right location and pull them on the back around two stitches below the tail.
Afterward, tie off the feet at the tips with 3 cinches into 4 sections. It is easiest to start with the middle cinch to ensure even distribution.
Done!

Hey Ono, you’re already done! And you’re waving so friendly again. You will surely bring a lot of joy to someone.
Vielleicht hast du aber auch Lust die anderen Amigurumis der Naminja Serie nachzuarbeiten.
Schau mal wer gerda am Mond vorbei geflogen ist. Das ist die kleine Hexe Mechthild auf ihrem neuen Hexenbesen.

Wenn du Lust hast, können wir zusammen den zuckersüßen Lebkuchenmann Pepe häkeln.
Am liebsten Mag das Nashorn Piko sonniges Wetter und saftige Wiesen.

Schau mal wer da so eifrig winkt. Da sitzt doch Hase Ono mitten in der Blumenwiese.

Der kleine Schneemann Sven sitzt schon den ganzen Tag mit seinem Schlitten am Fenster und wartet auf den ersten Schnee.
Ich fürchte unser Elch Sören hat sich schon wieder im Christbaumschmuck verheddert. Kannst du ihn retten?
Es sieht ganz so aus, als hätte das Rentier Rudi schon den Schlitten bereit gemacht.

Ich glaube Teddy Pina hat sich gerade fürchterlich erschreckt. Weißt du was das ist?